

City Trees Bunting Tutorial
The winter holiday season is by far my most favorite time of the year. I love the coziness, the chilly nights, the smell of pine and cinnamon that is forever present in the air (or maybe I just wish it was), and the feeling of something magical is just around the corner.
I set a personal goal for myself to make something to decorate my home in a way that captures those exact feelings, so here I present to you the City Trees Bunting. This tutorial will walk you through making no-waste flying geese (four at a time method) to make the trees and will guide you through the finishing touches.
Blog contains affiliate links for products endorsed by writer.

Here’s what you need:
FABRICS AND BATTING
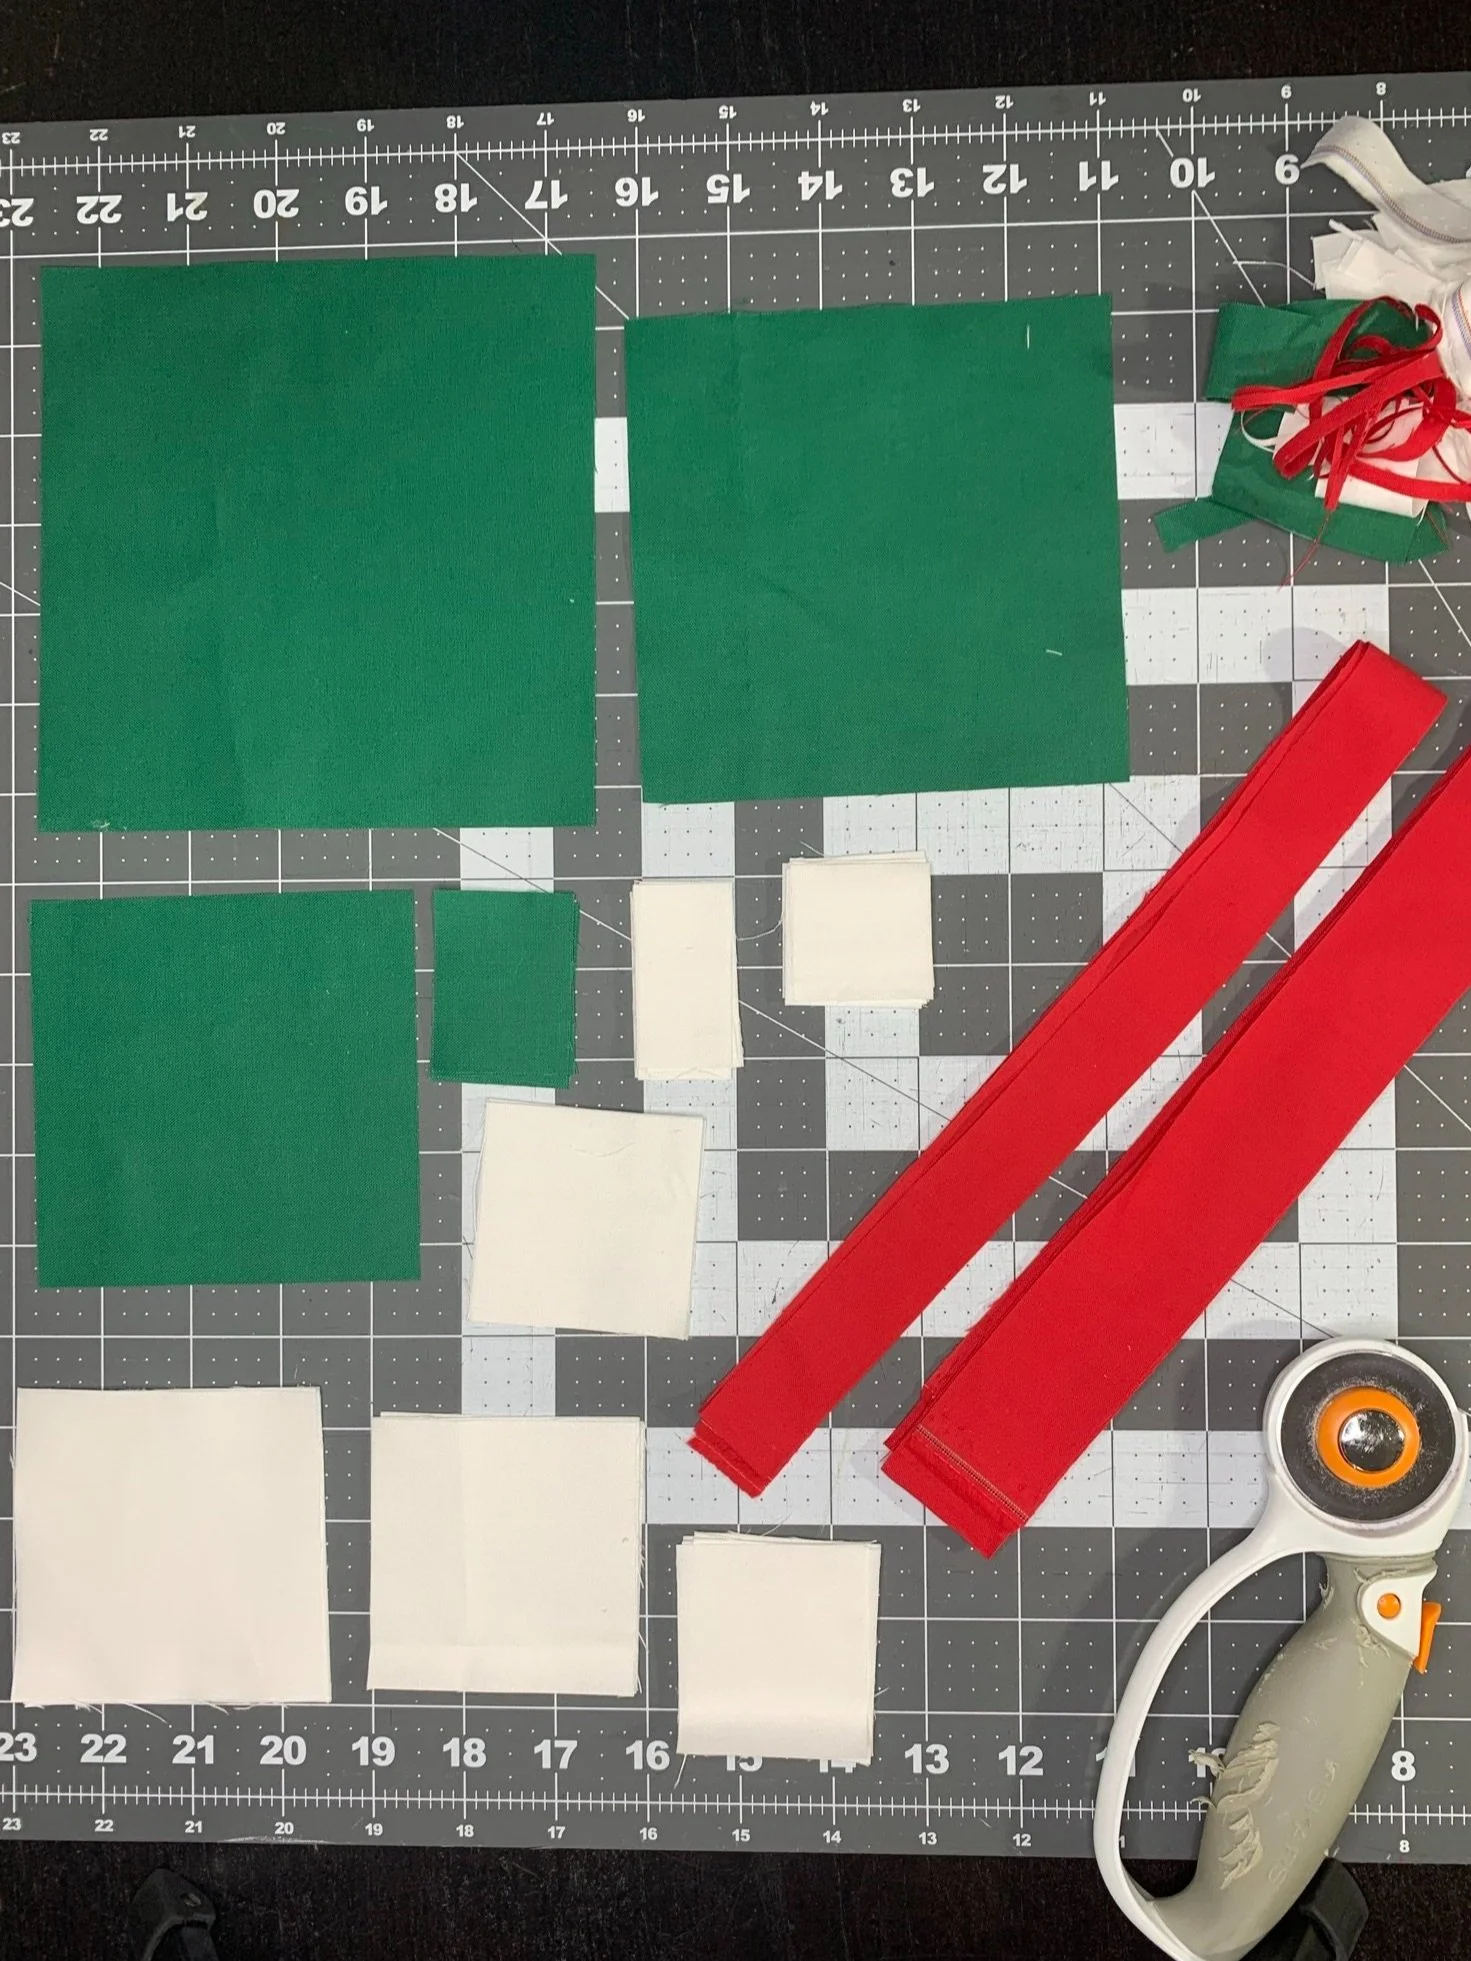
Background (White): 1/4 yard
Trees (Green): (1) Fat Quarter
Binding (Red): 5” x WOF
Batting: (1) Fat Quarter (18” x 21”) or (4) scrap 6 1/2” squares
Backing Fabric: (1) Fat Quarter (18” x 21”) or (4) scrap 6 1/2” squares
Fabrics shown are Connecting Threads Color Wheel Solids in White, Emerald, and Red.
TOOLS
Rotary Cutter and Cutting Mat
Scissors and/or Snips
Ruler
Straight Pins or Clips
Iron and Pressing Mat
Sewing Machine
Helpful Tool: Tailor’s Clapper
Optional: Contrasting threads for embroidery embellishment. Threads shown are Connecting Threads Essential Quilting Threads in Red and White.
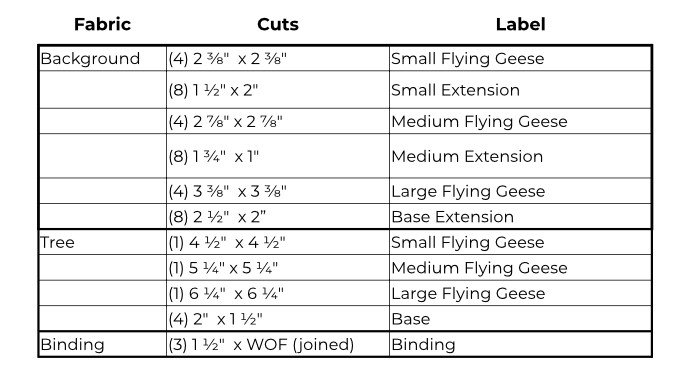
Fabric Cuts
Make the Flying Geese
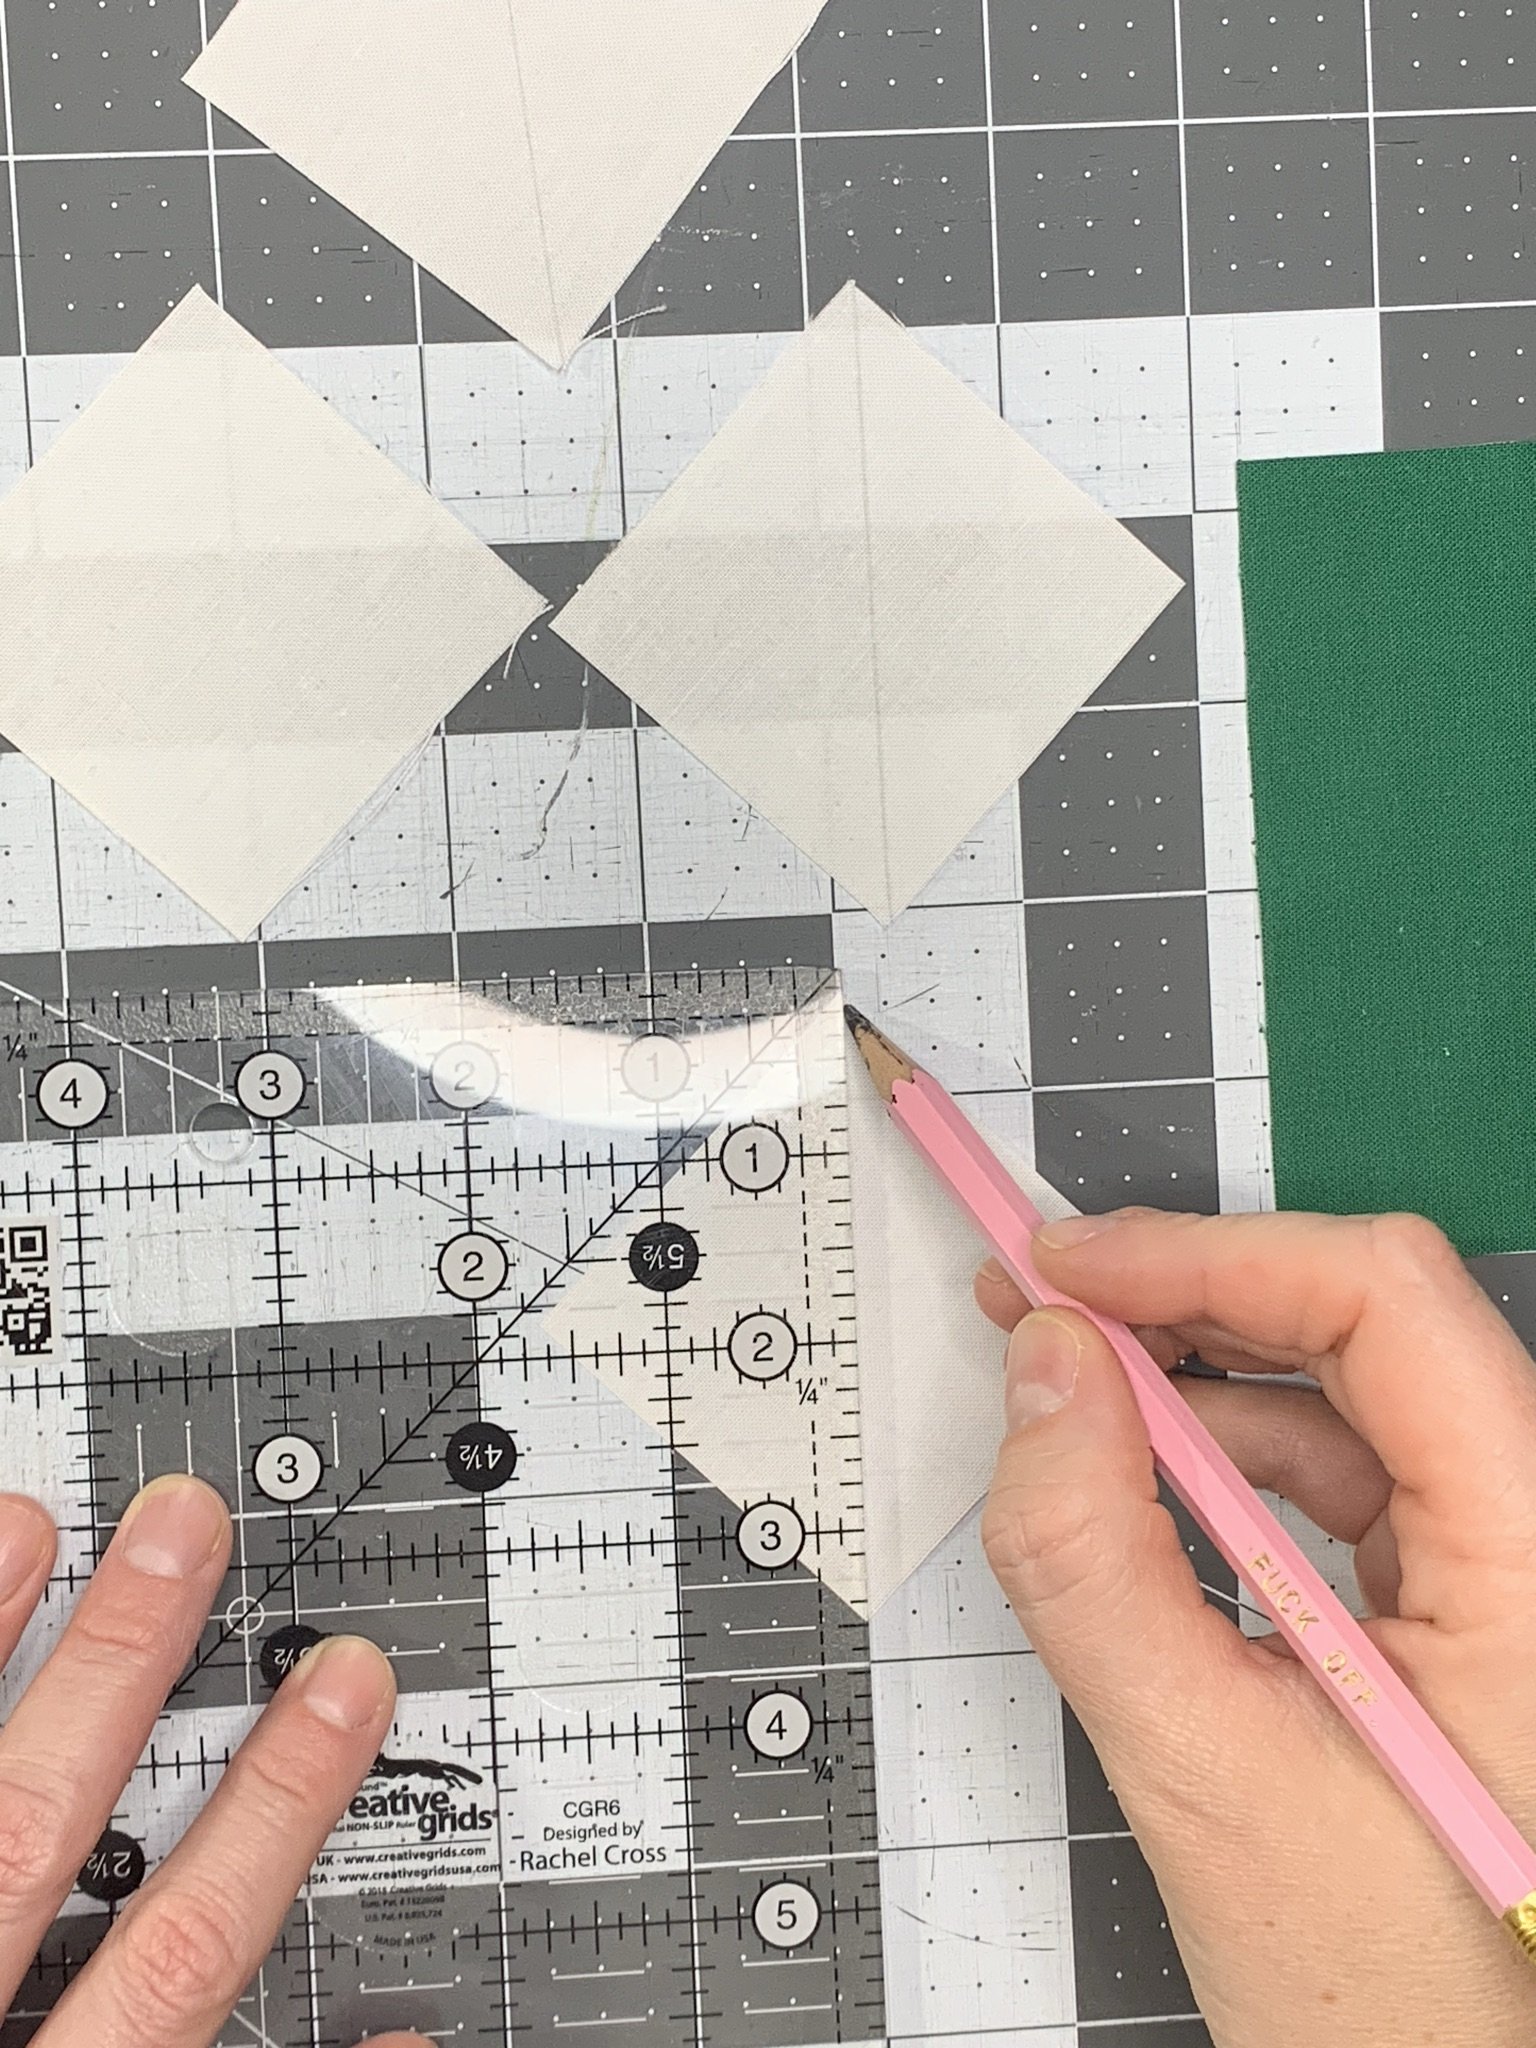
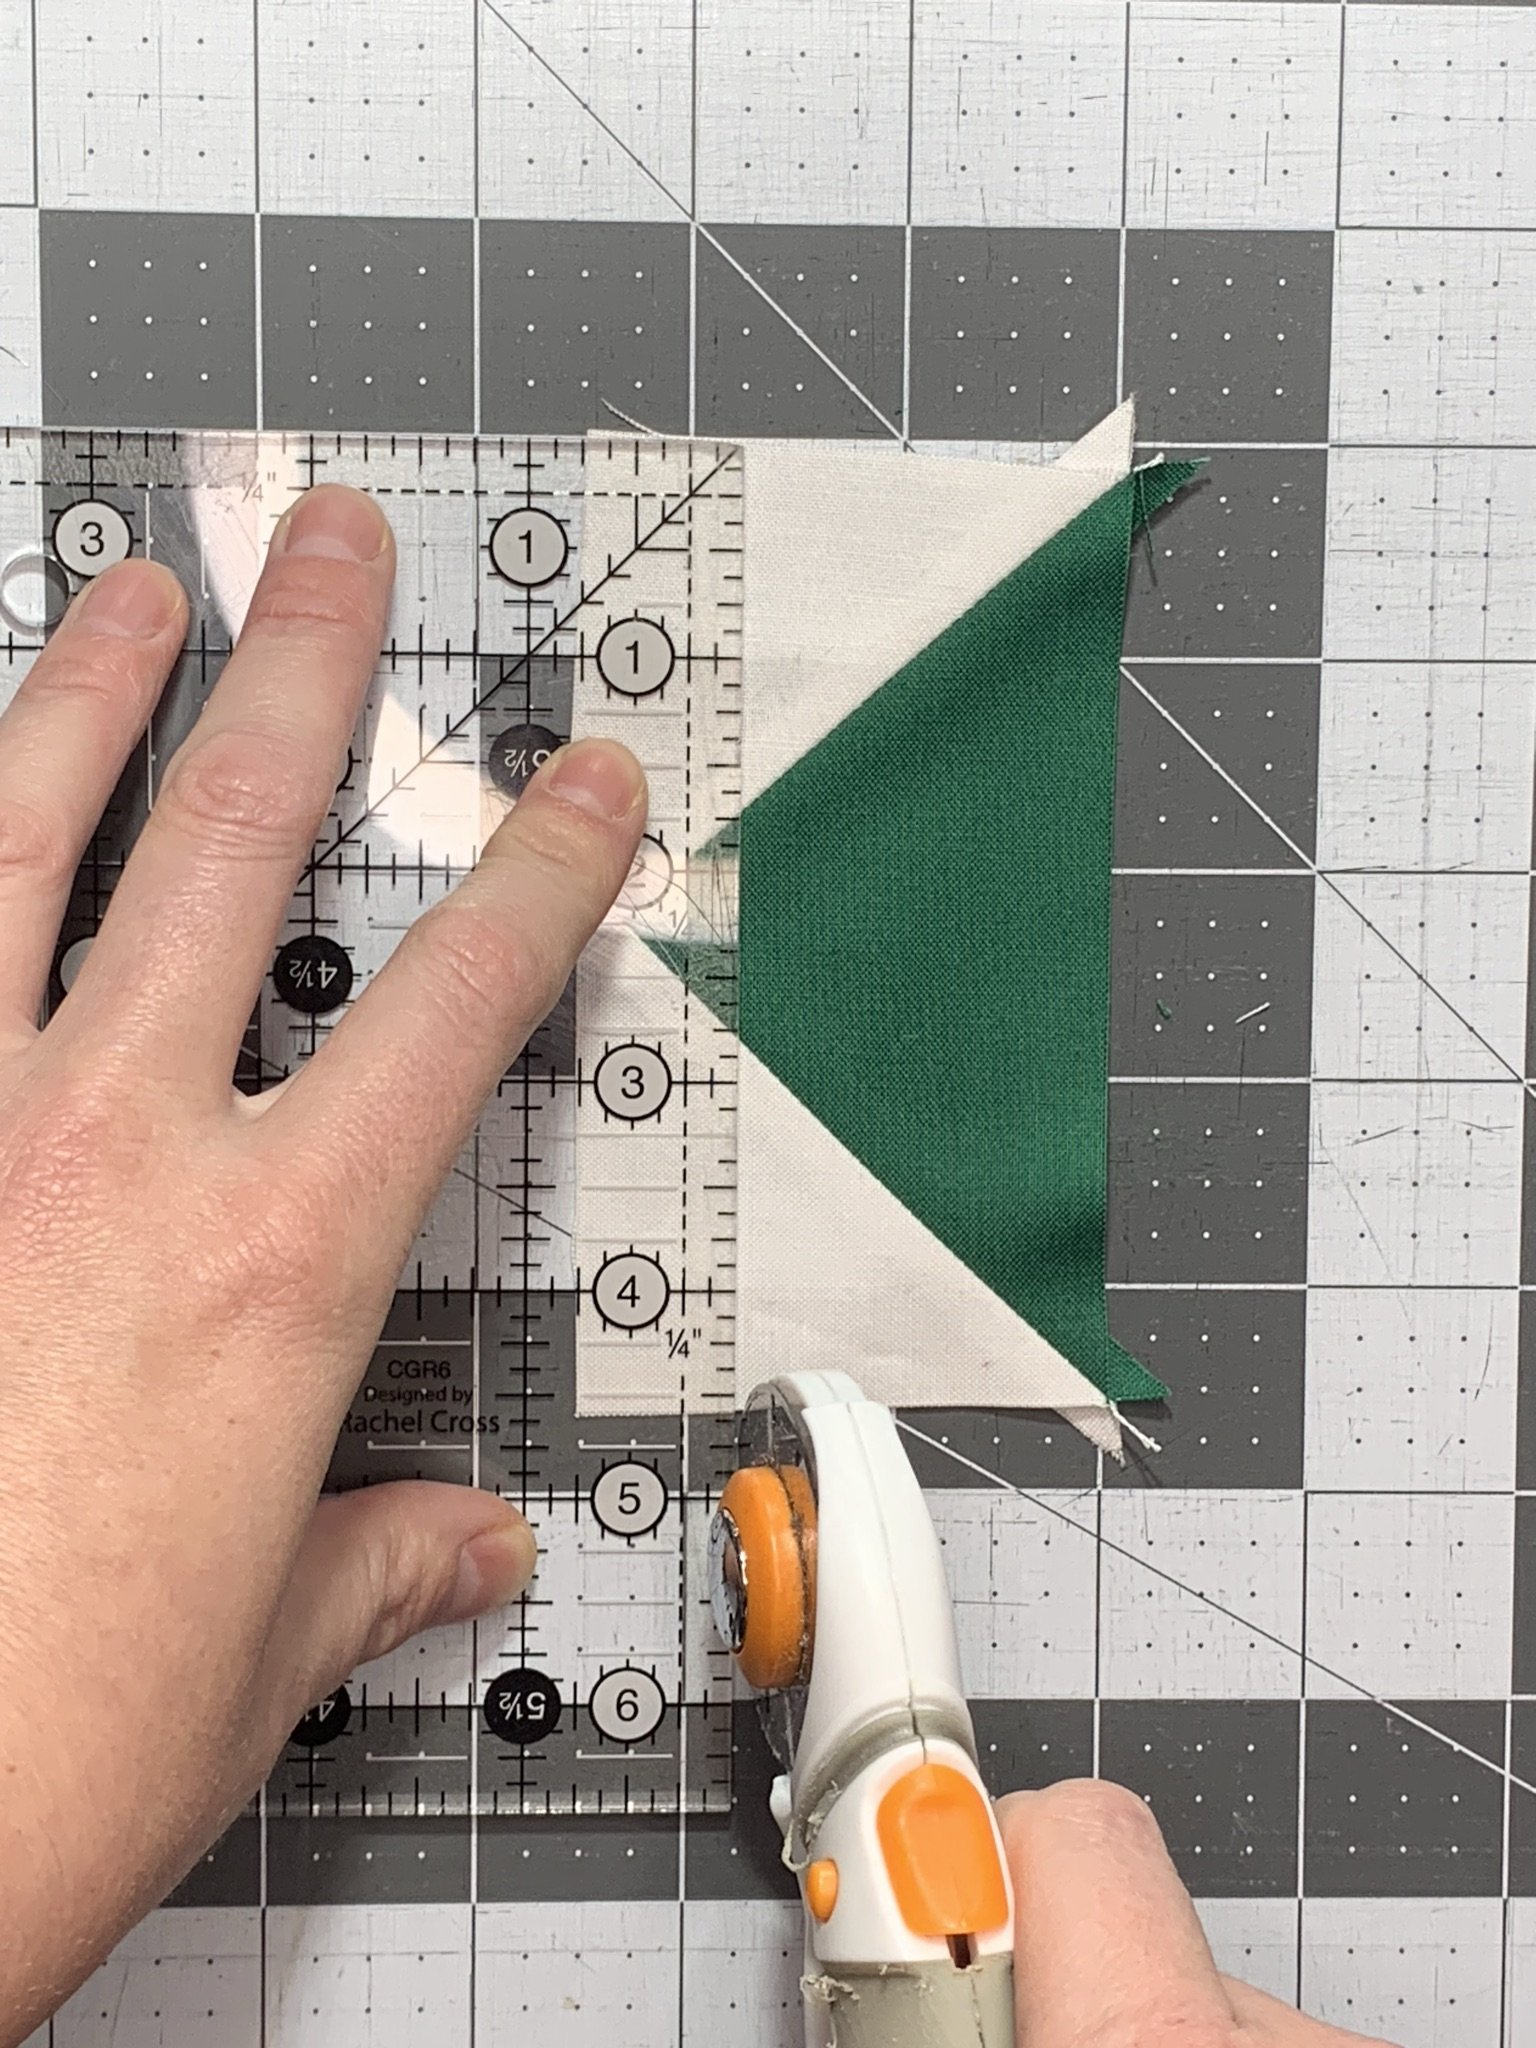
To start, draw a diagonal line across the Background Flying Geese squares, connecting corner to corner. This will be the sewing guide line. Next, separate the Flying Geese bundles into the Smalls, Mediums, and Larges.

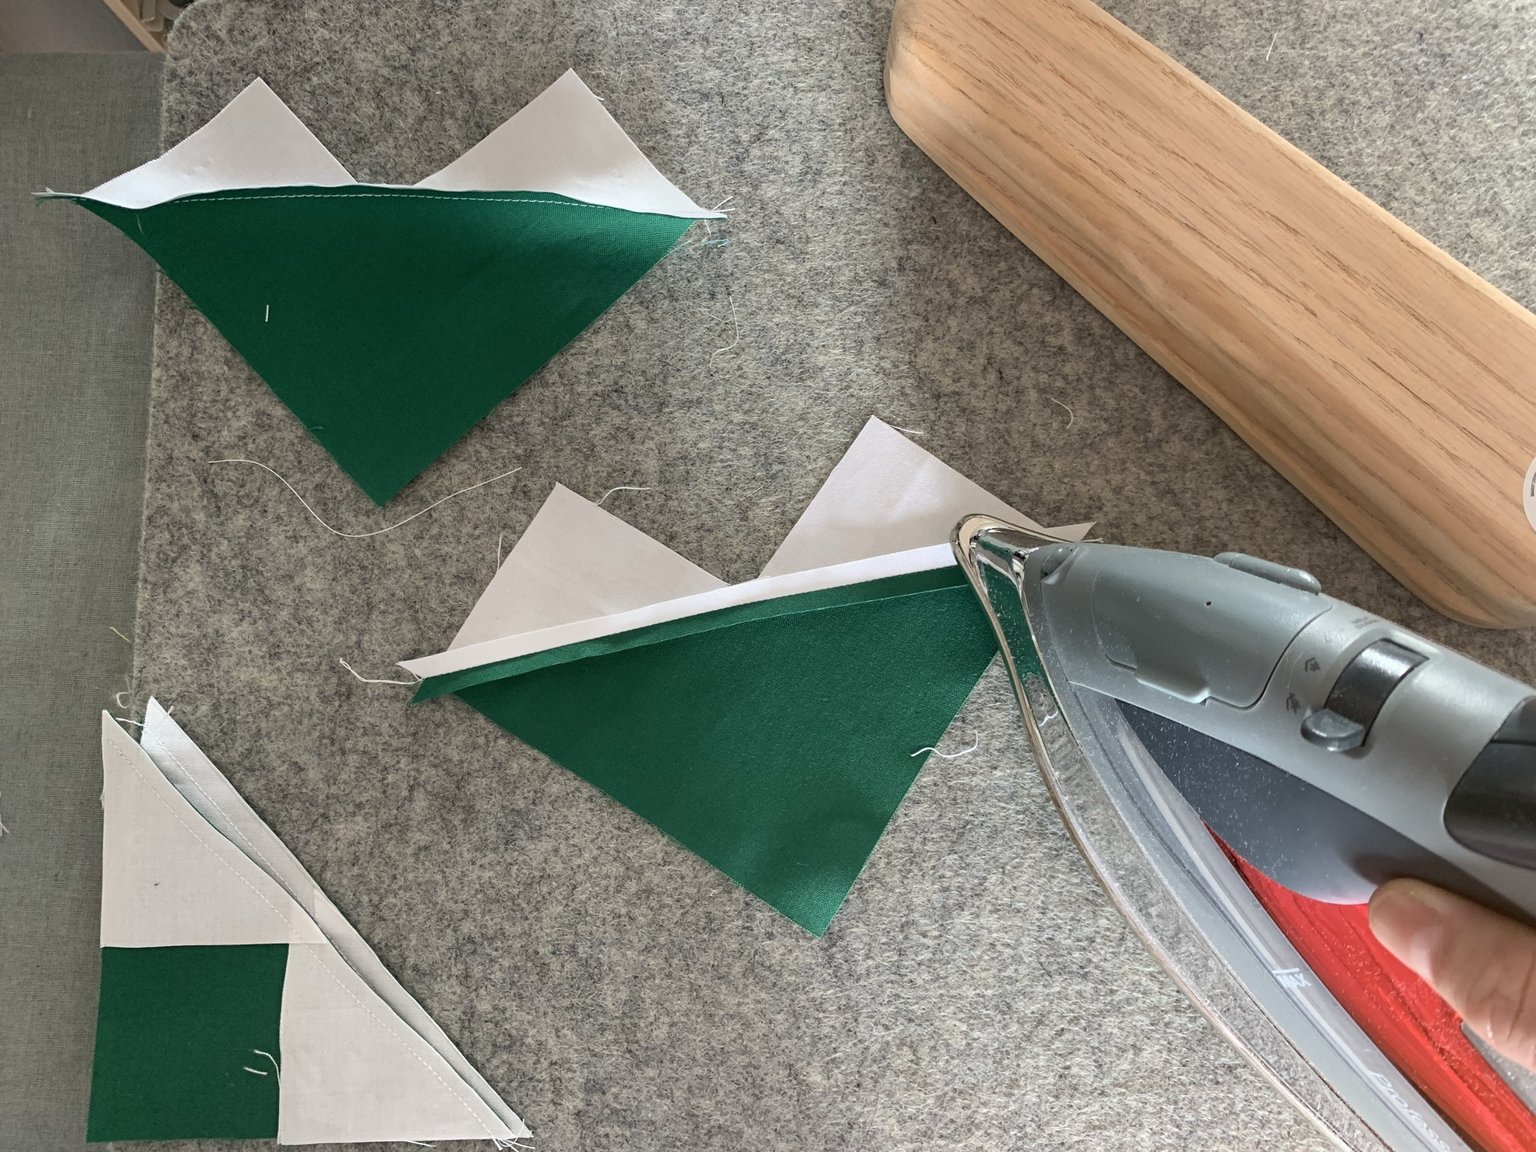
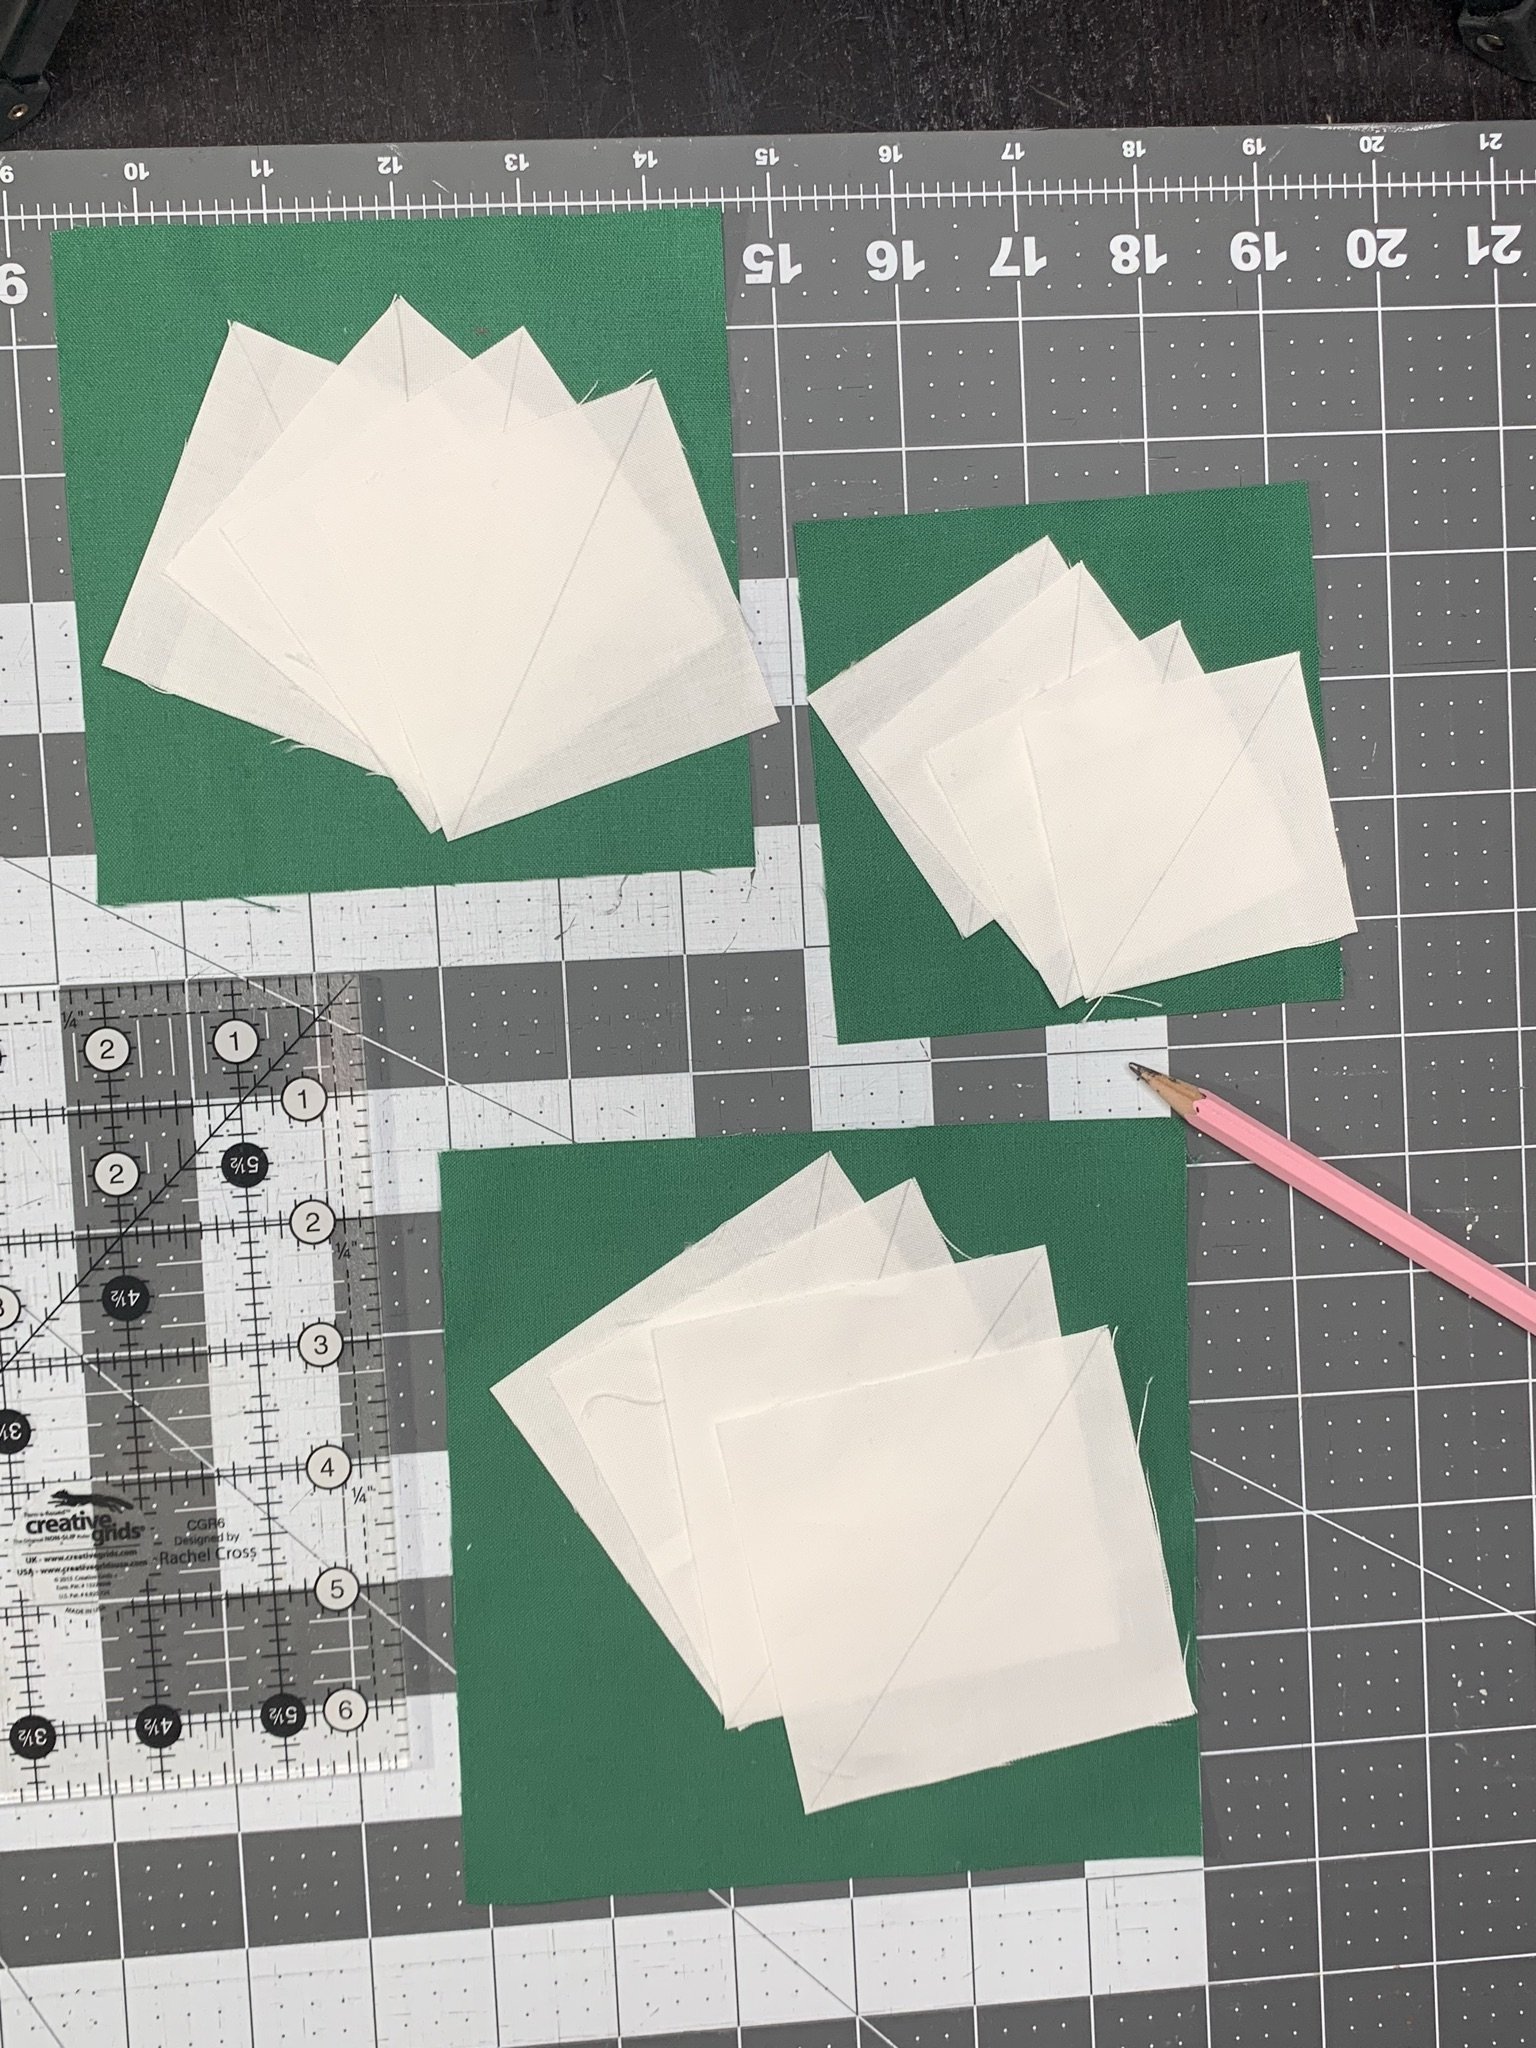
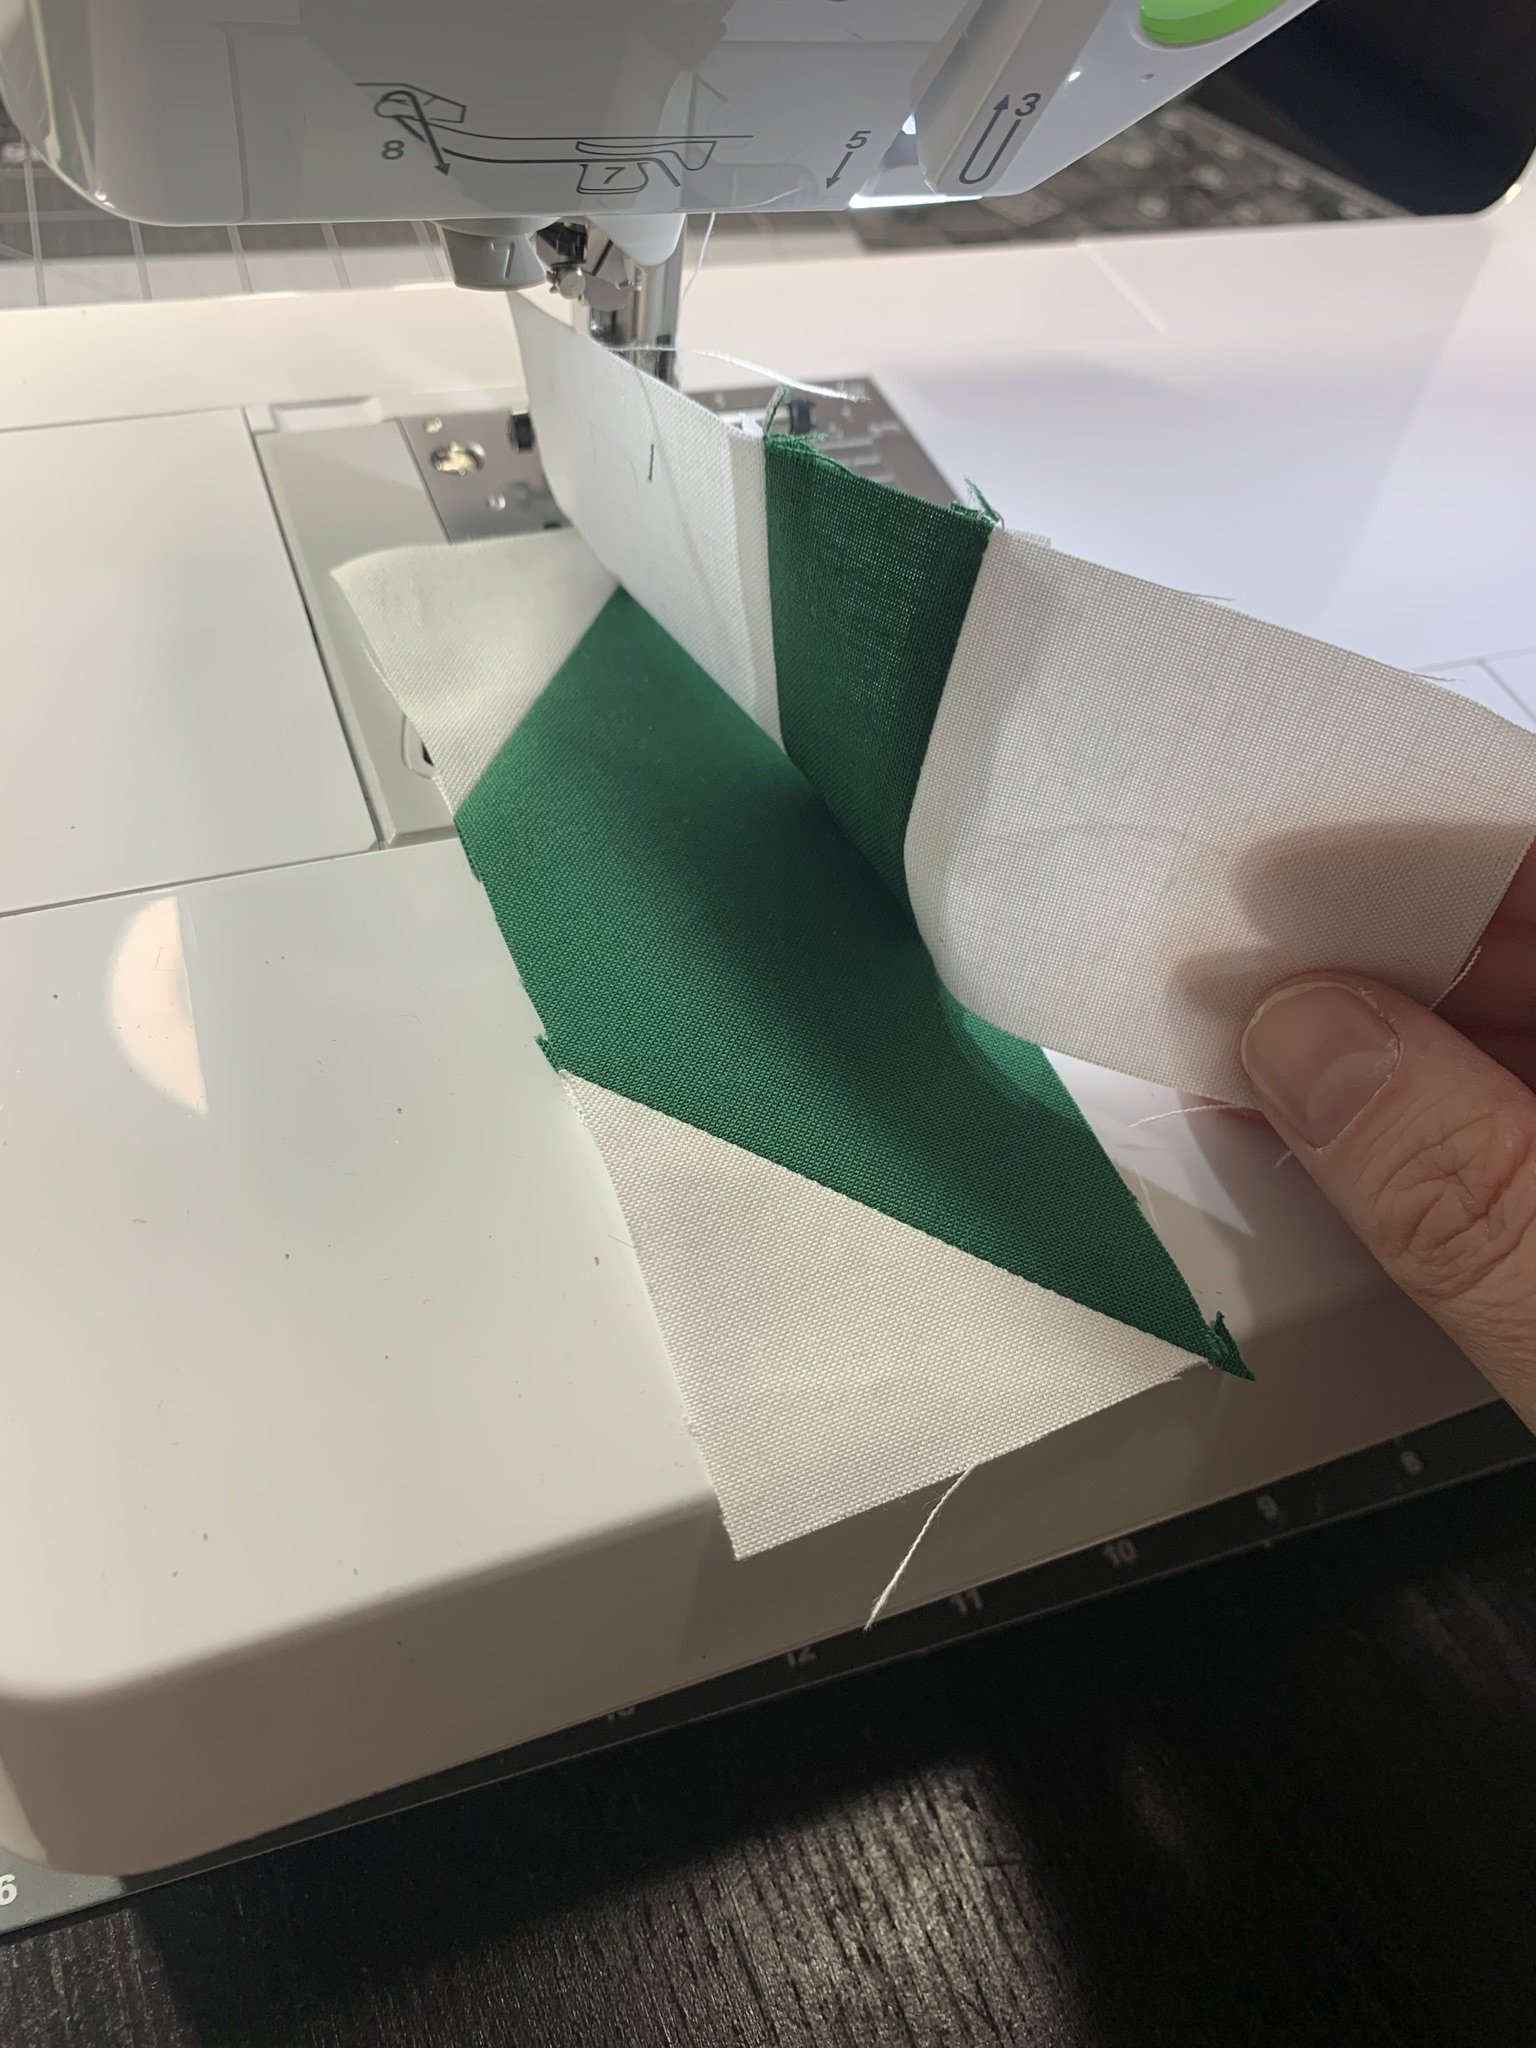
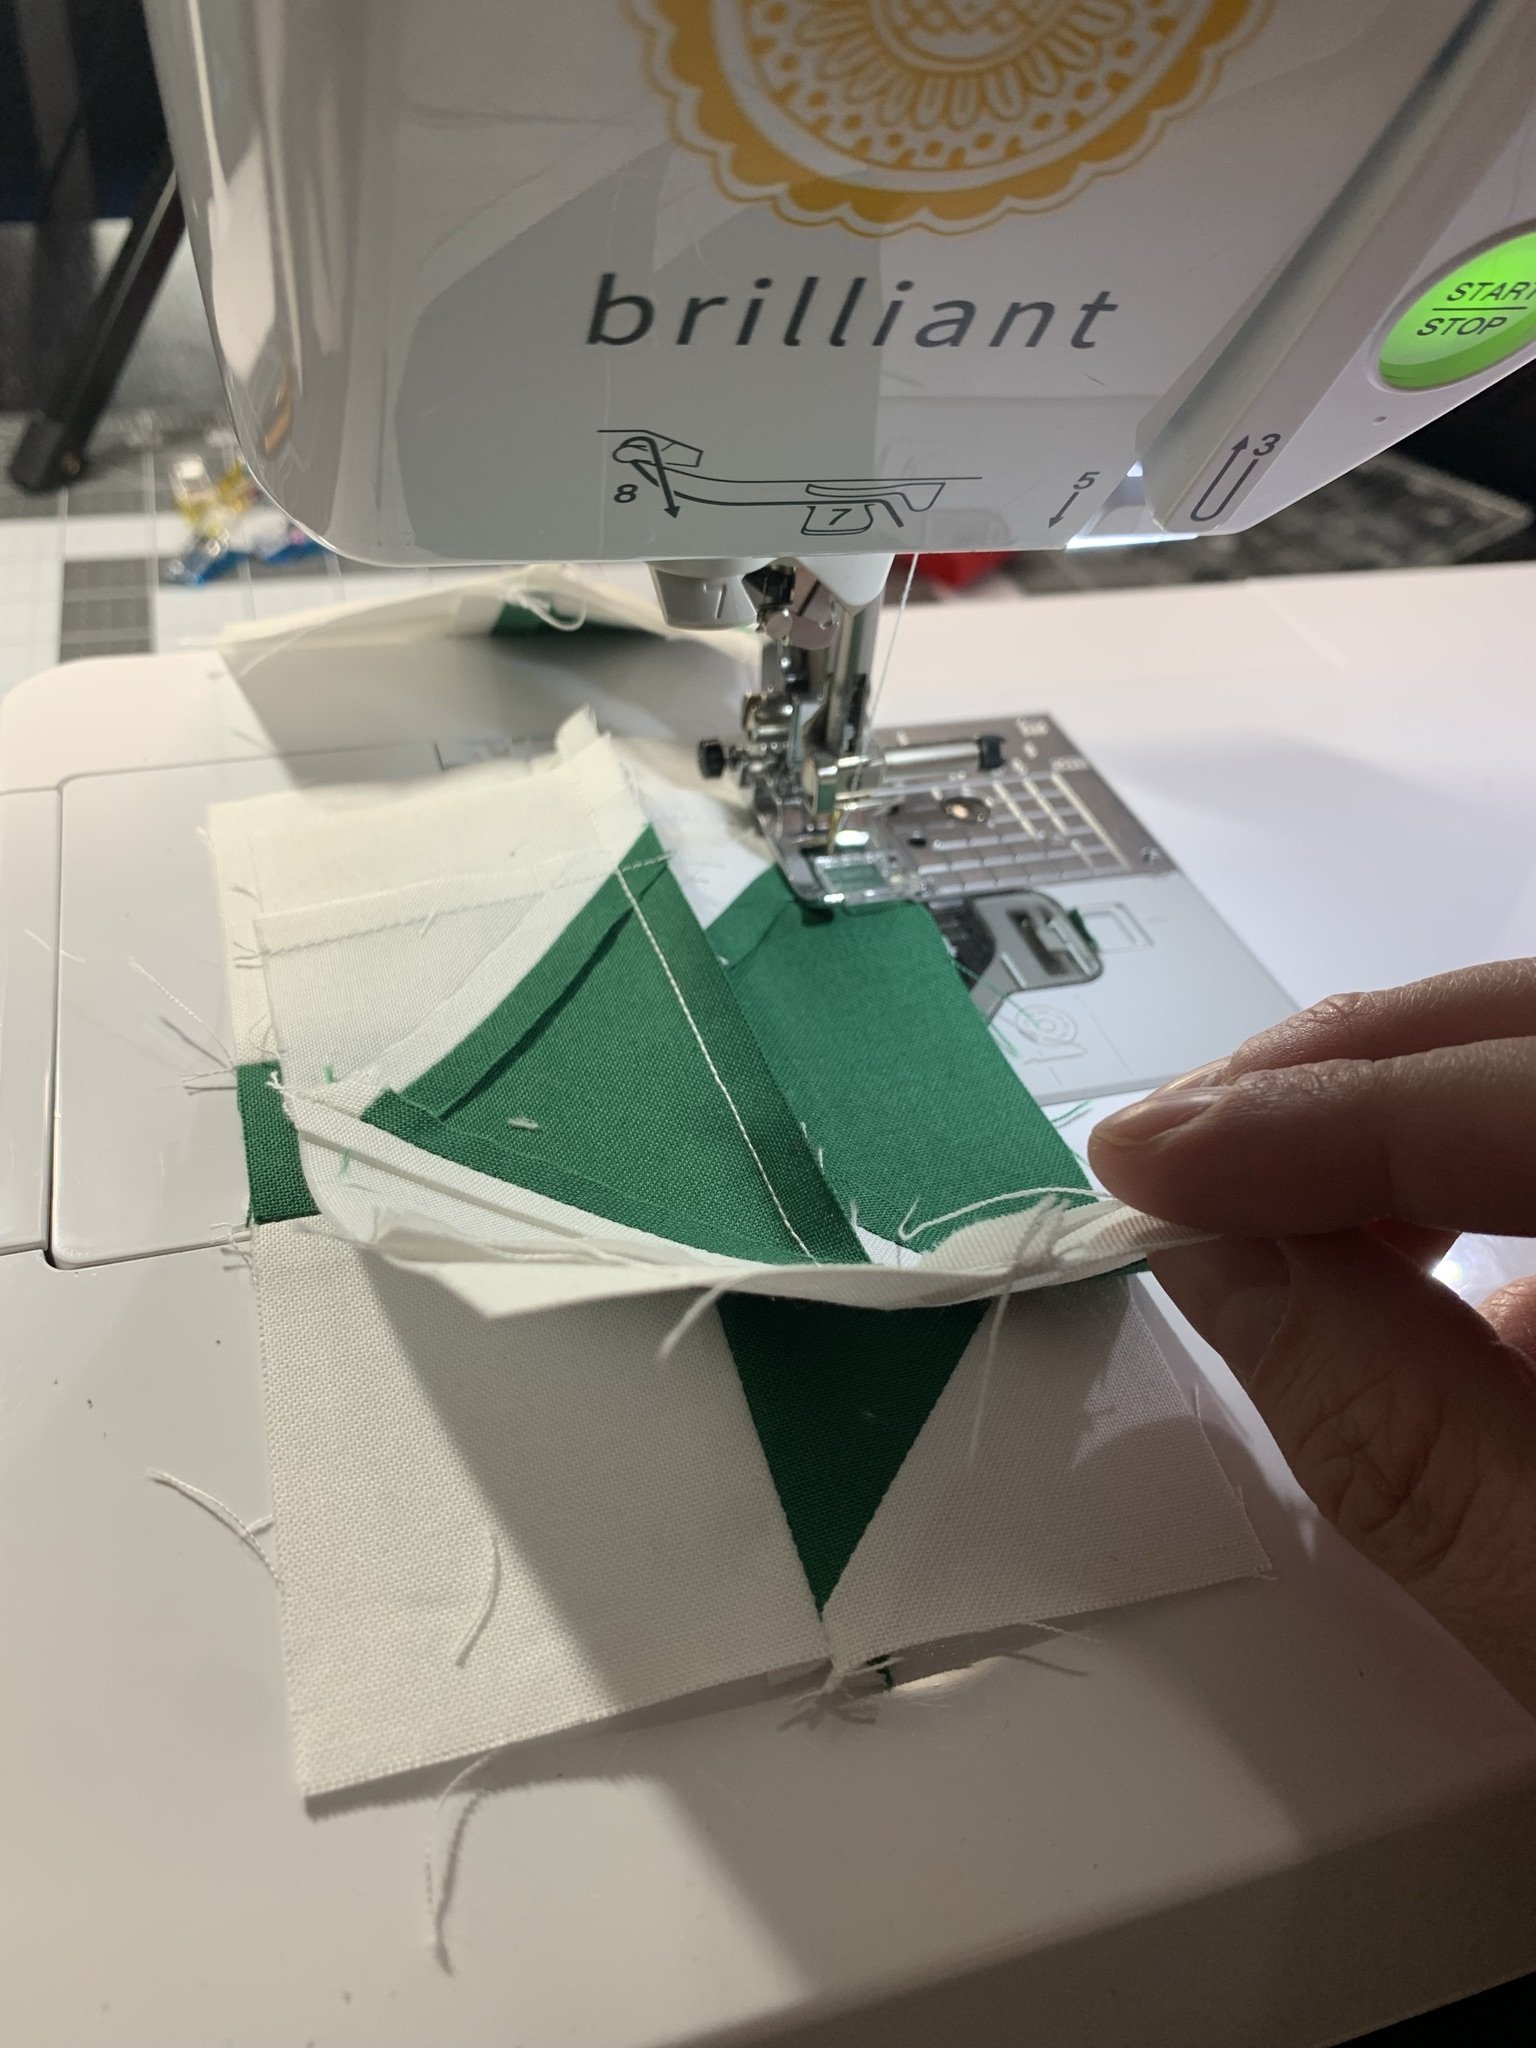
For each size, layer two Background Flying Geese over the coordinating Tree Flying Geese square. Be sure the drawn diagonal line overlaps. Sew 1/4” on either side of the diagonal line. Complete for all sizes. Cut along the diagonal lines to create six pieces. Press the seams open.
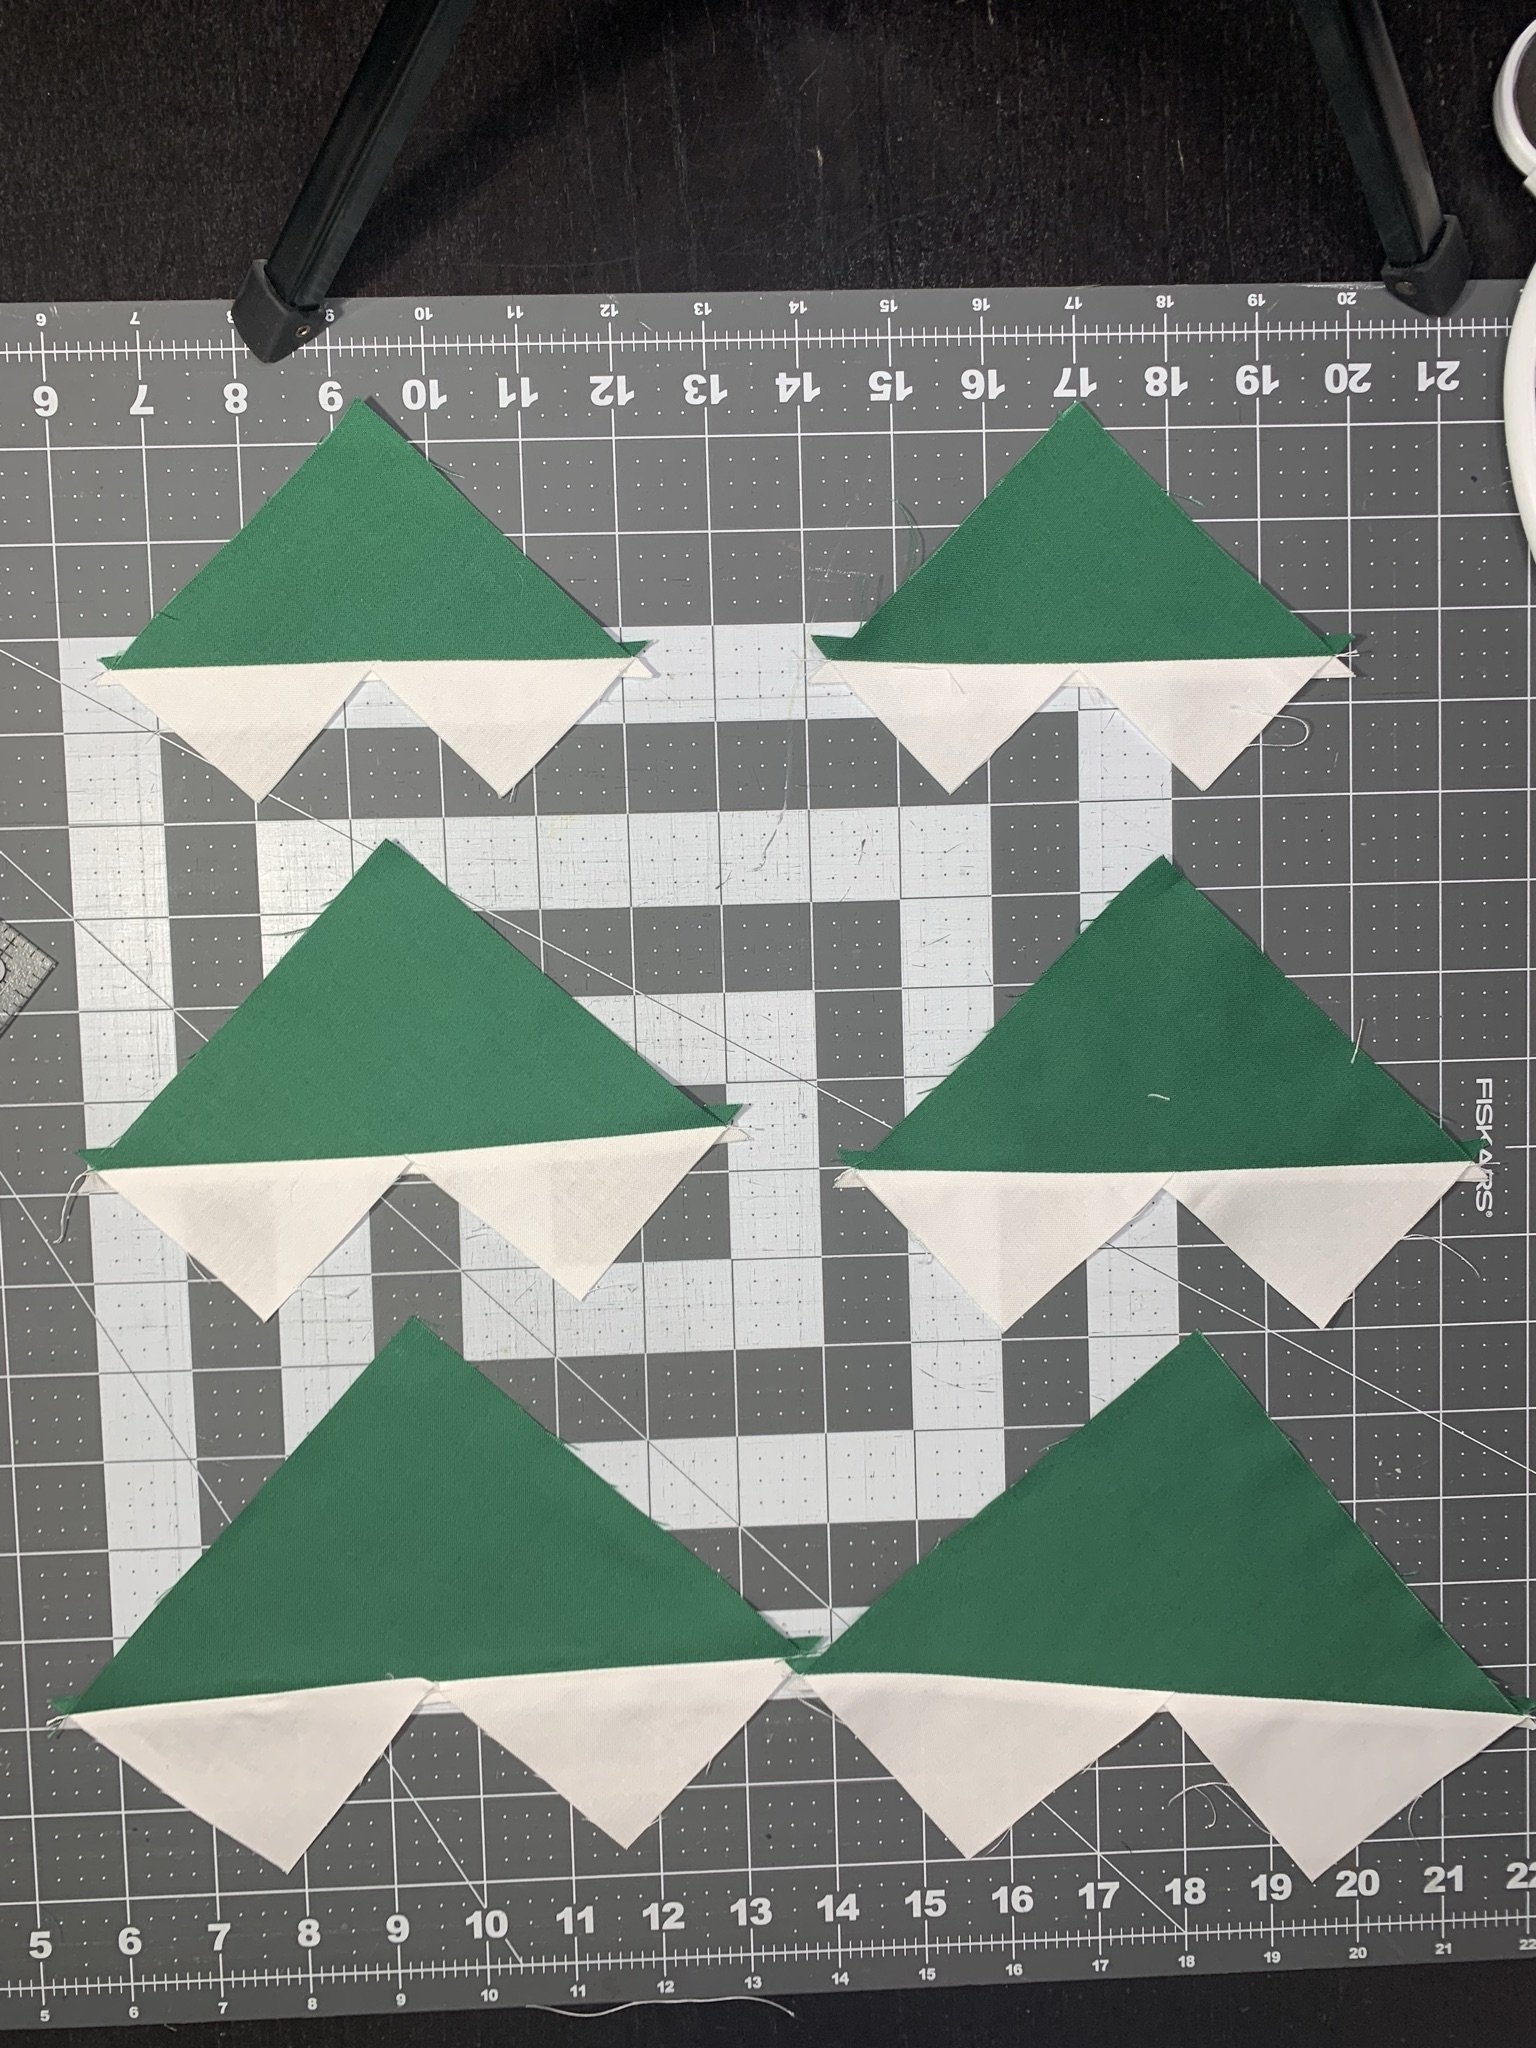
For each size, add a Background Flying Geese square to the corner of the Tree fabric with the drawn diagonal line intersecting the gap between the two Background pieces. Sew on either side of the diagonal line using a 1/4” seam allowance.
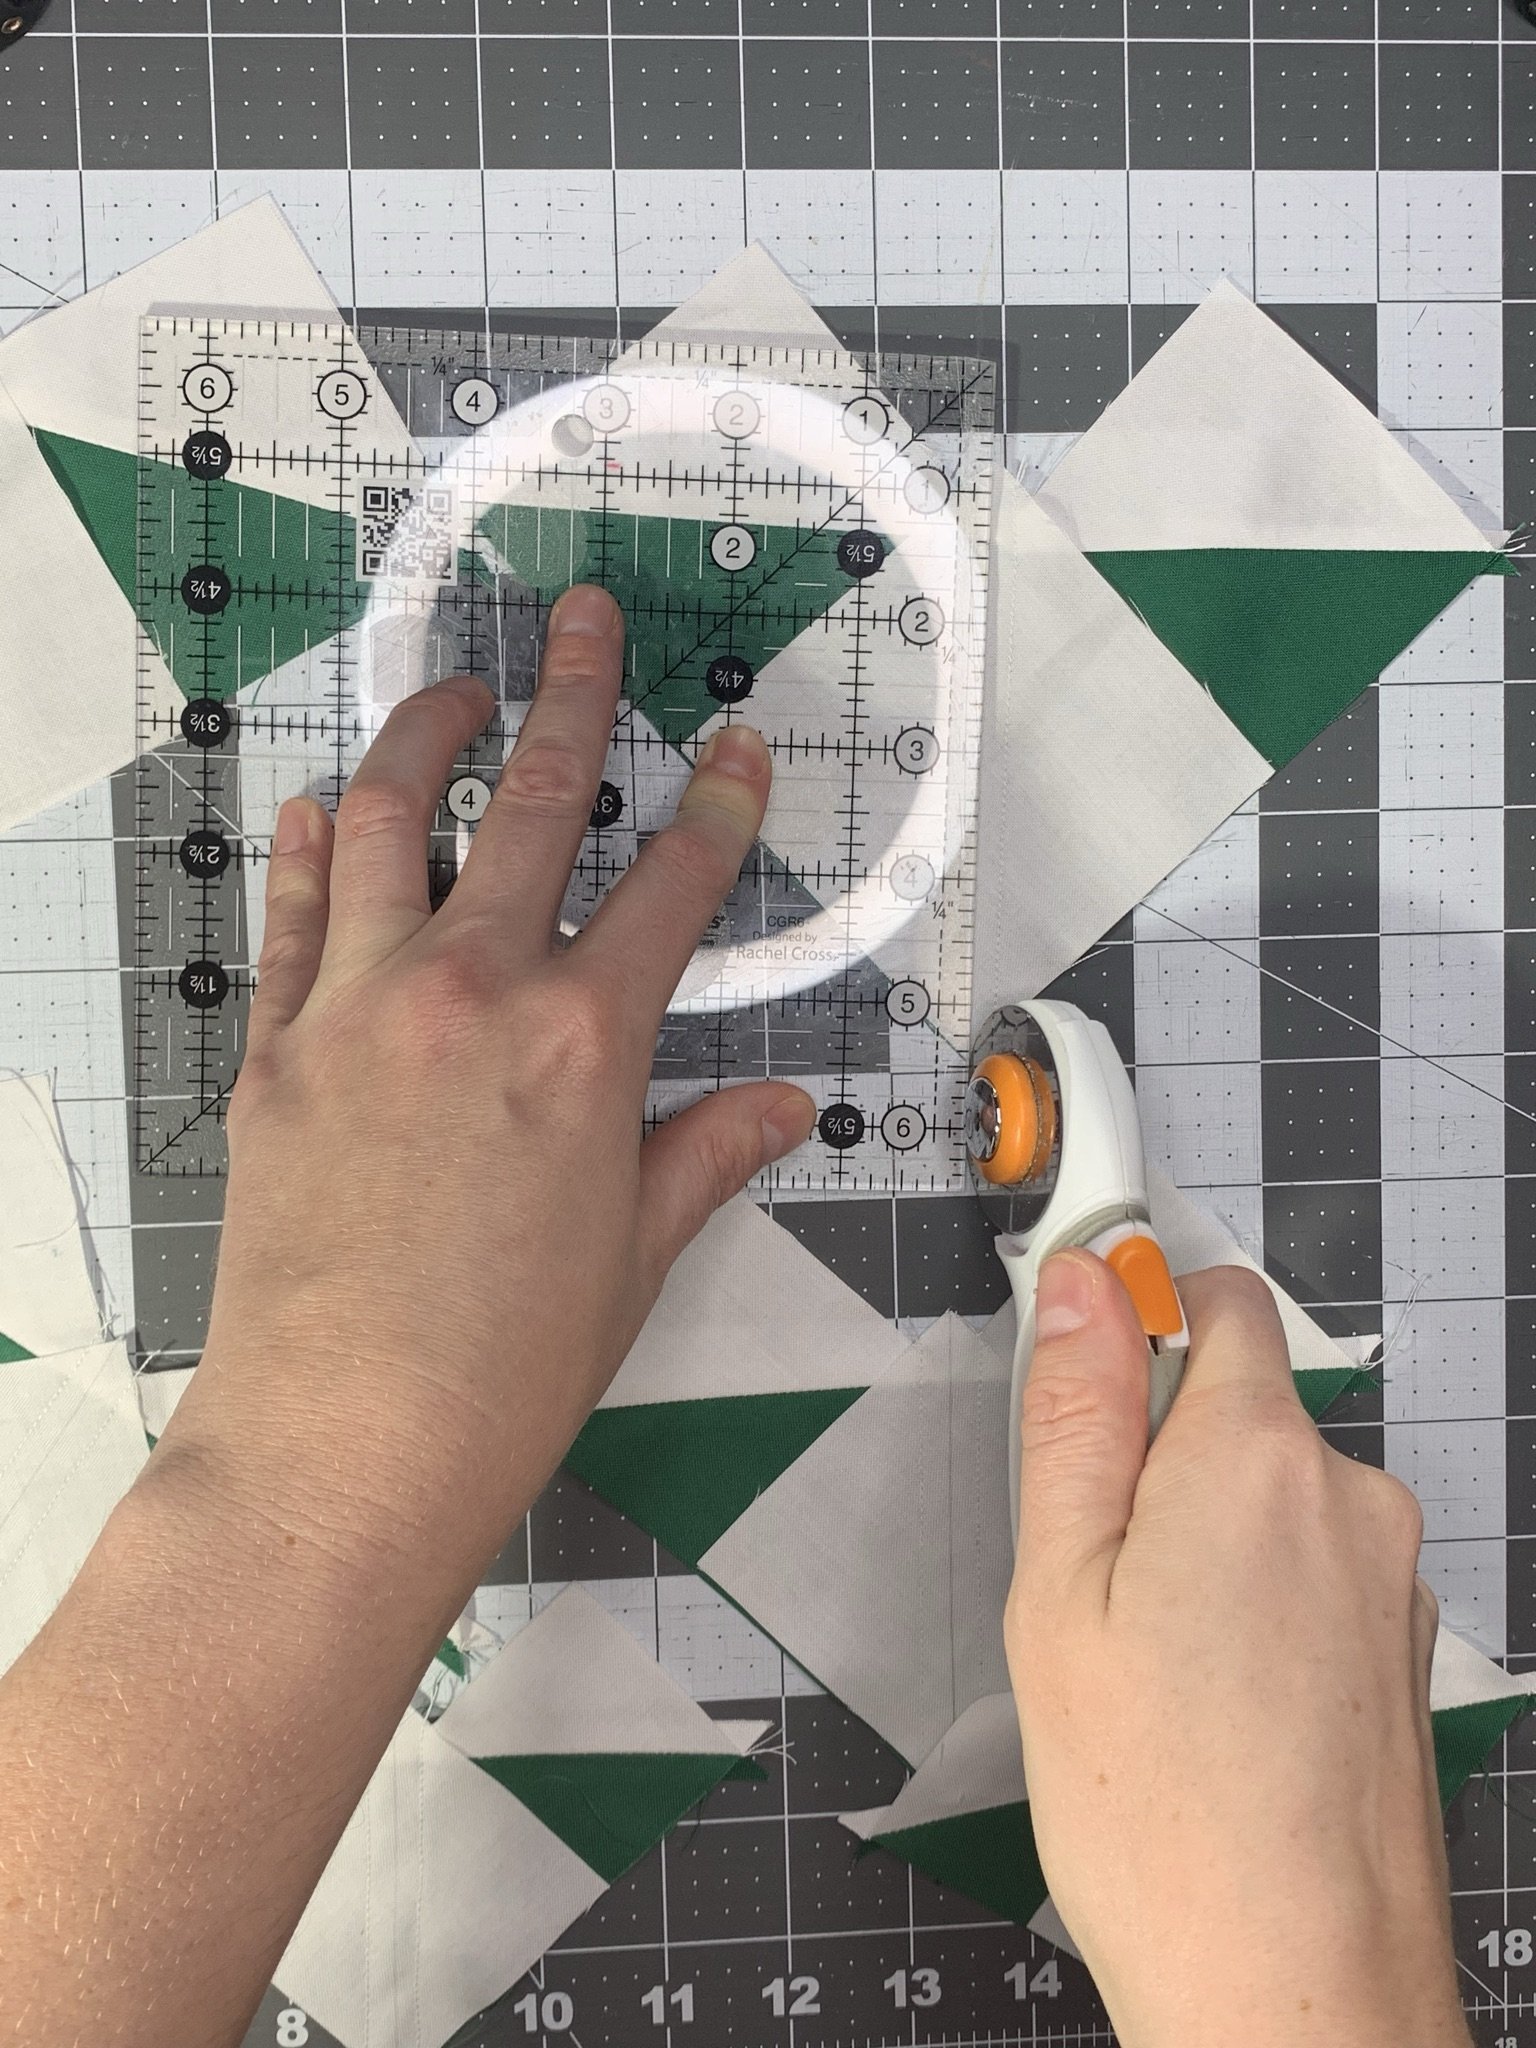

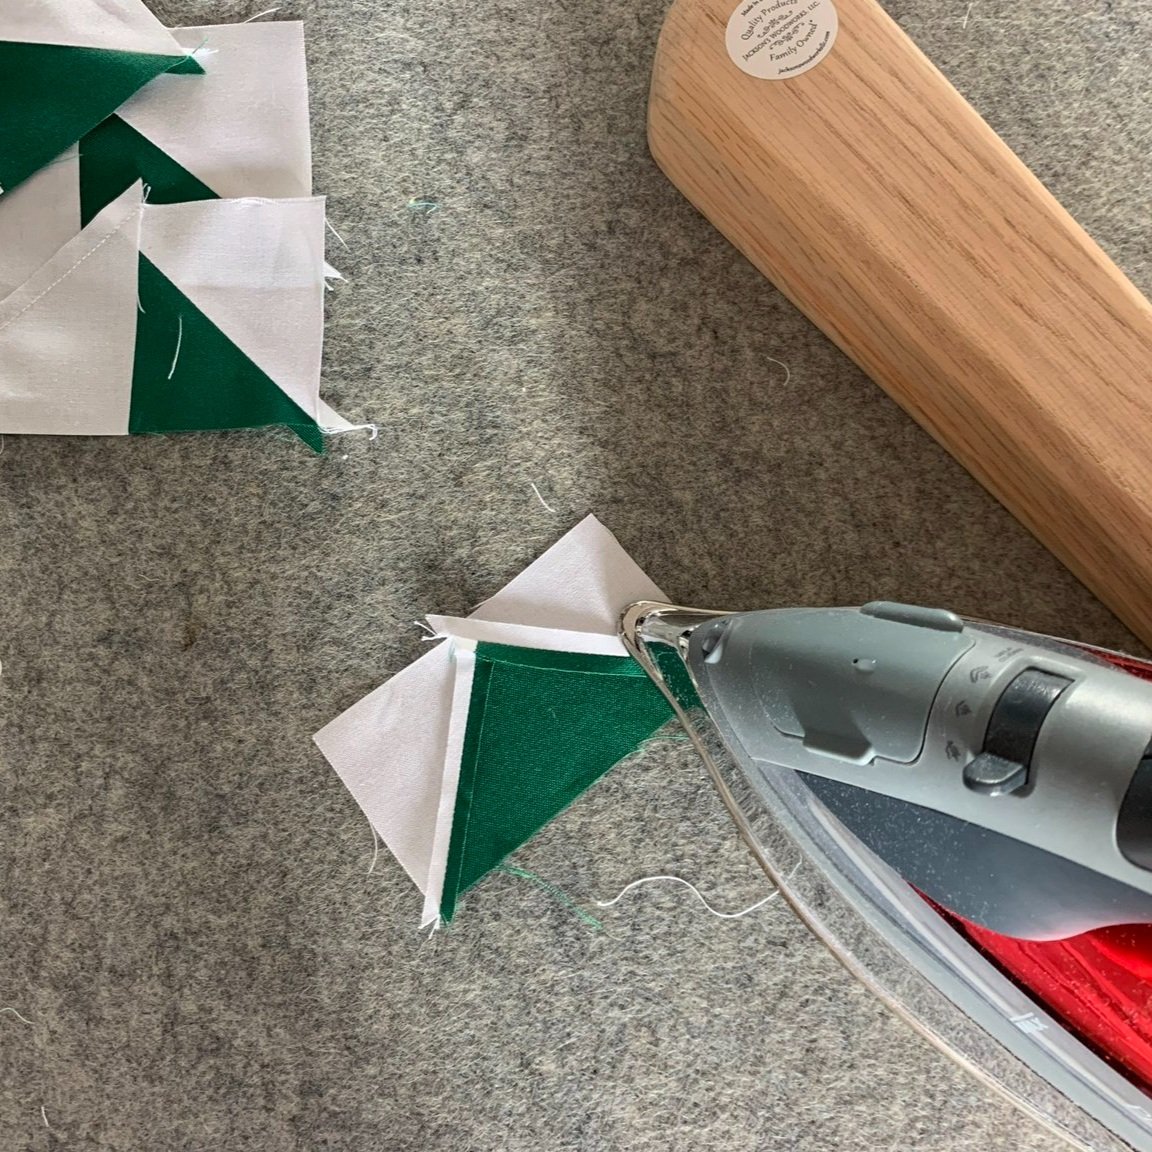
Cut along the diagonal line for all pieces. Press seams open.
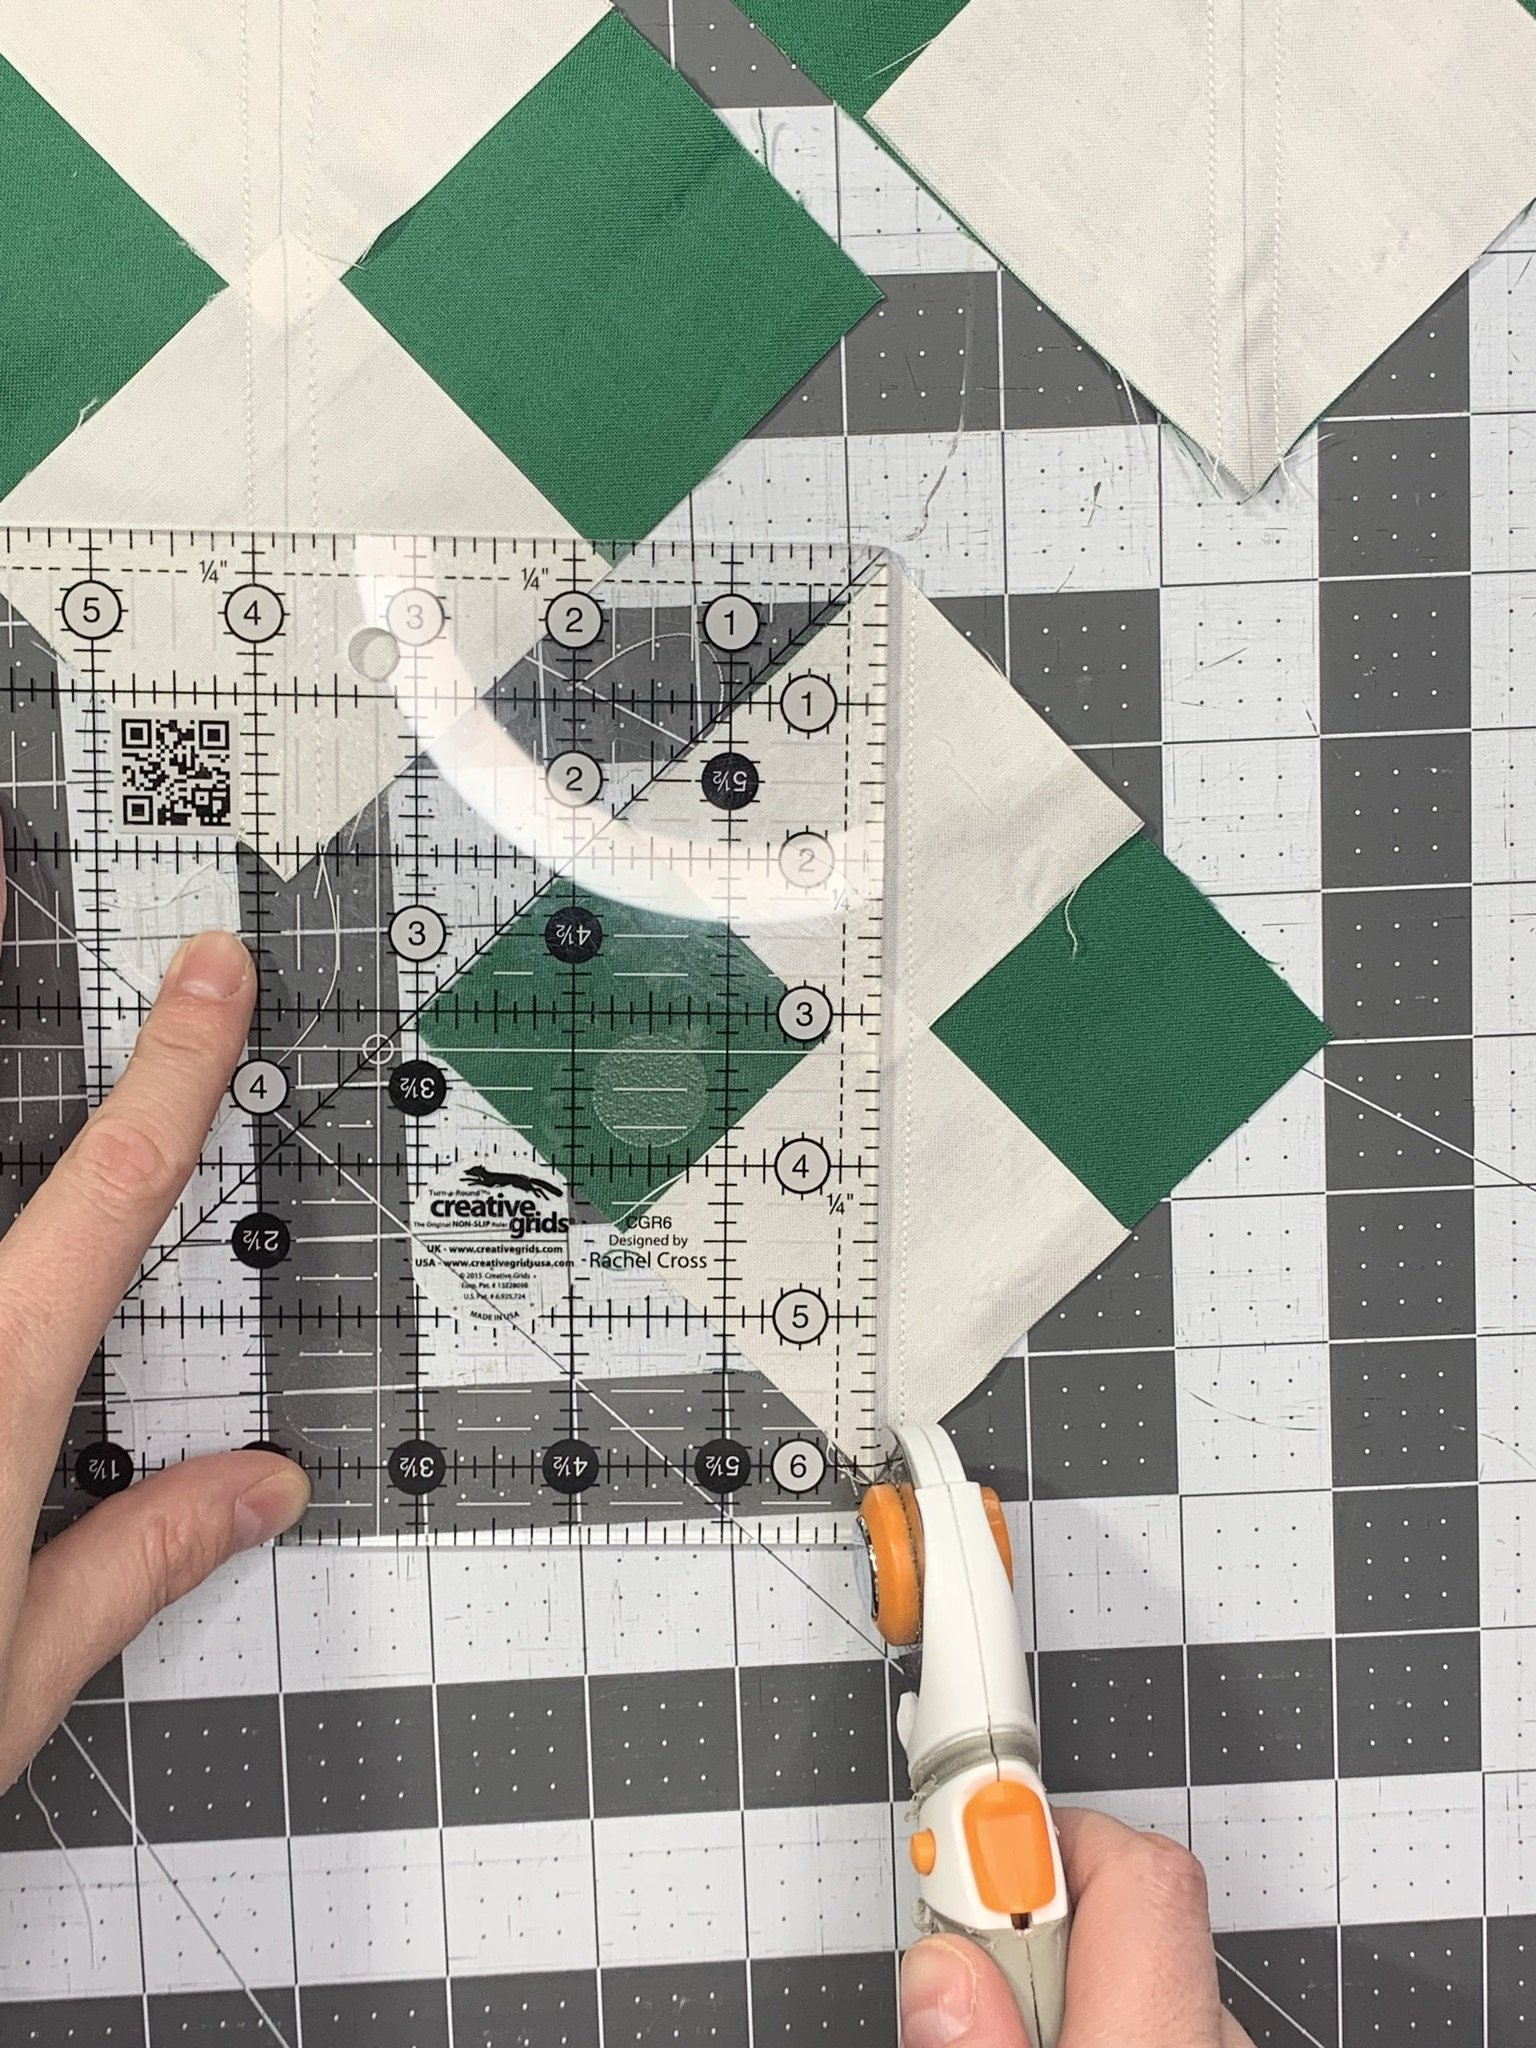
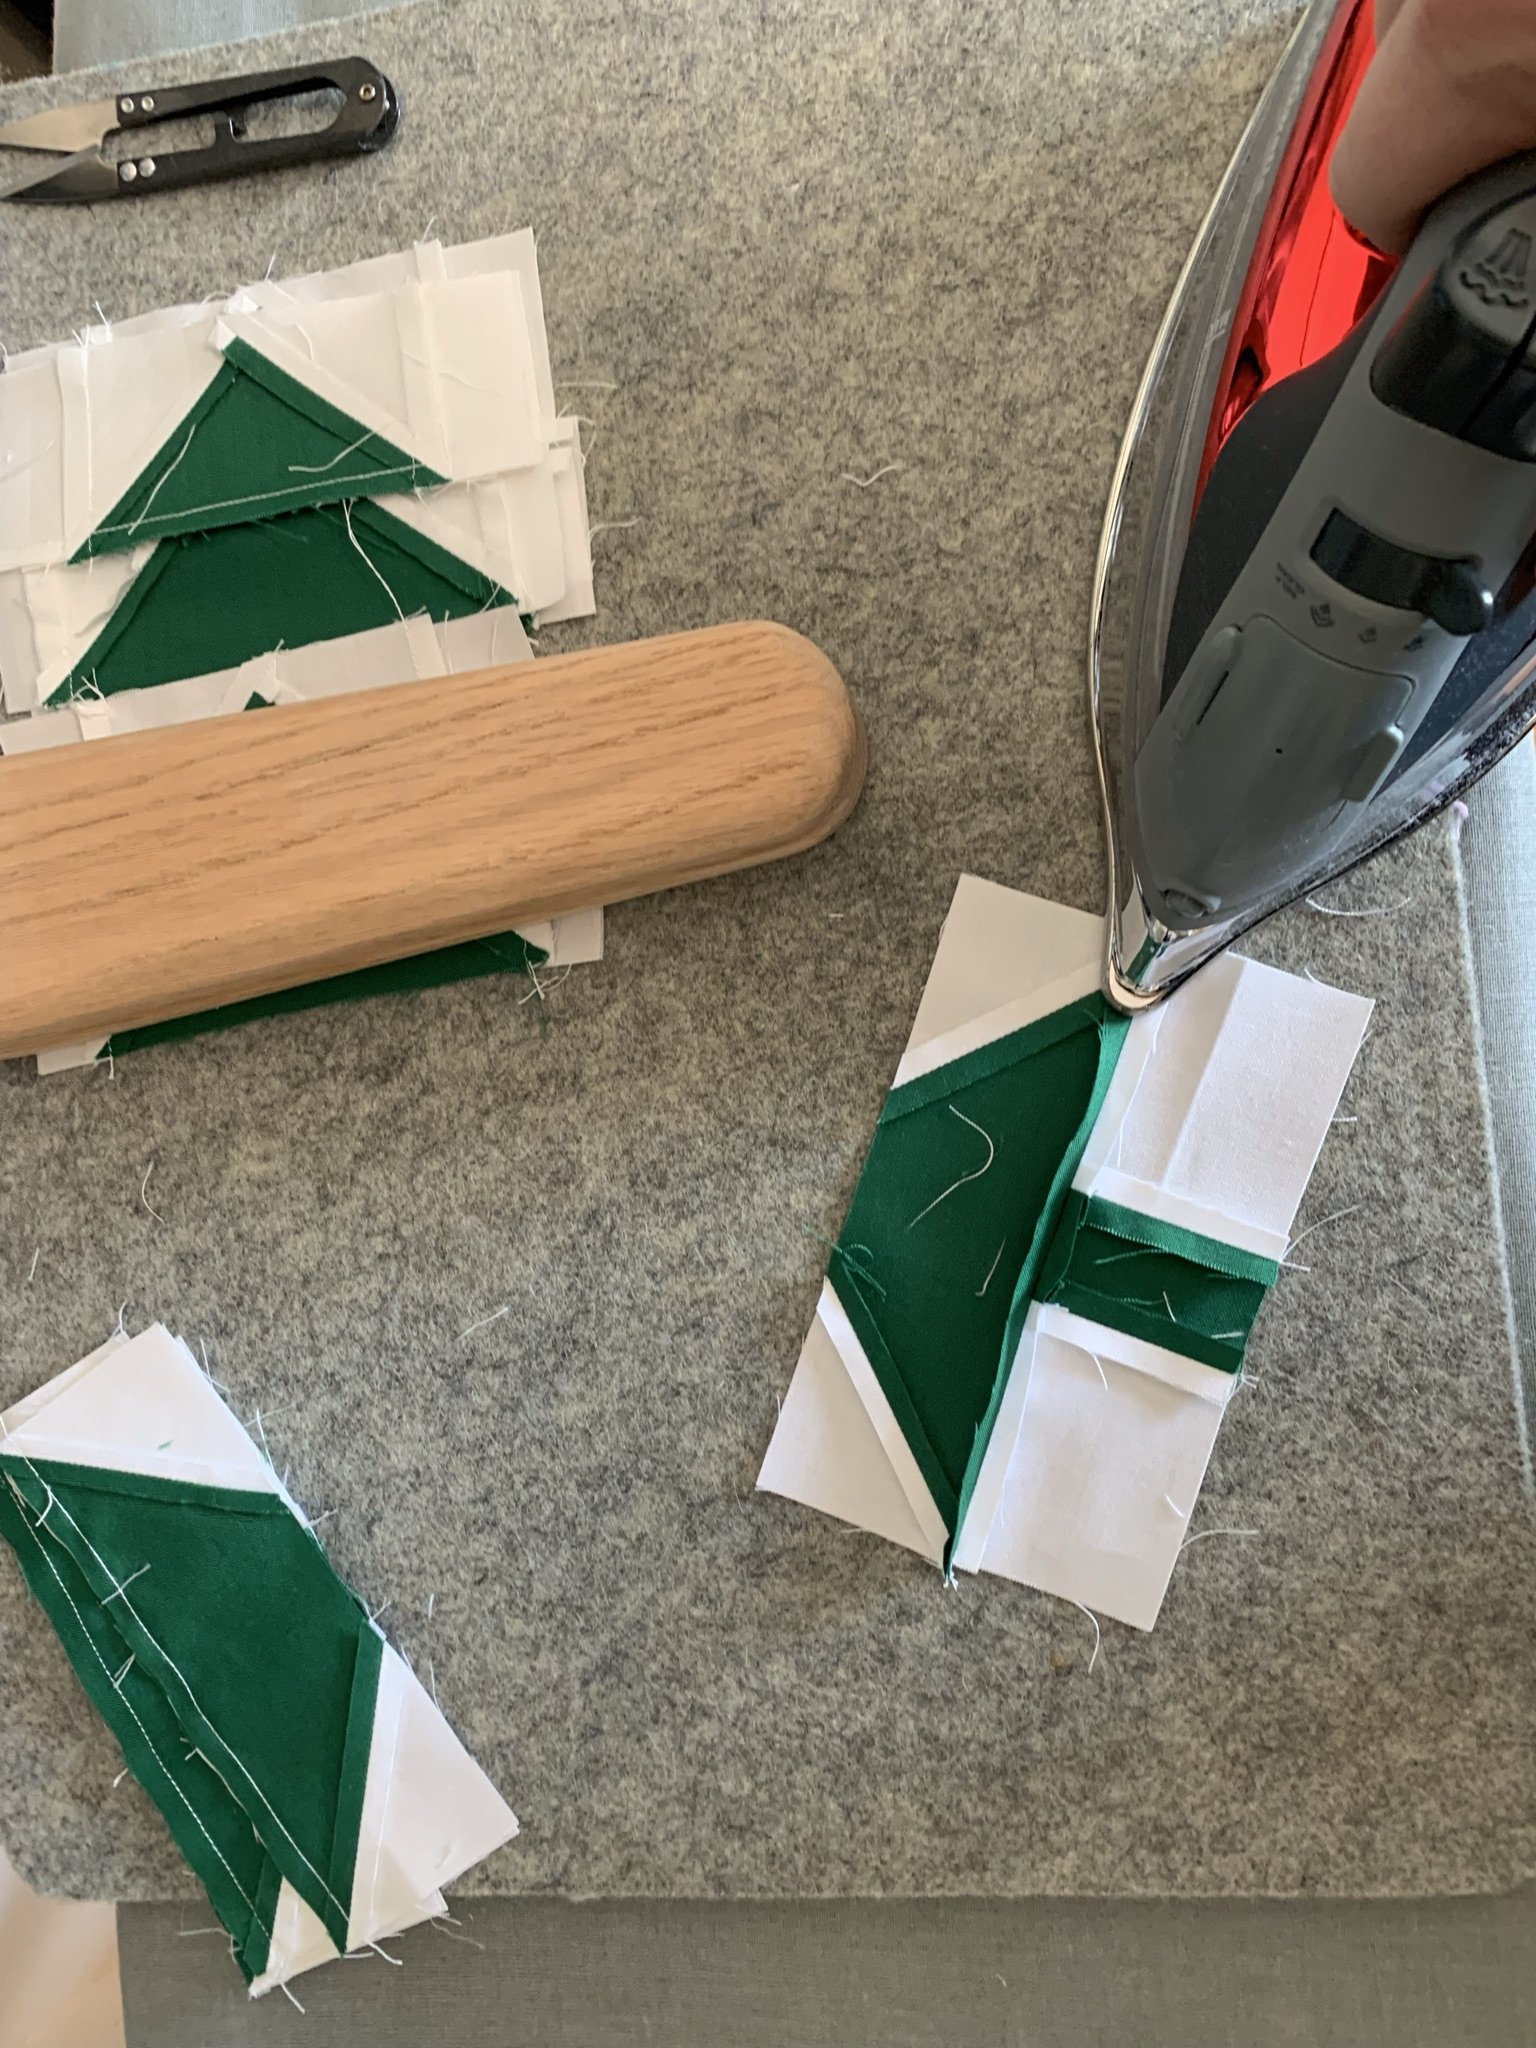
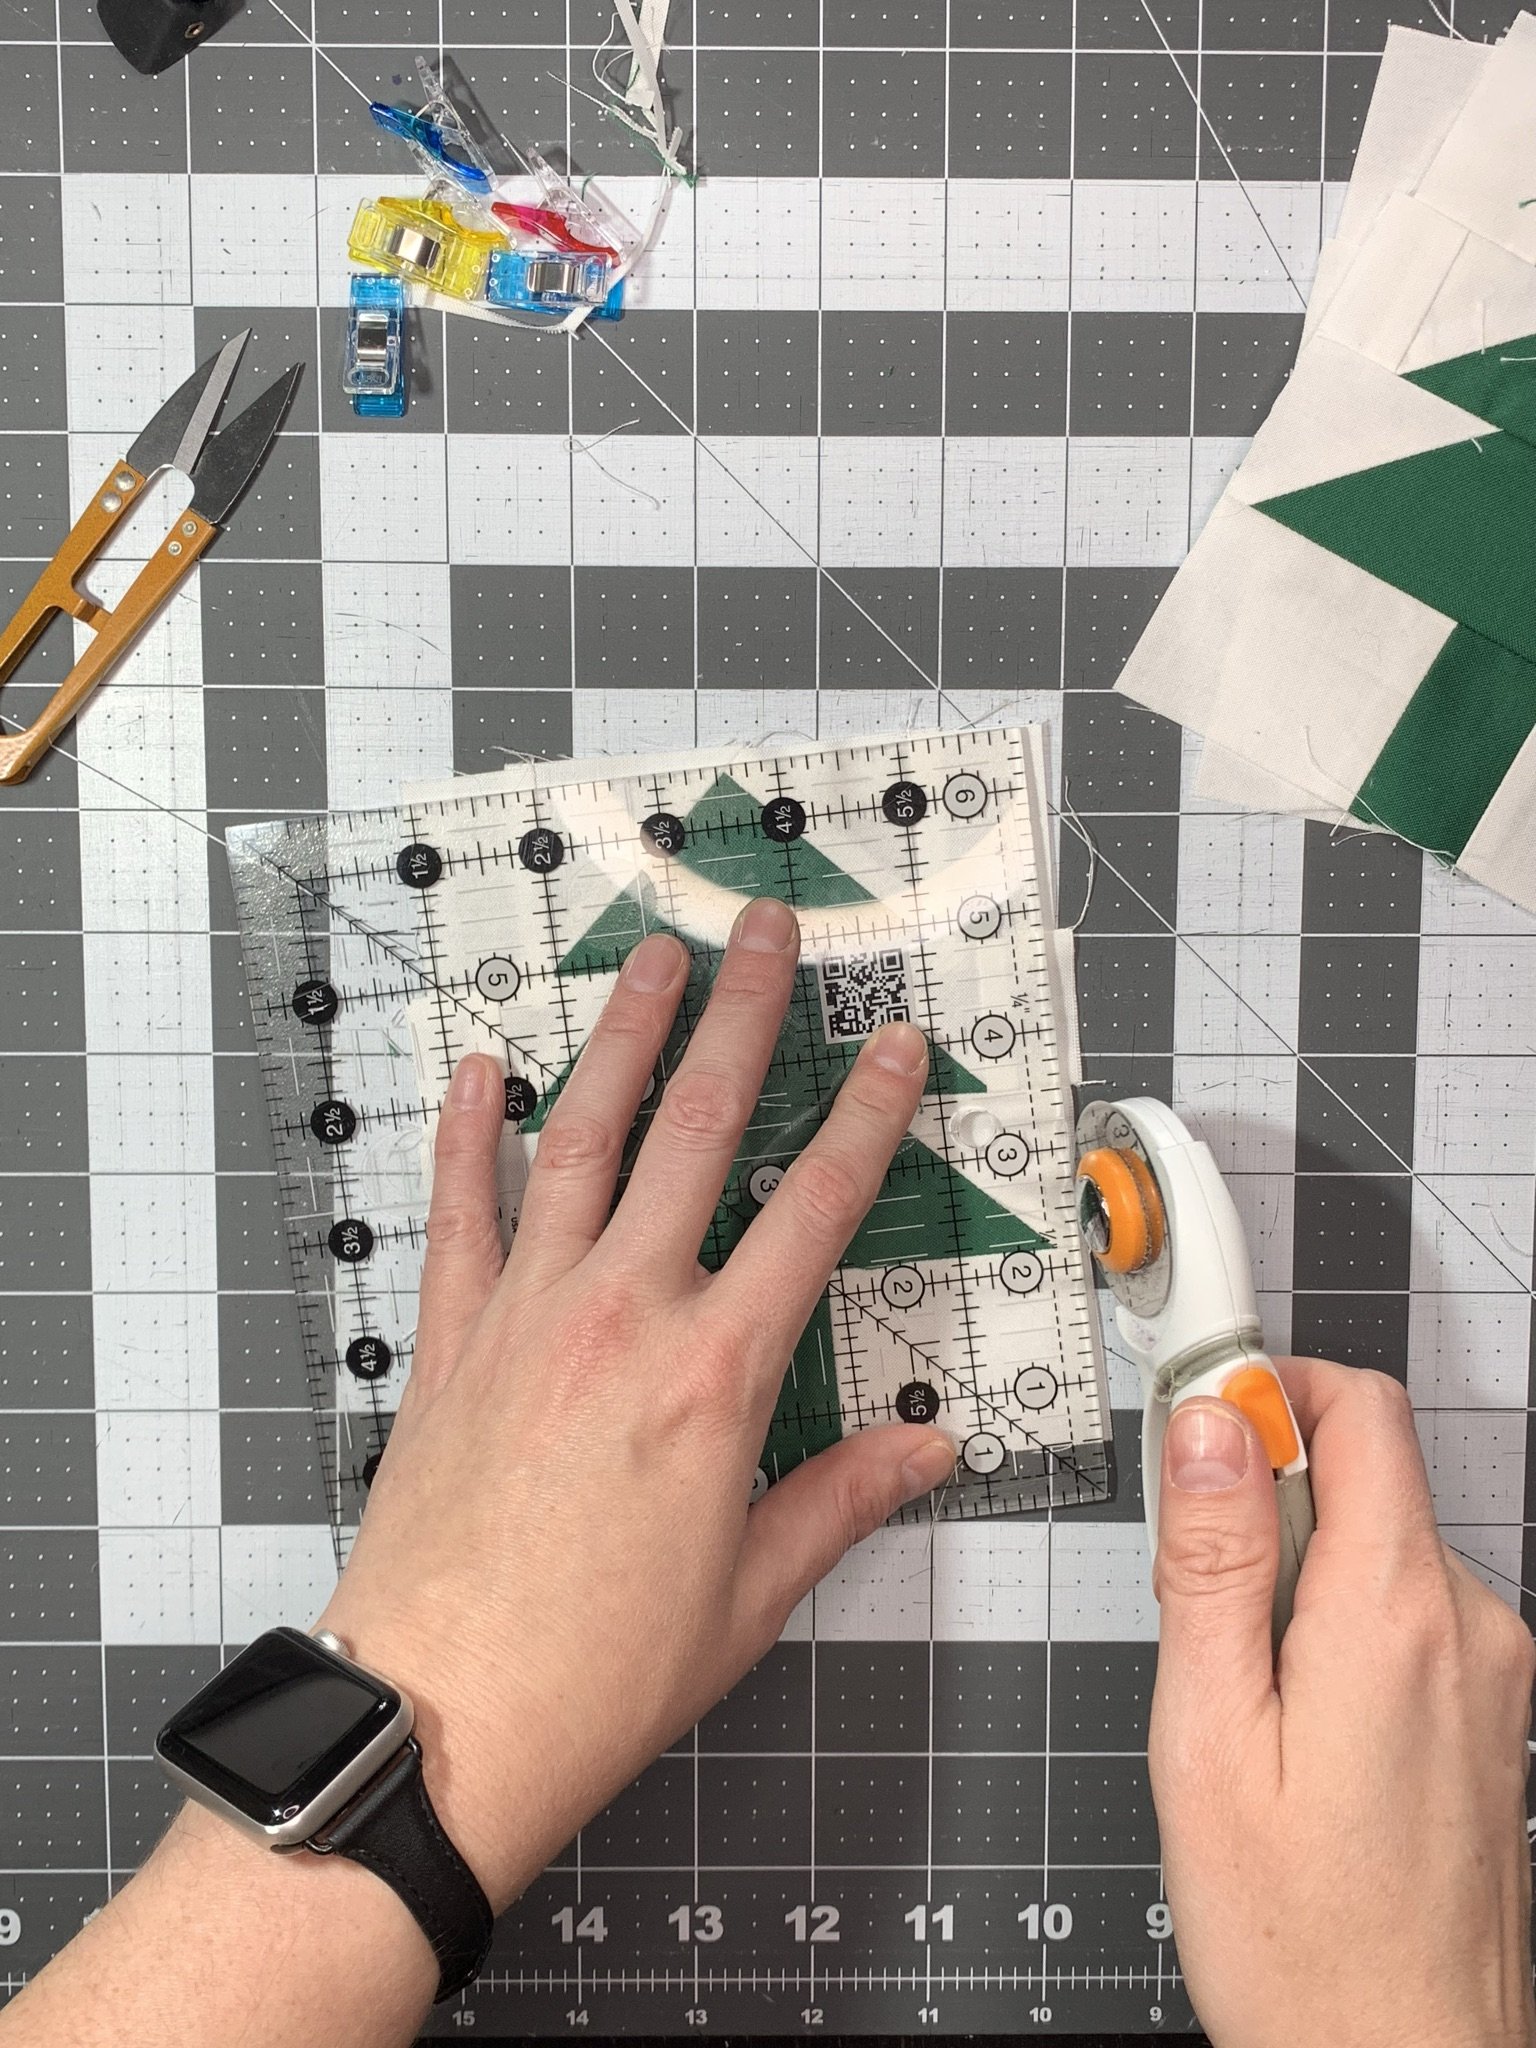
Trim the Pieces
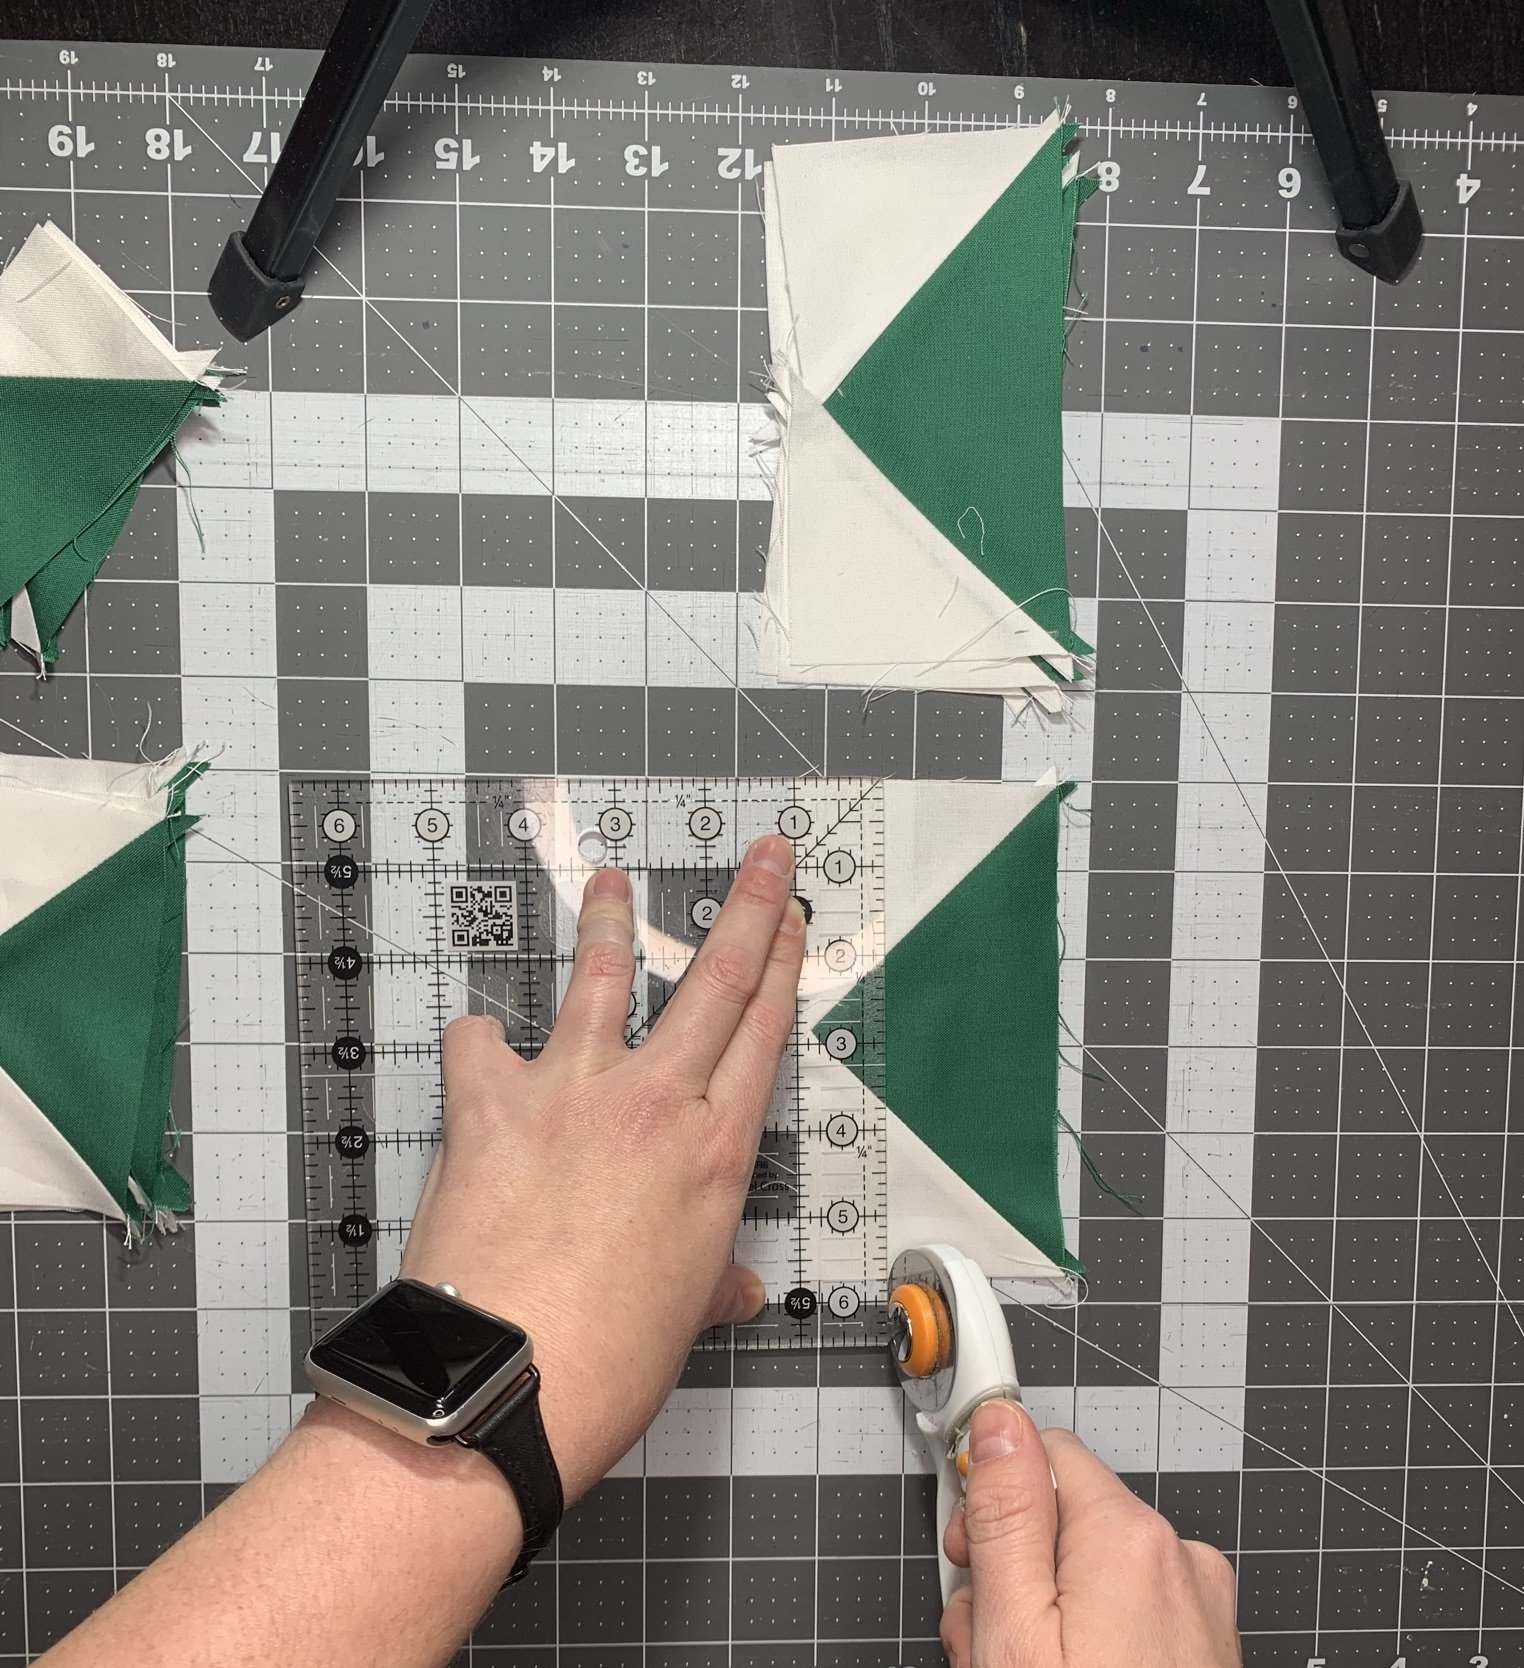
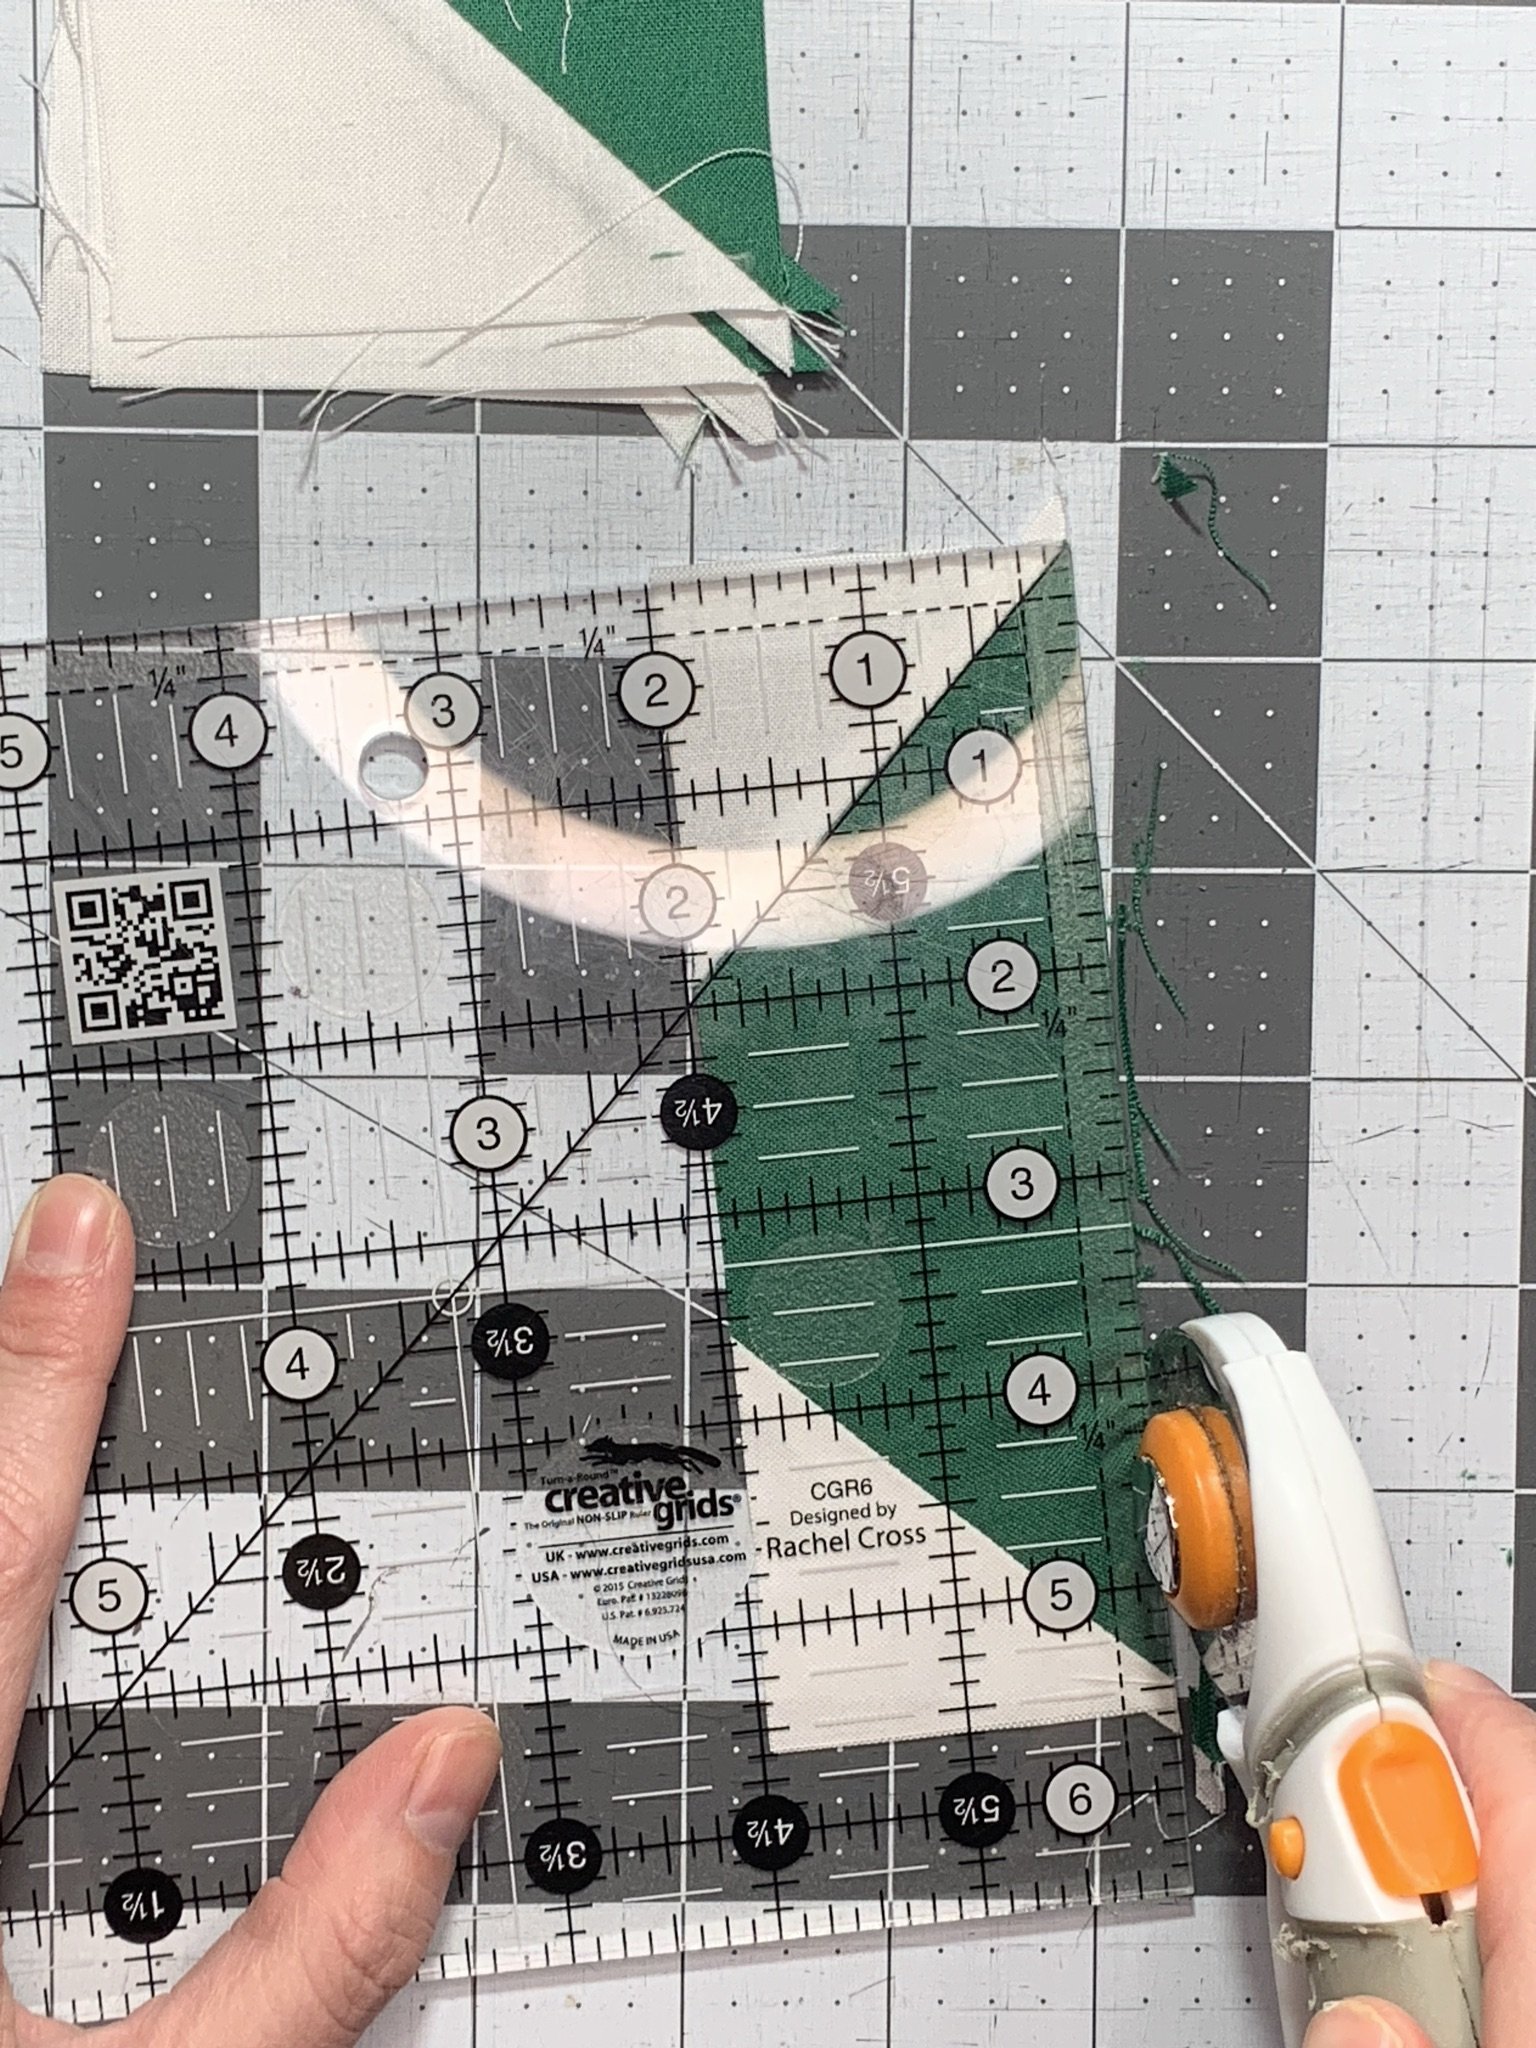
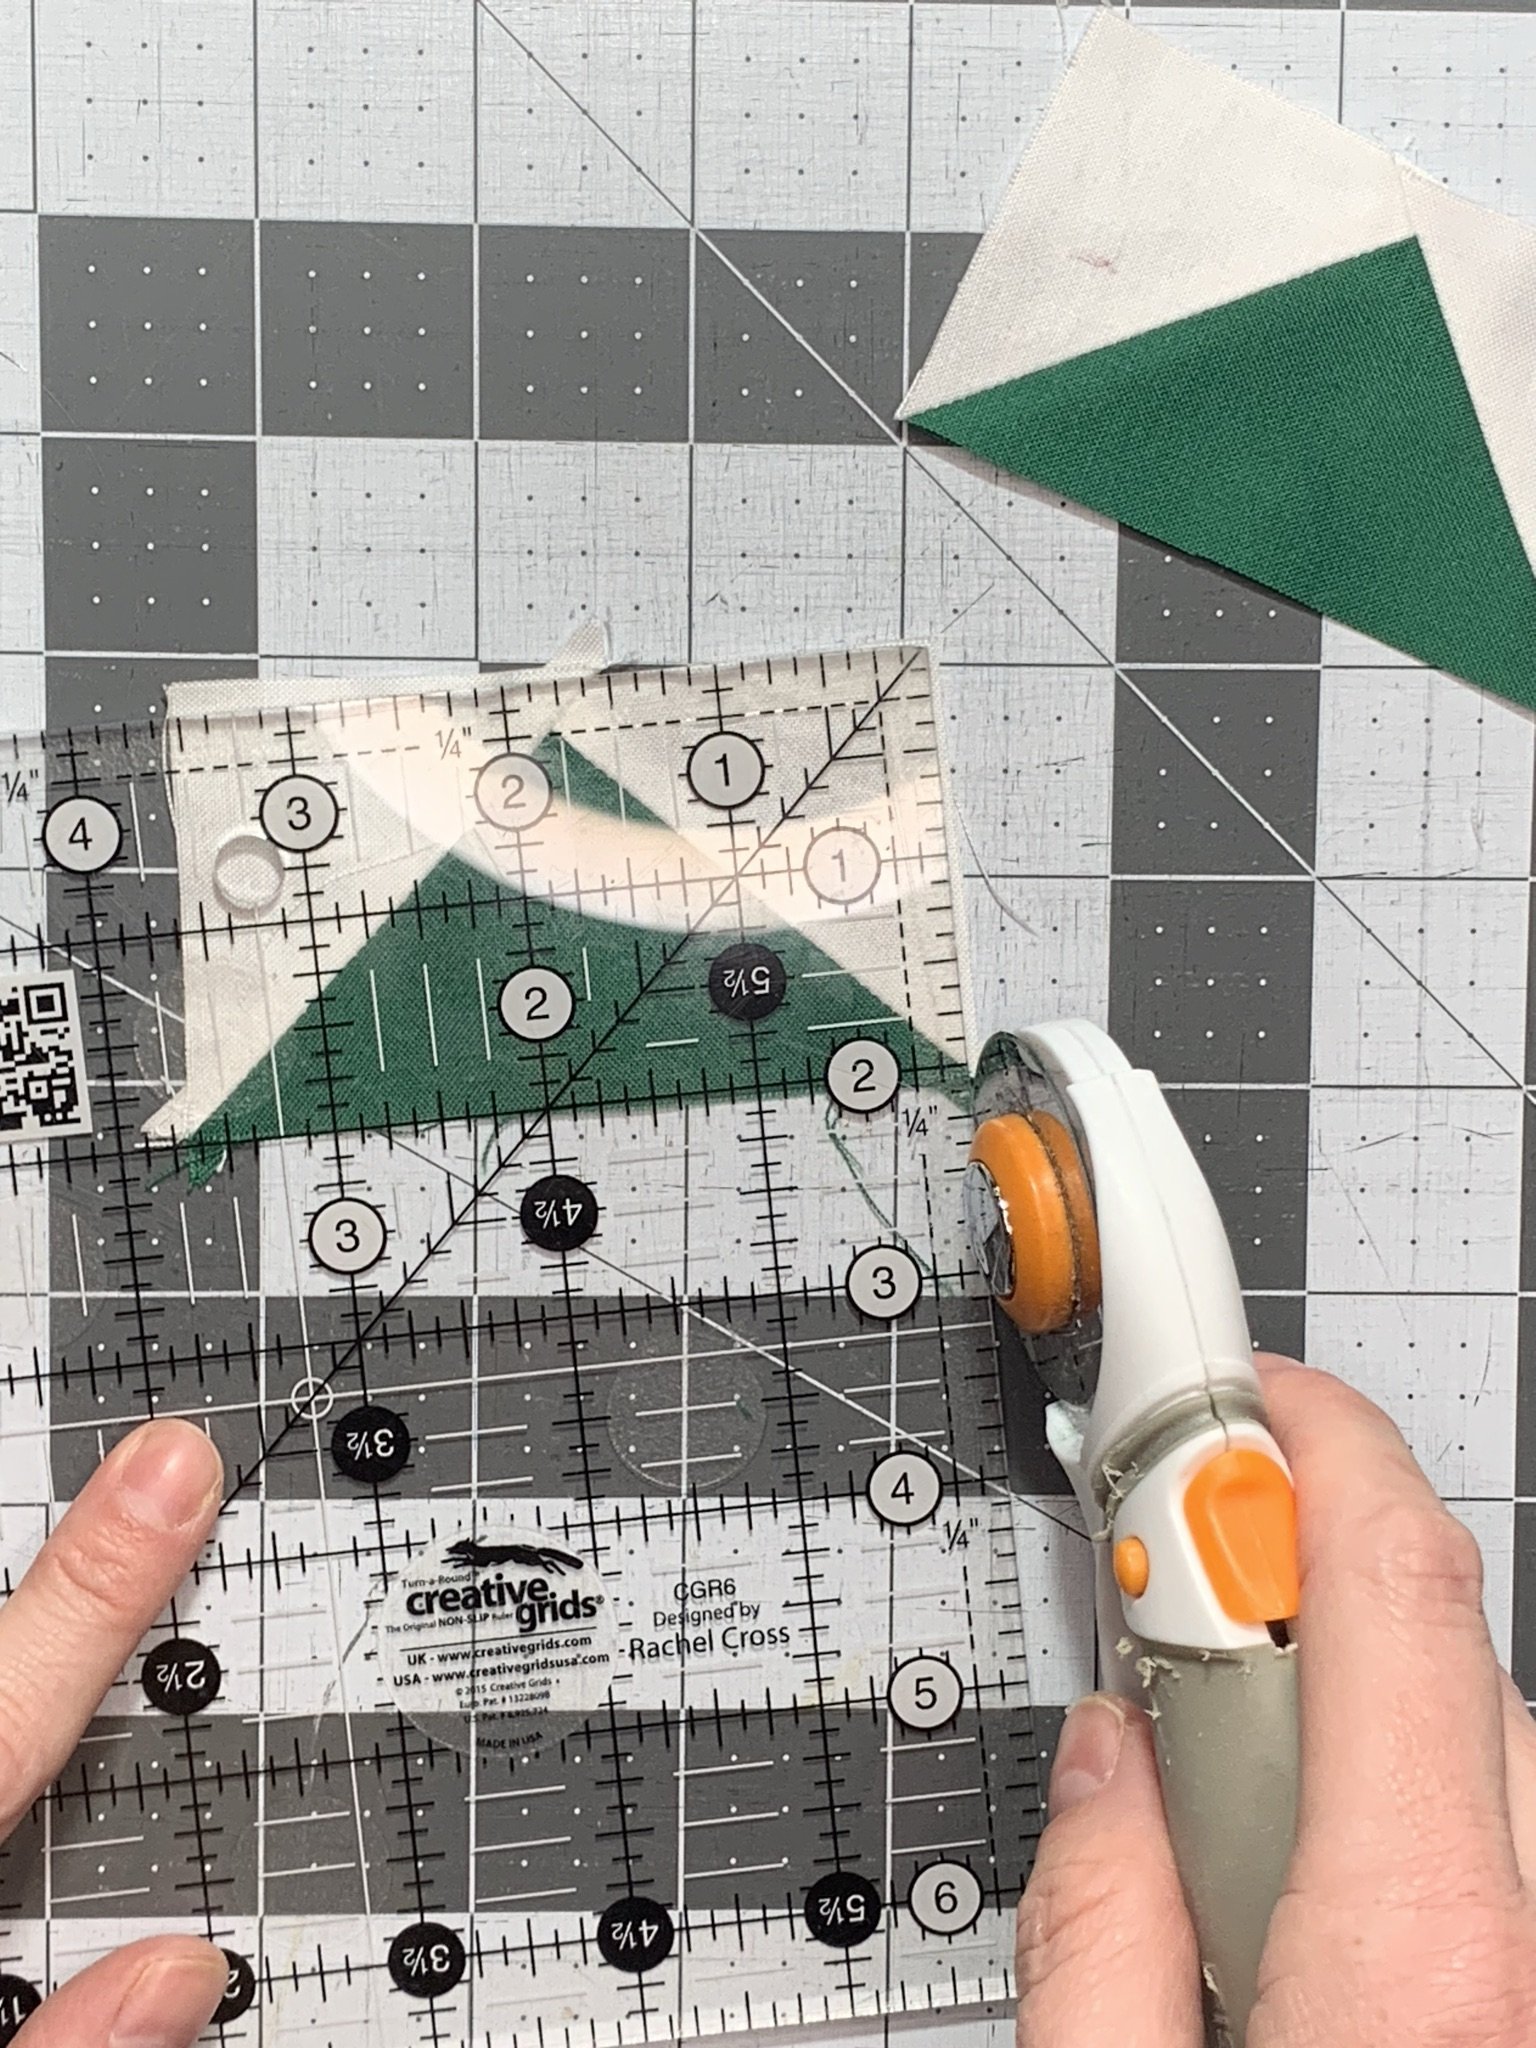
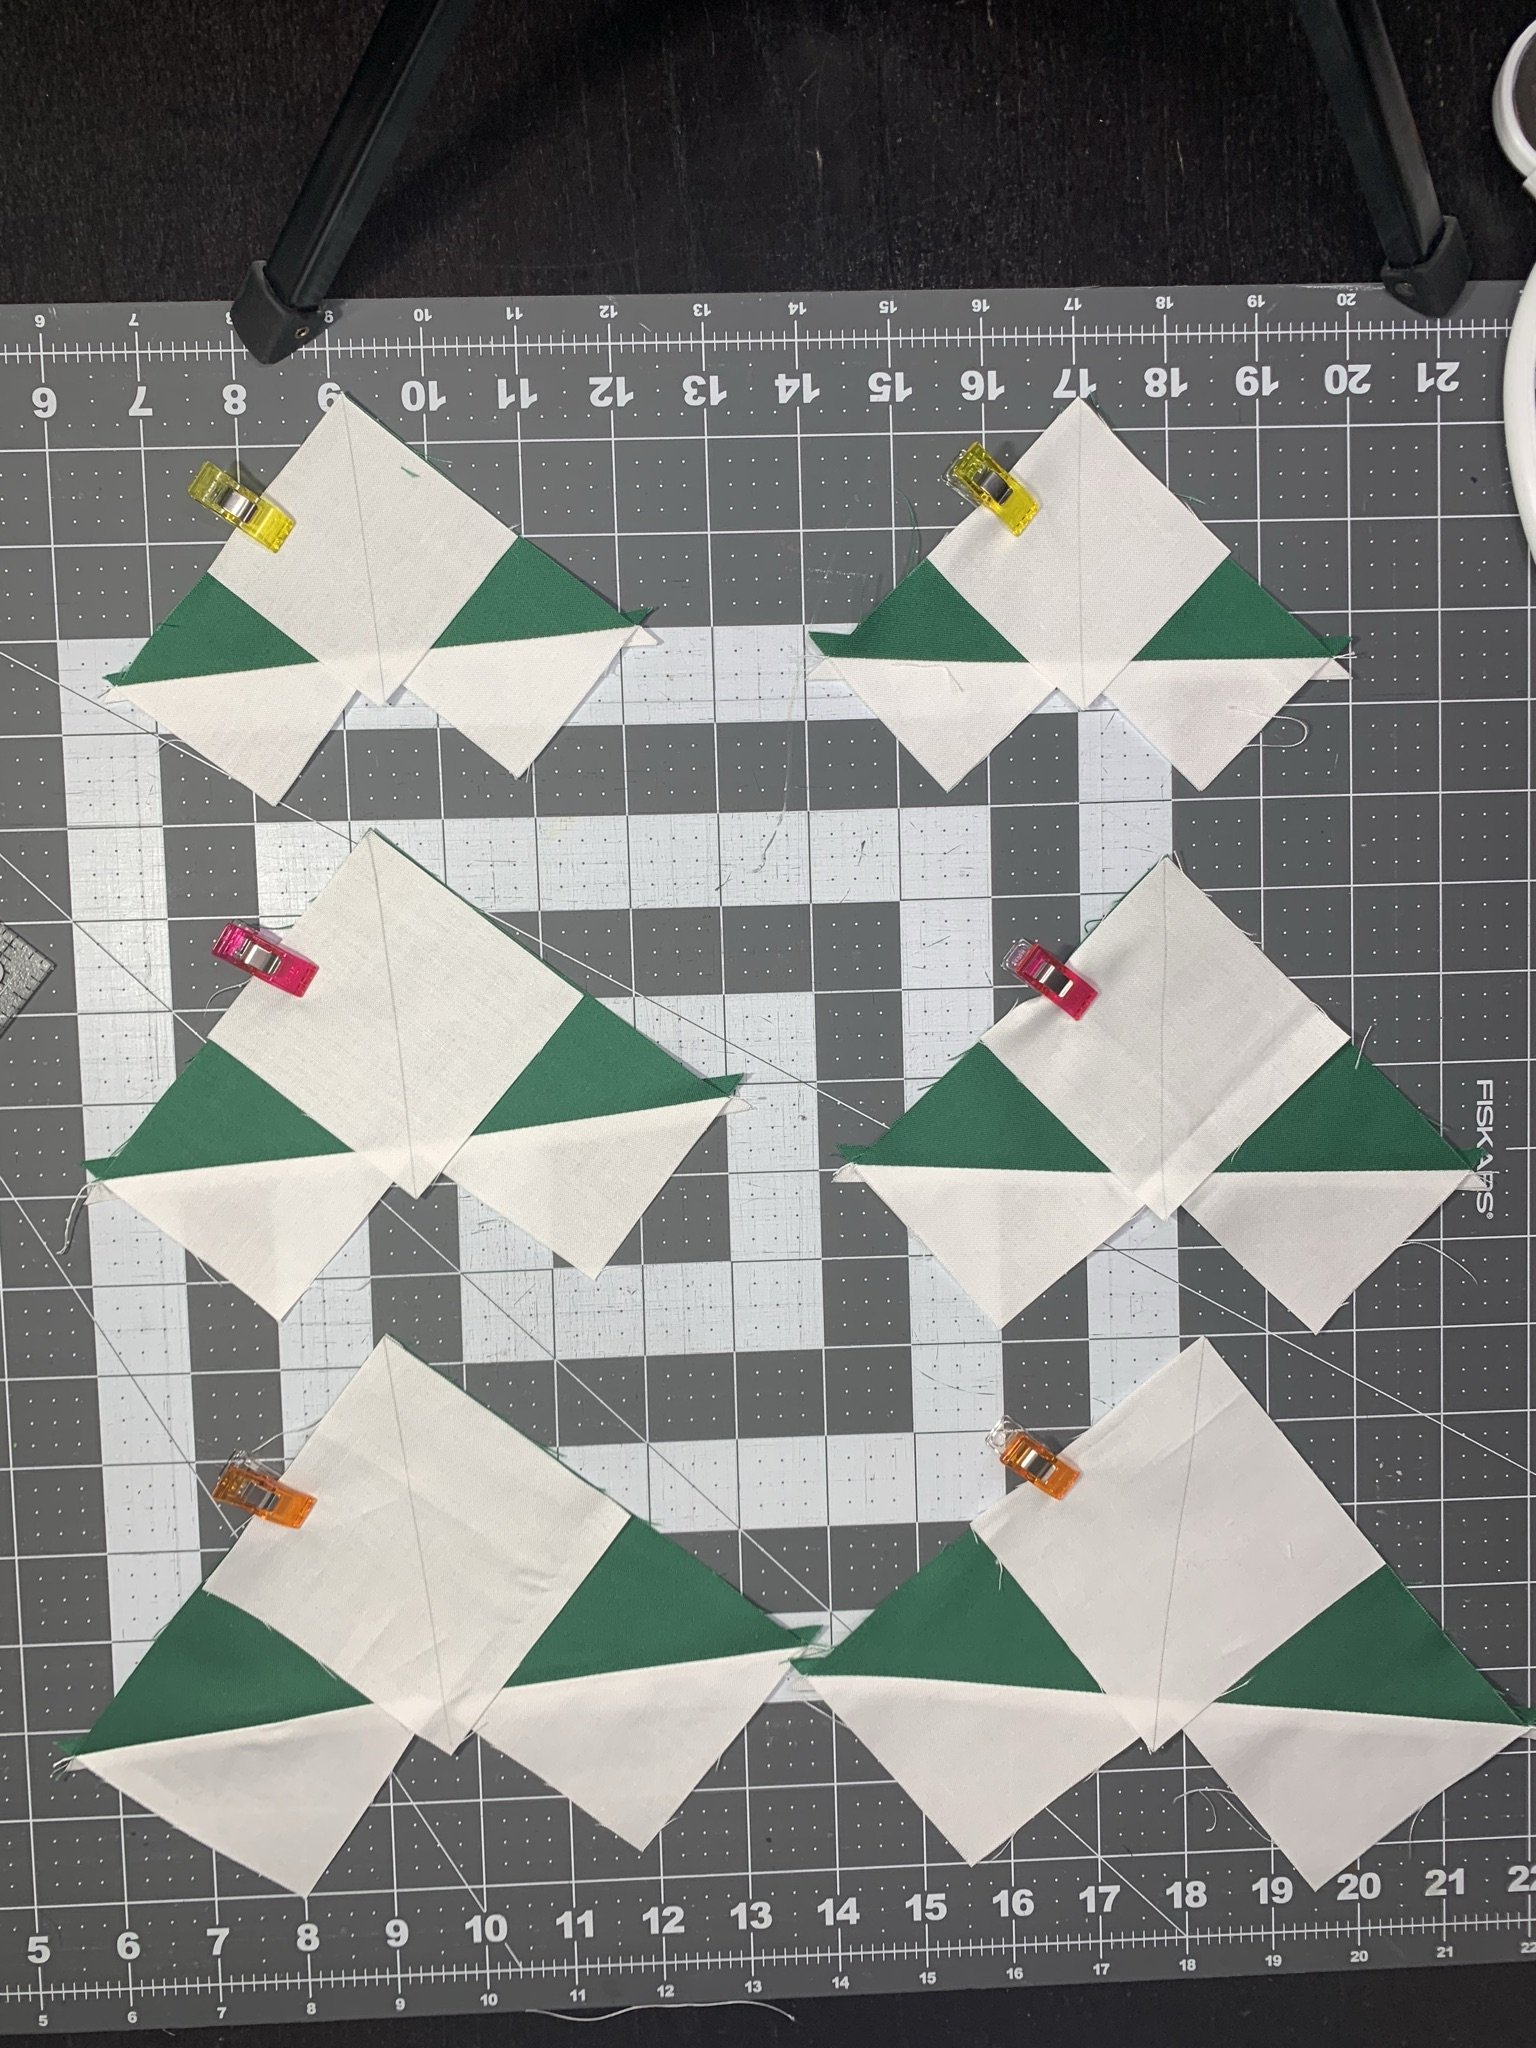
Trim and cut the Flying Geese according to chart below. The Small Flying Geese will only need the dog ears trimmed. The Medium and Large Flying Geese will have a portion of the top (where the triangle point is) removed.

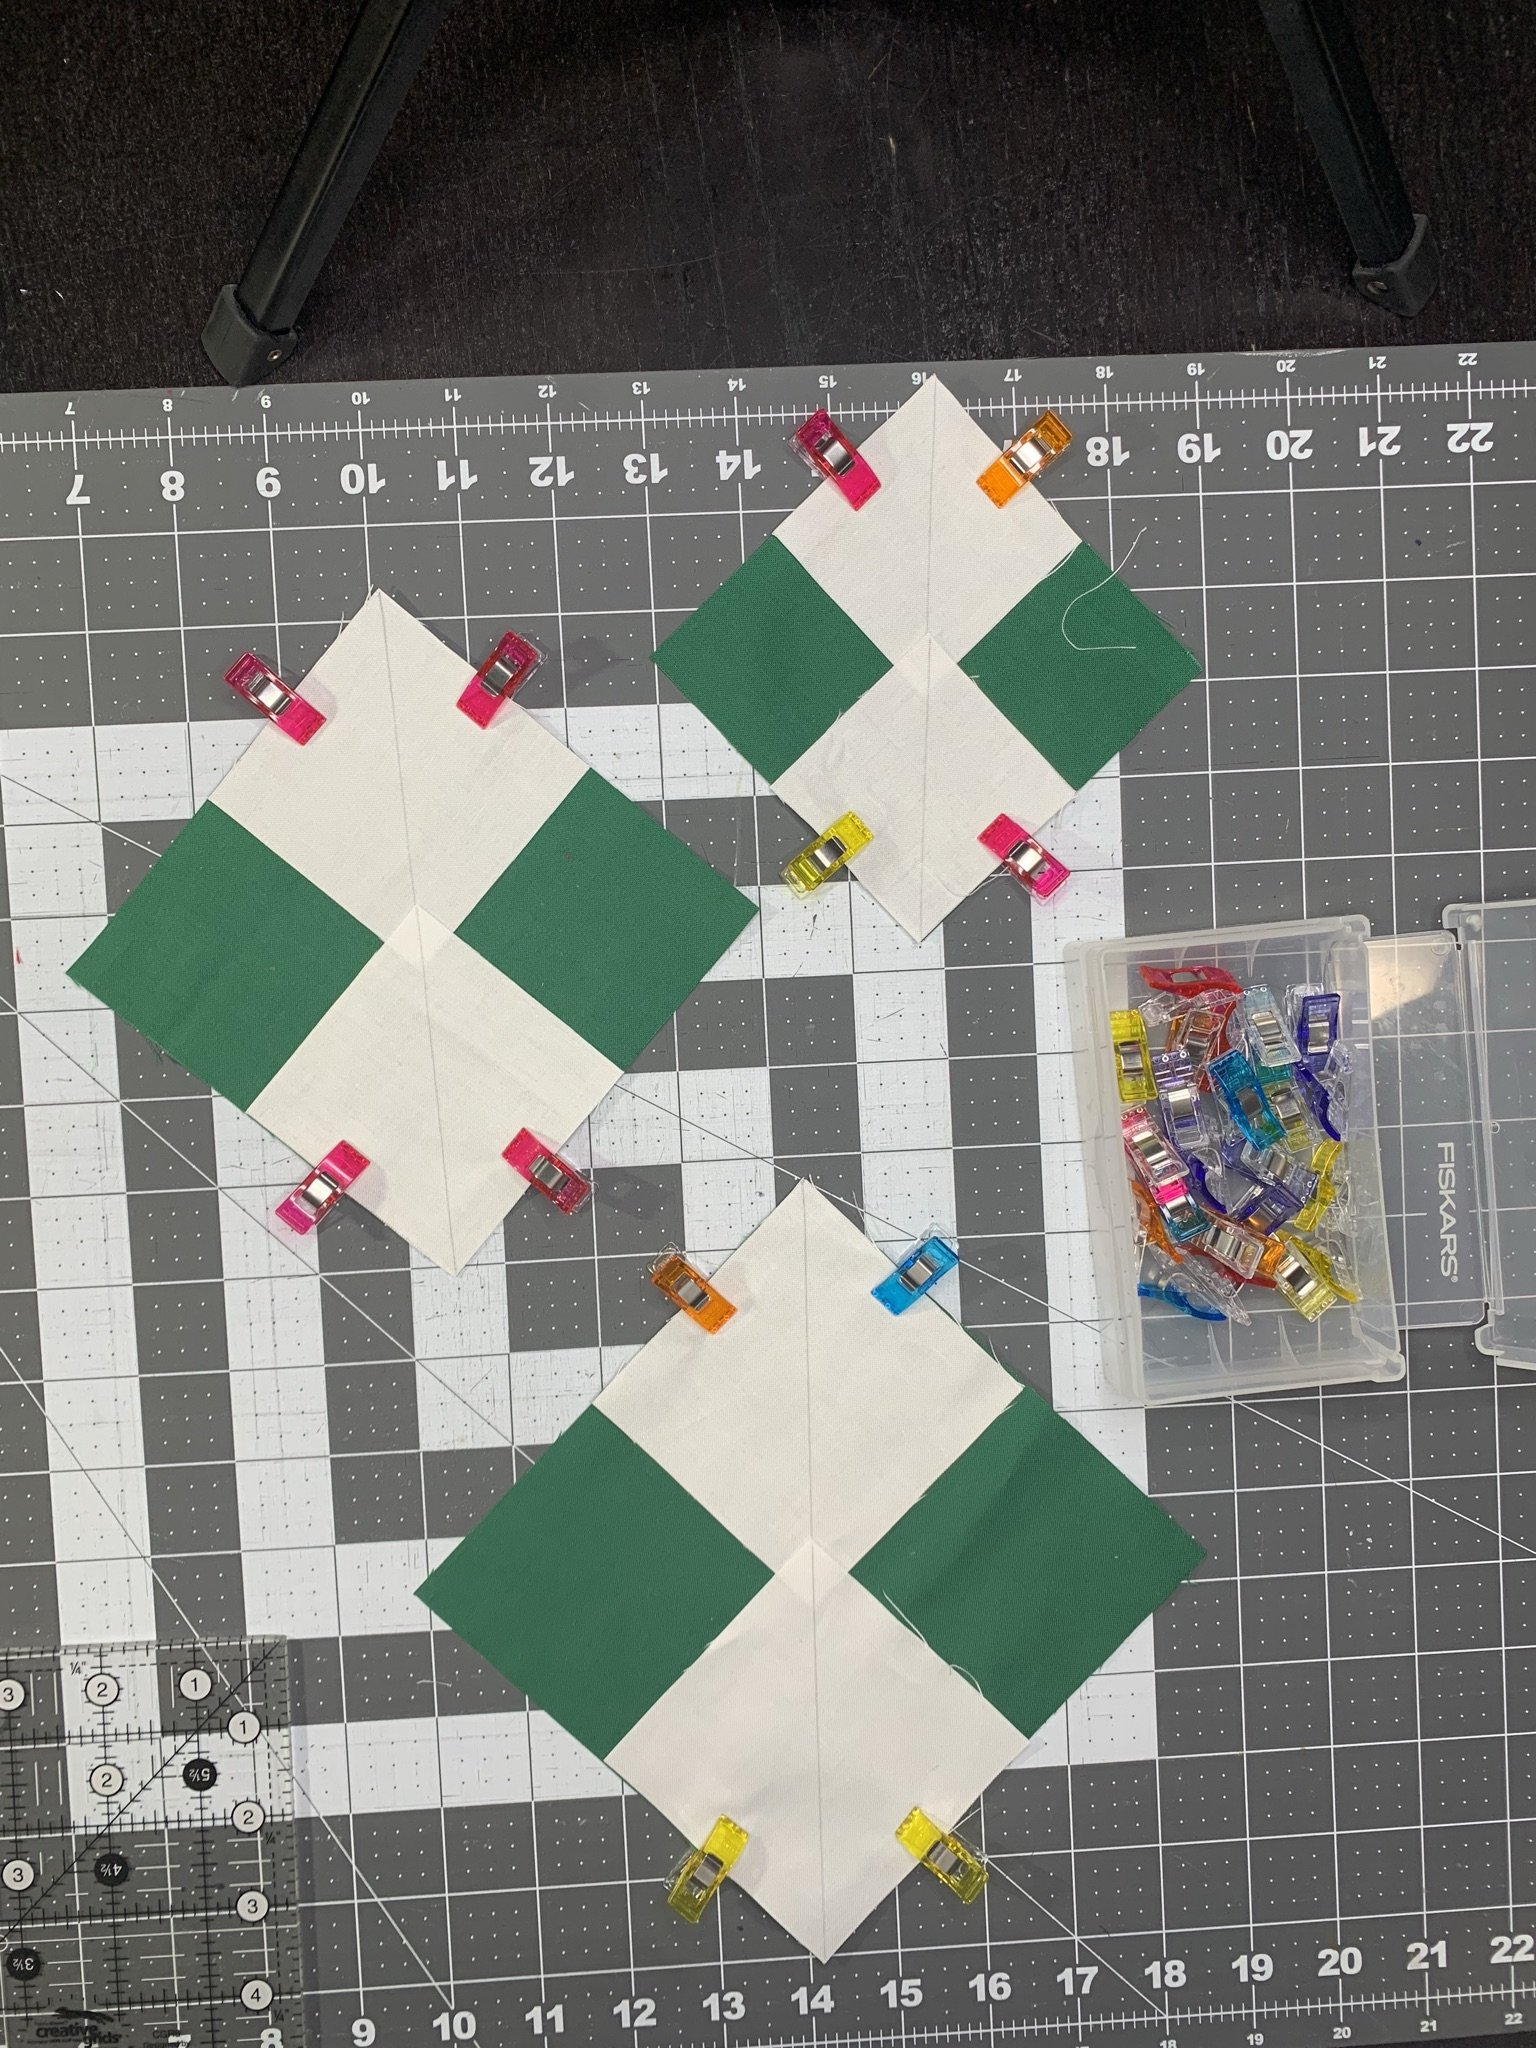
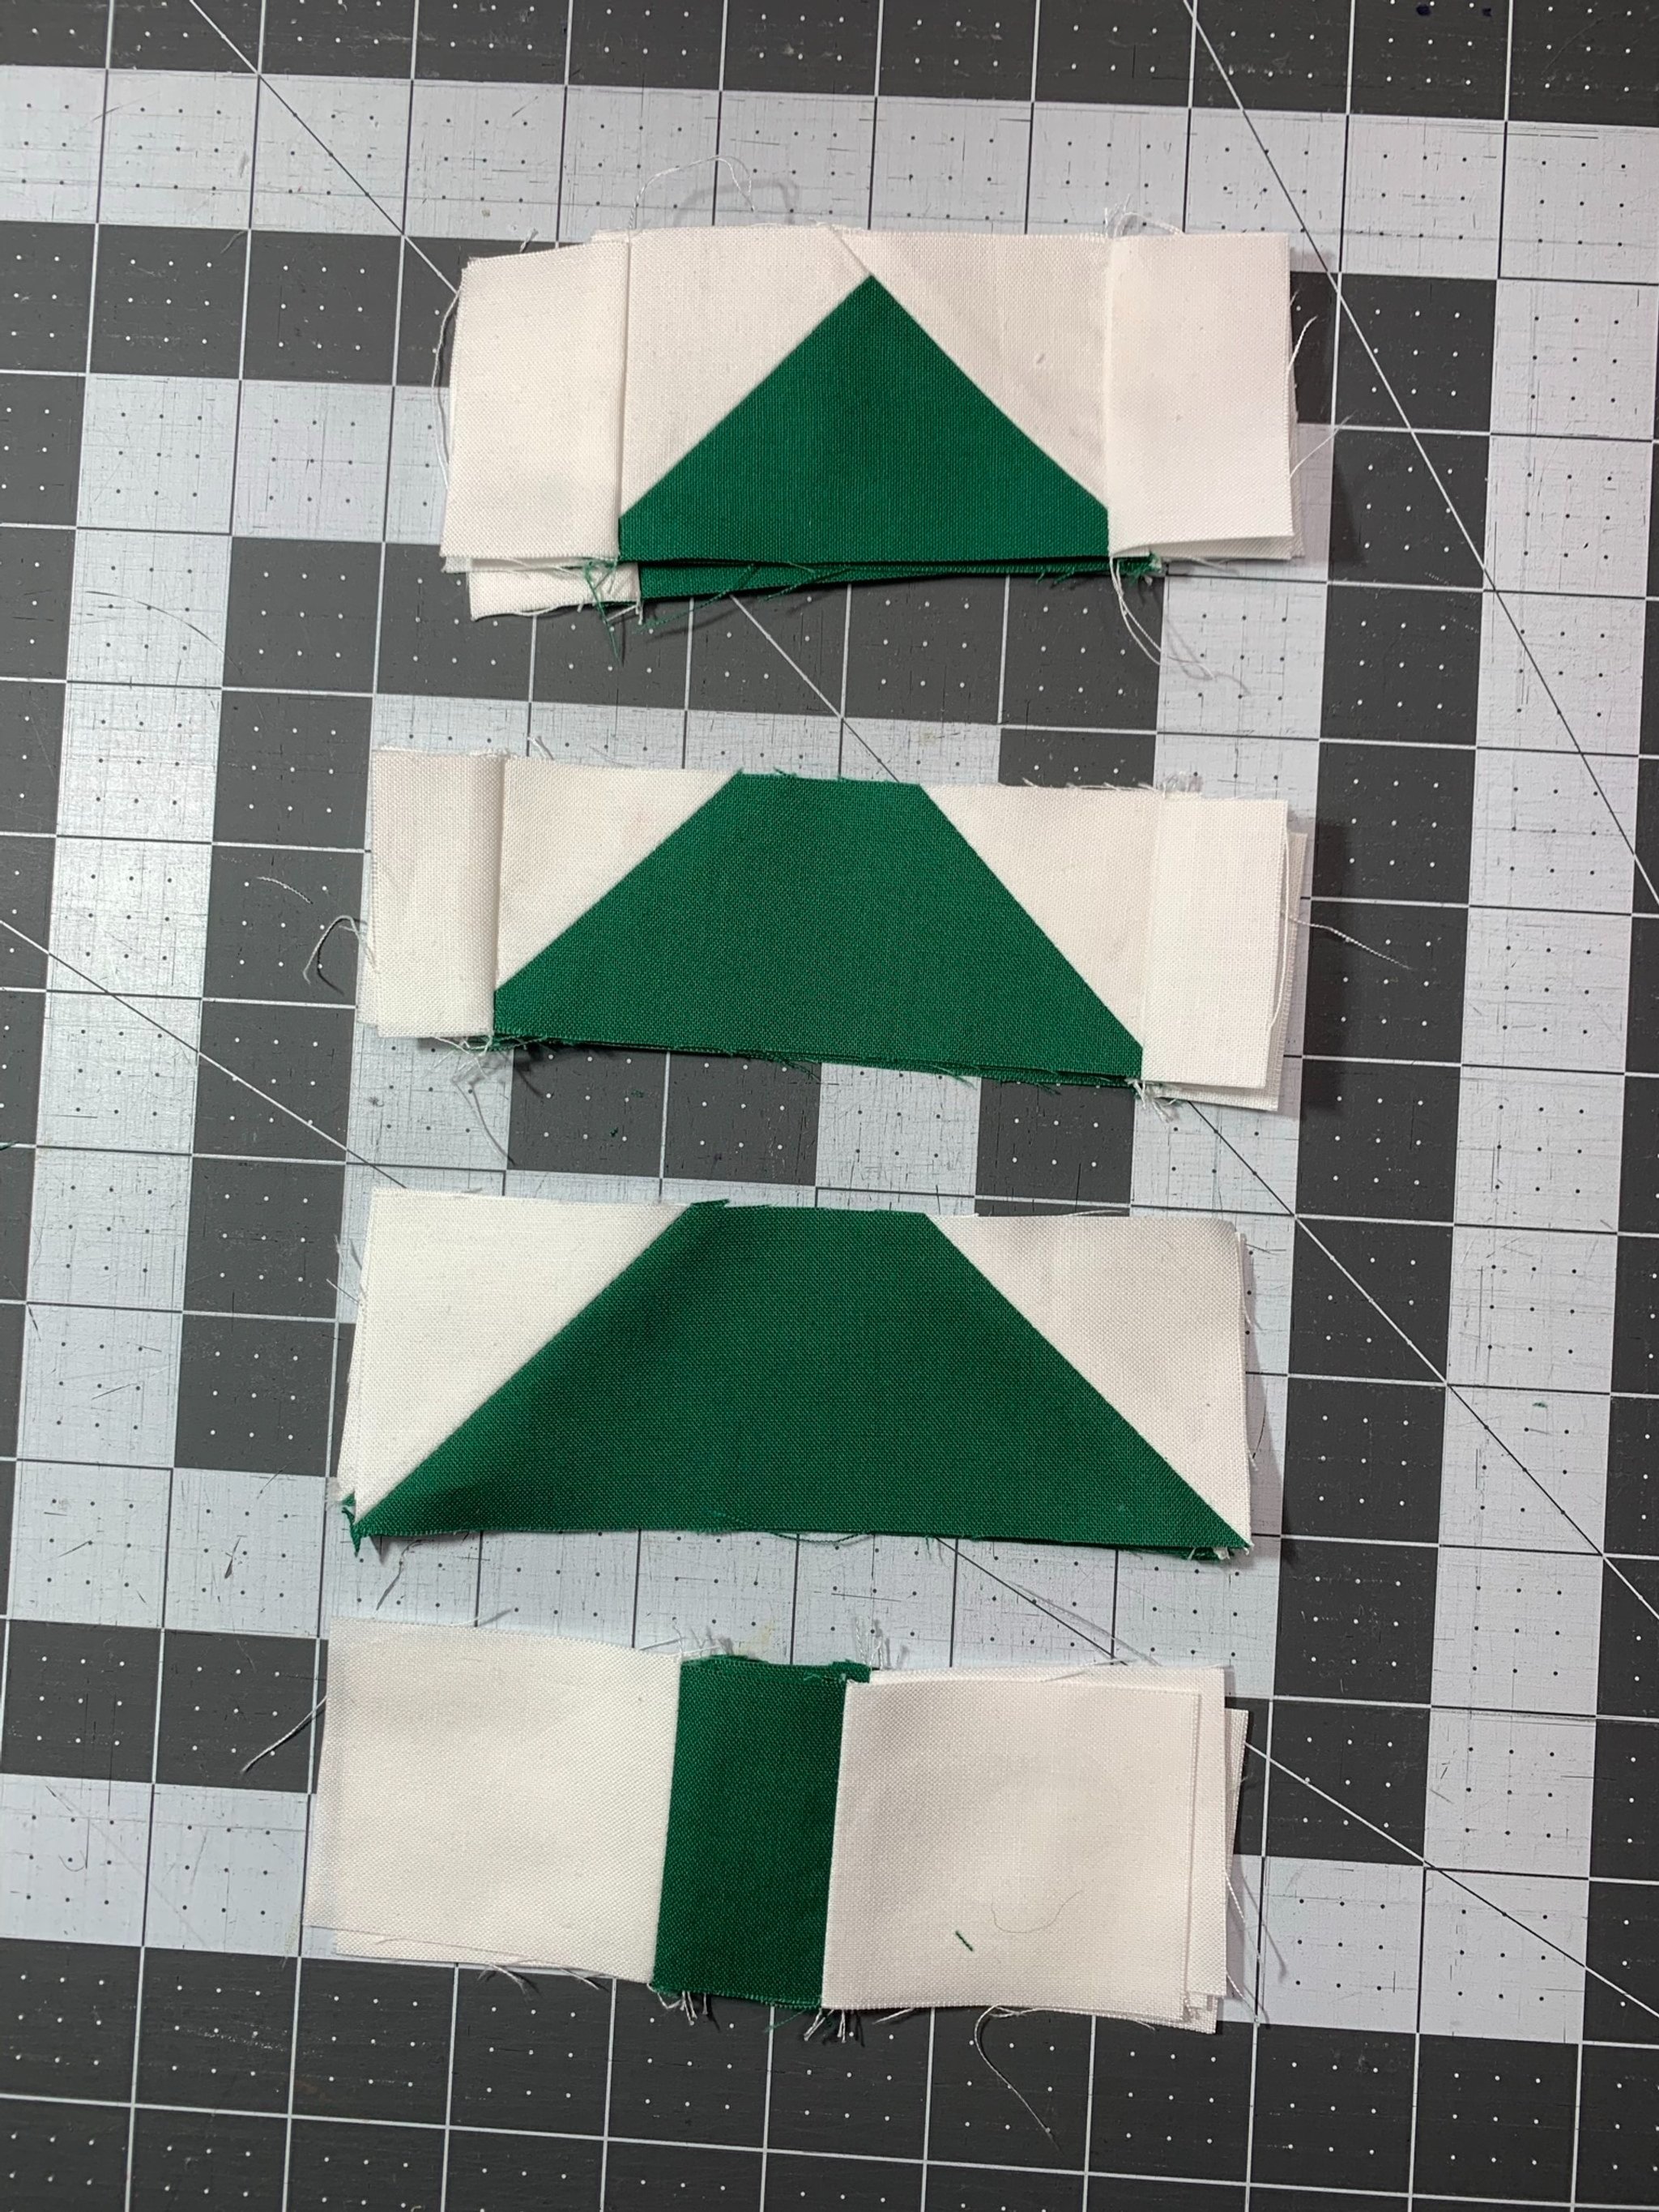
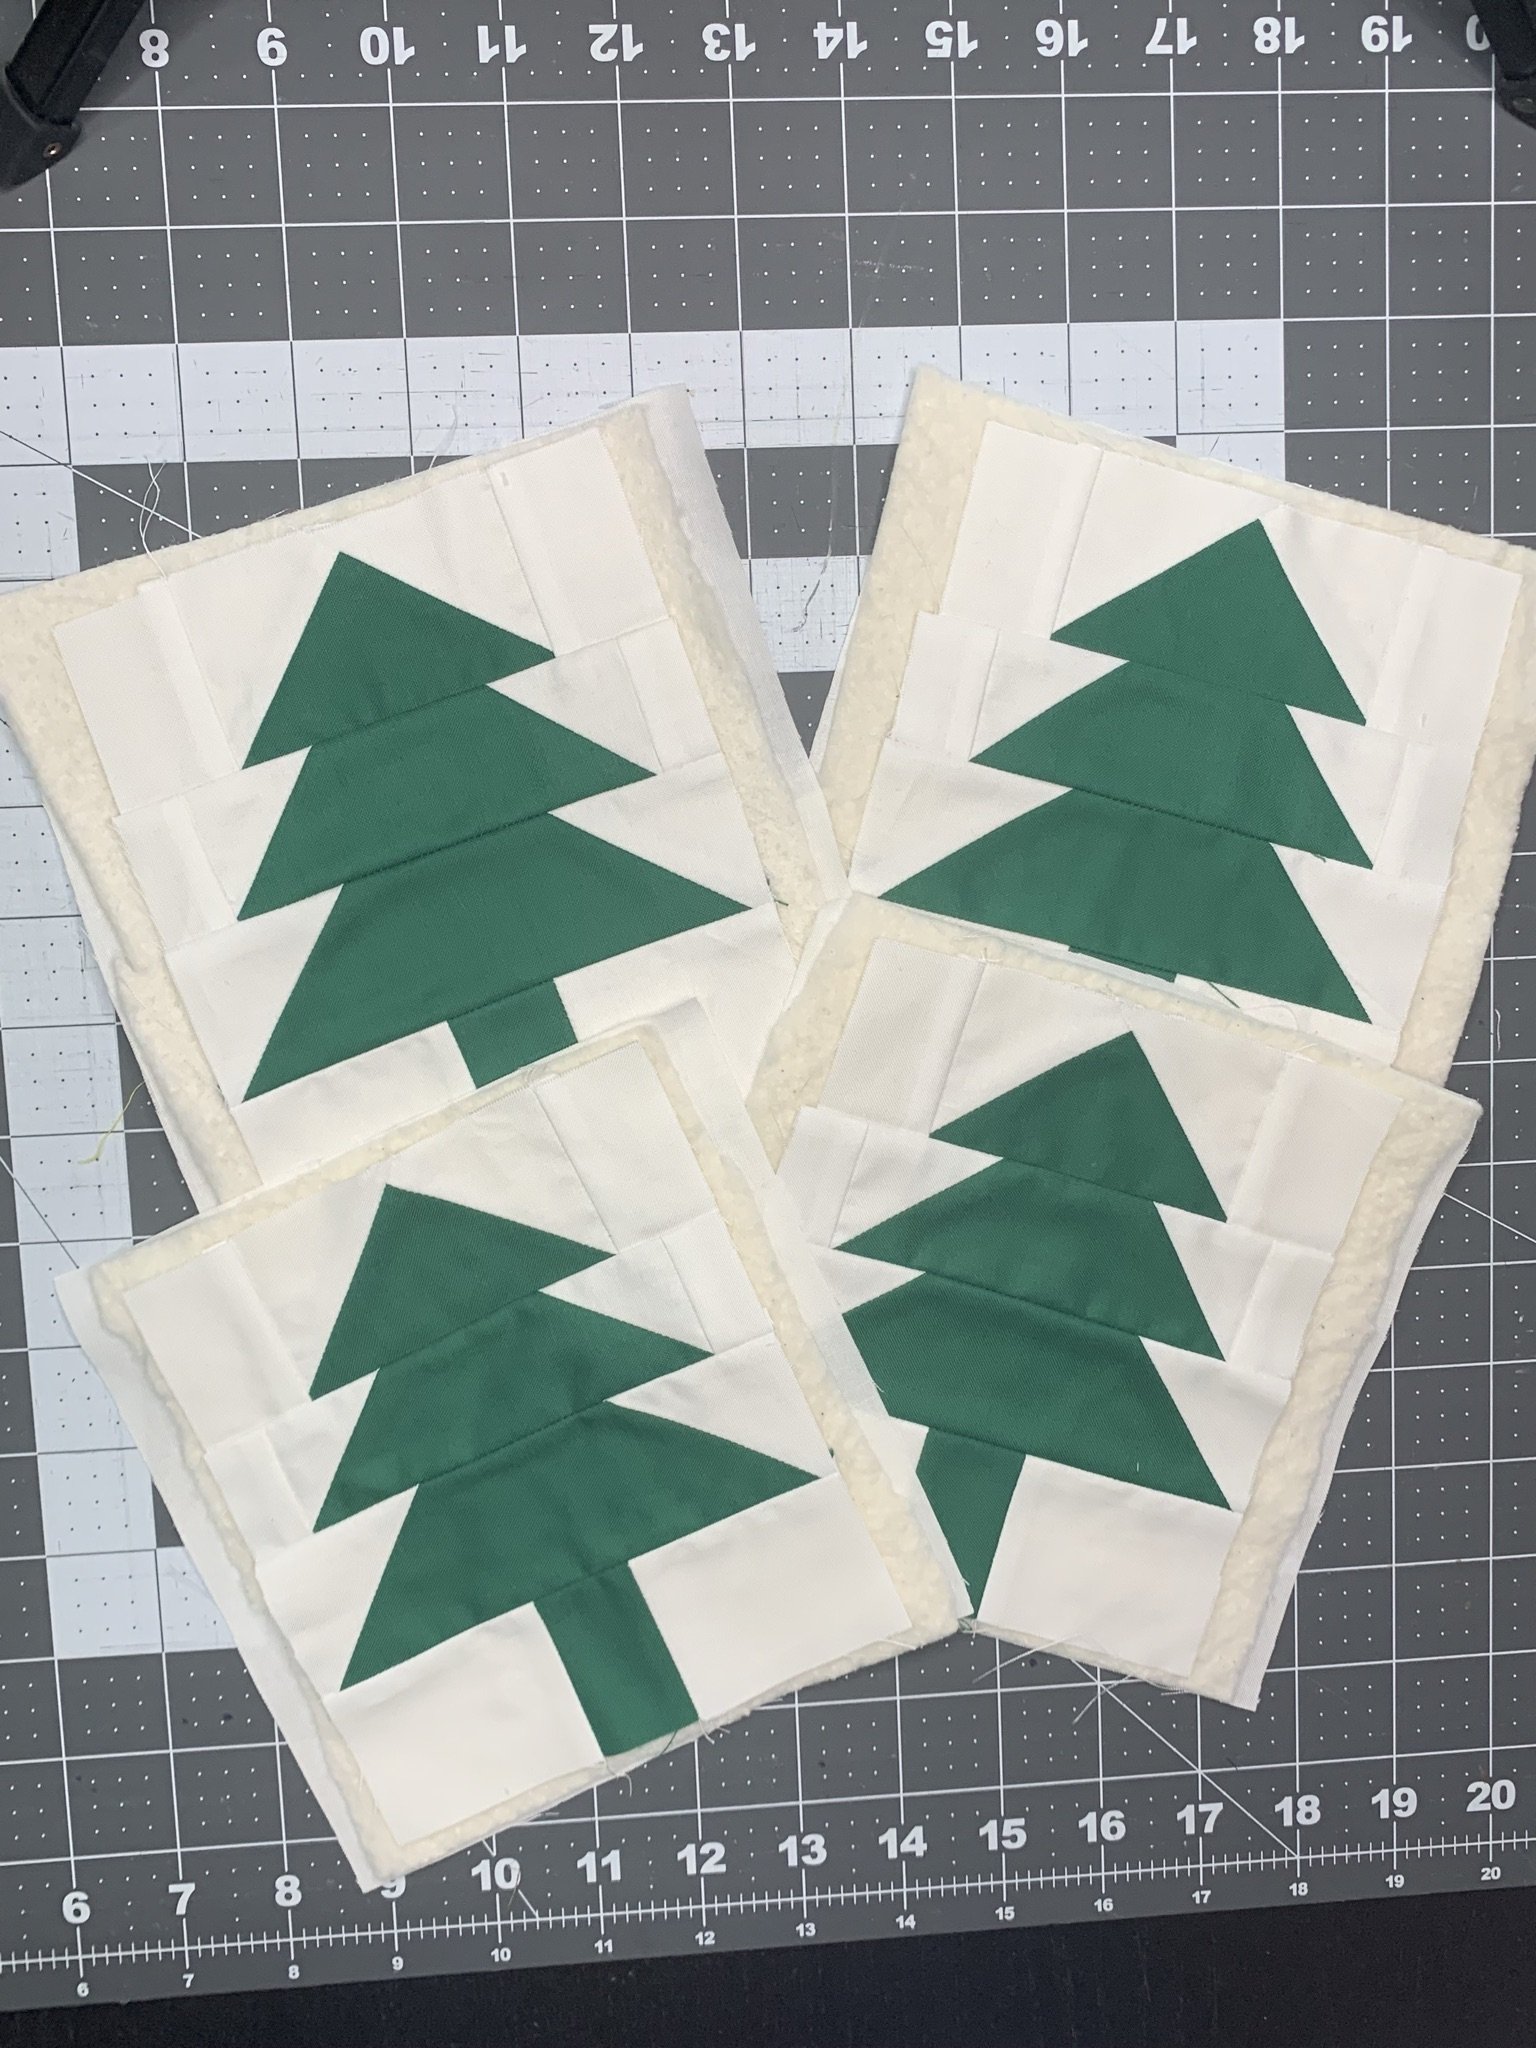
Assemble the Mini Quilts

Lay out all Flying Geese, extension pieces, and base pieces in order to help stay organized. See photo for placement.
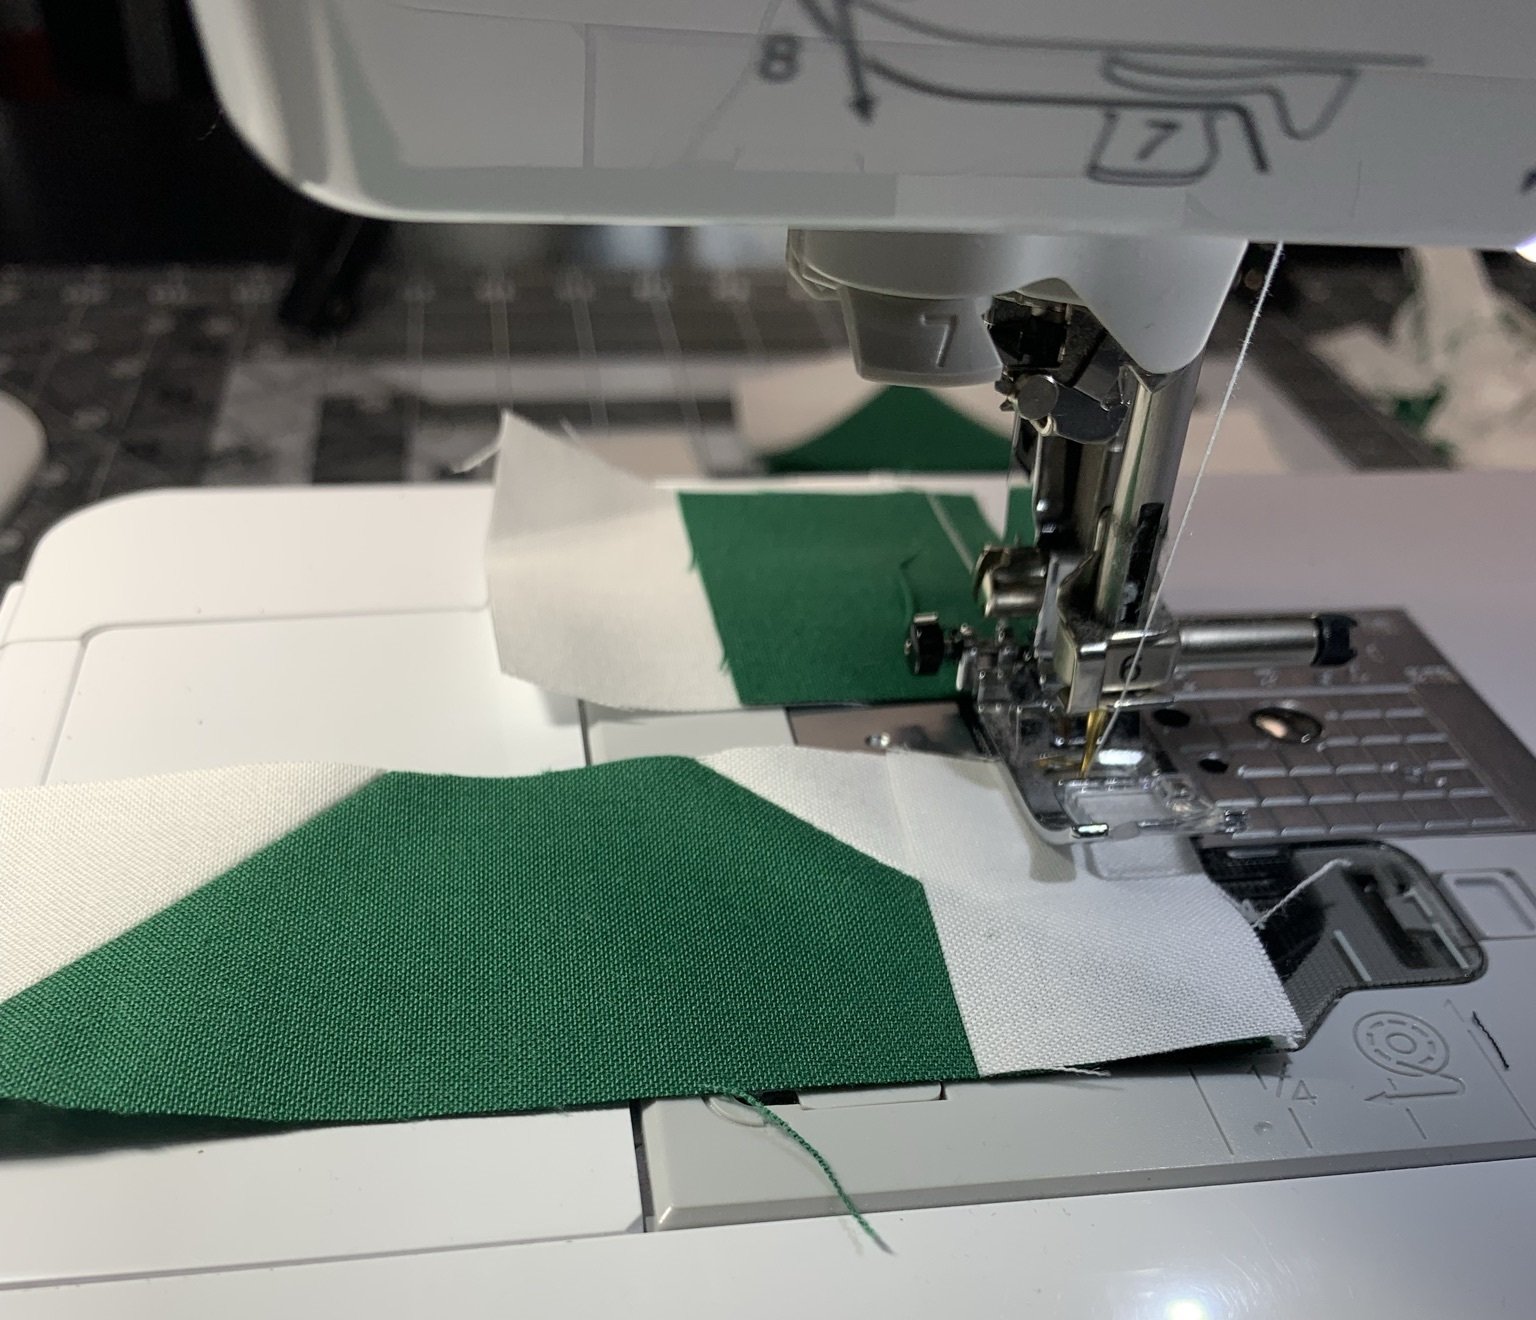
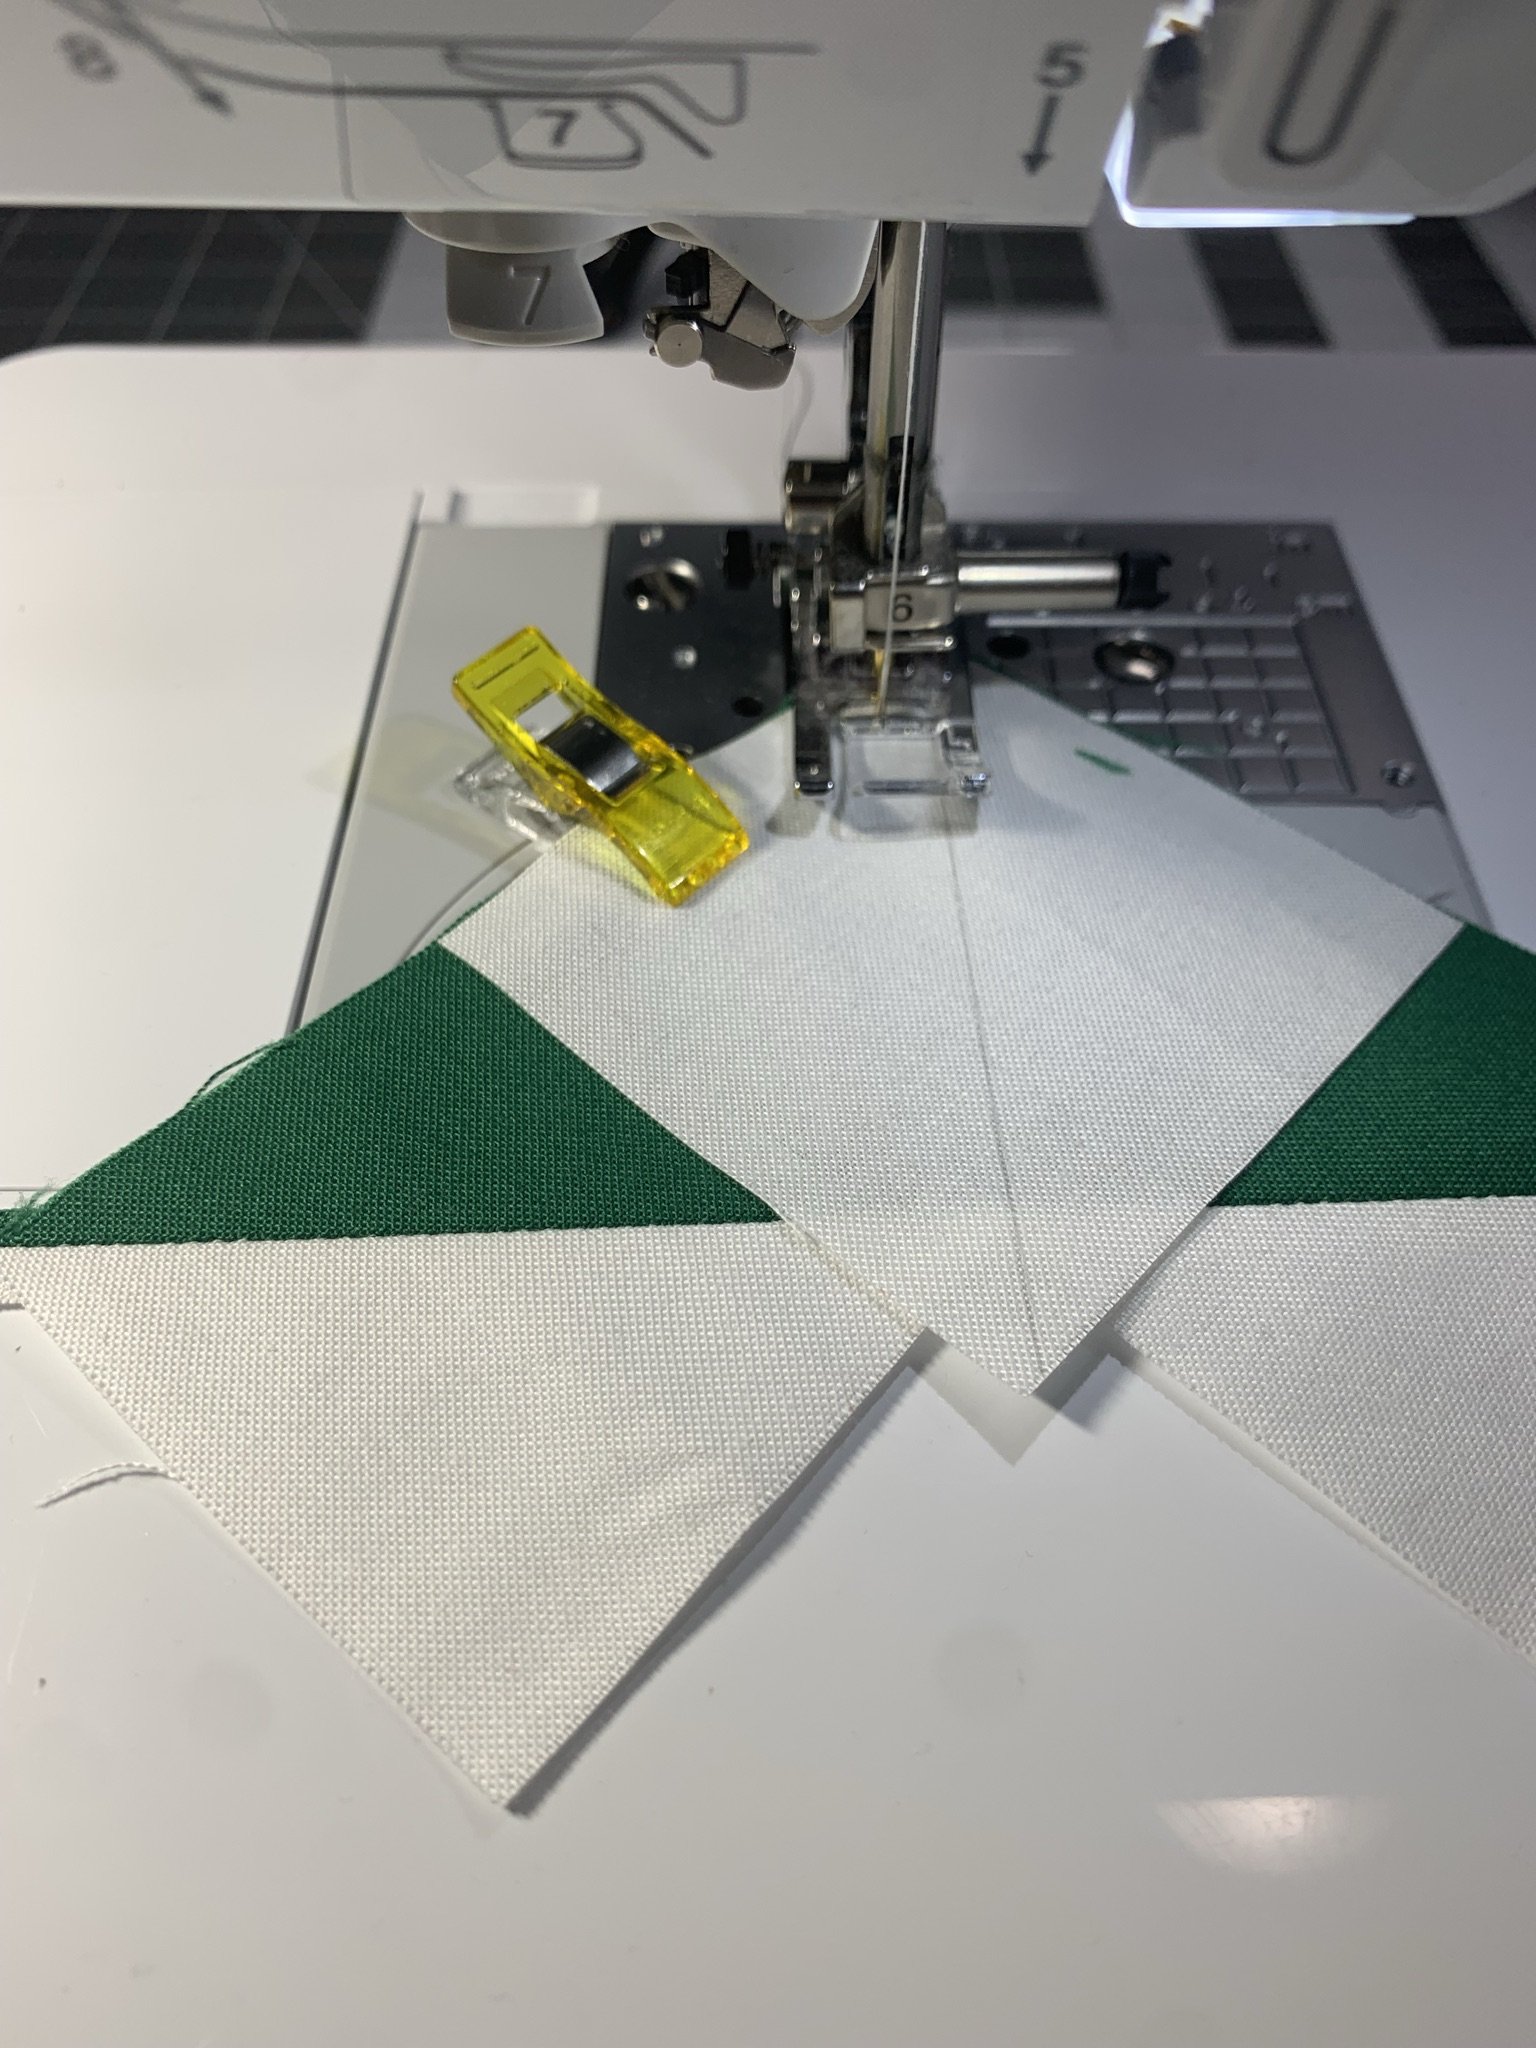
Chain piece the Extension pieces to the Small Flying Geese and the Medium Flying Geese. Chain piece the Base pieces together. Reminder: The Large Flying Geese piece does not have an extension.
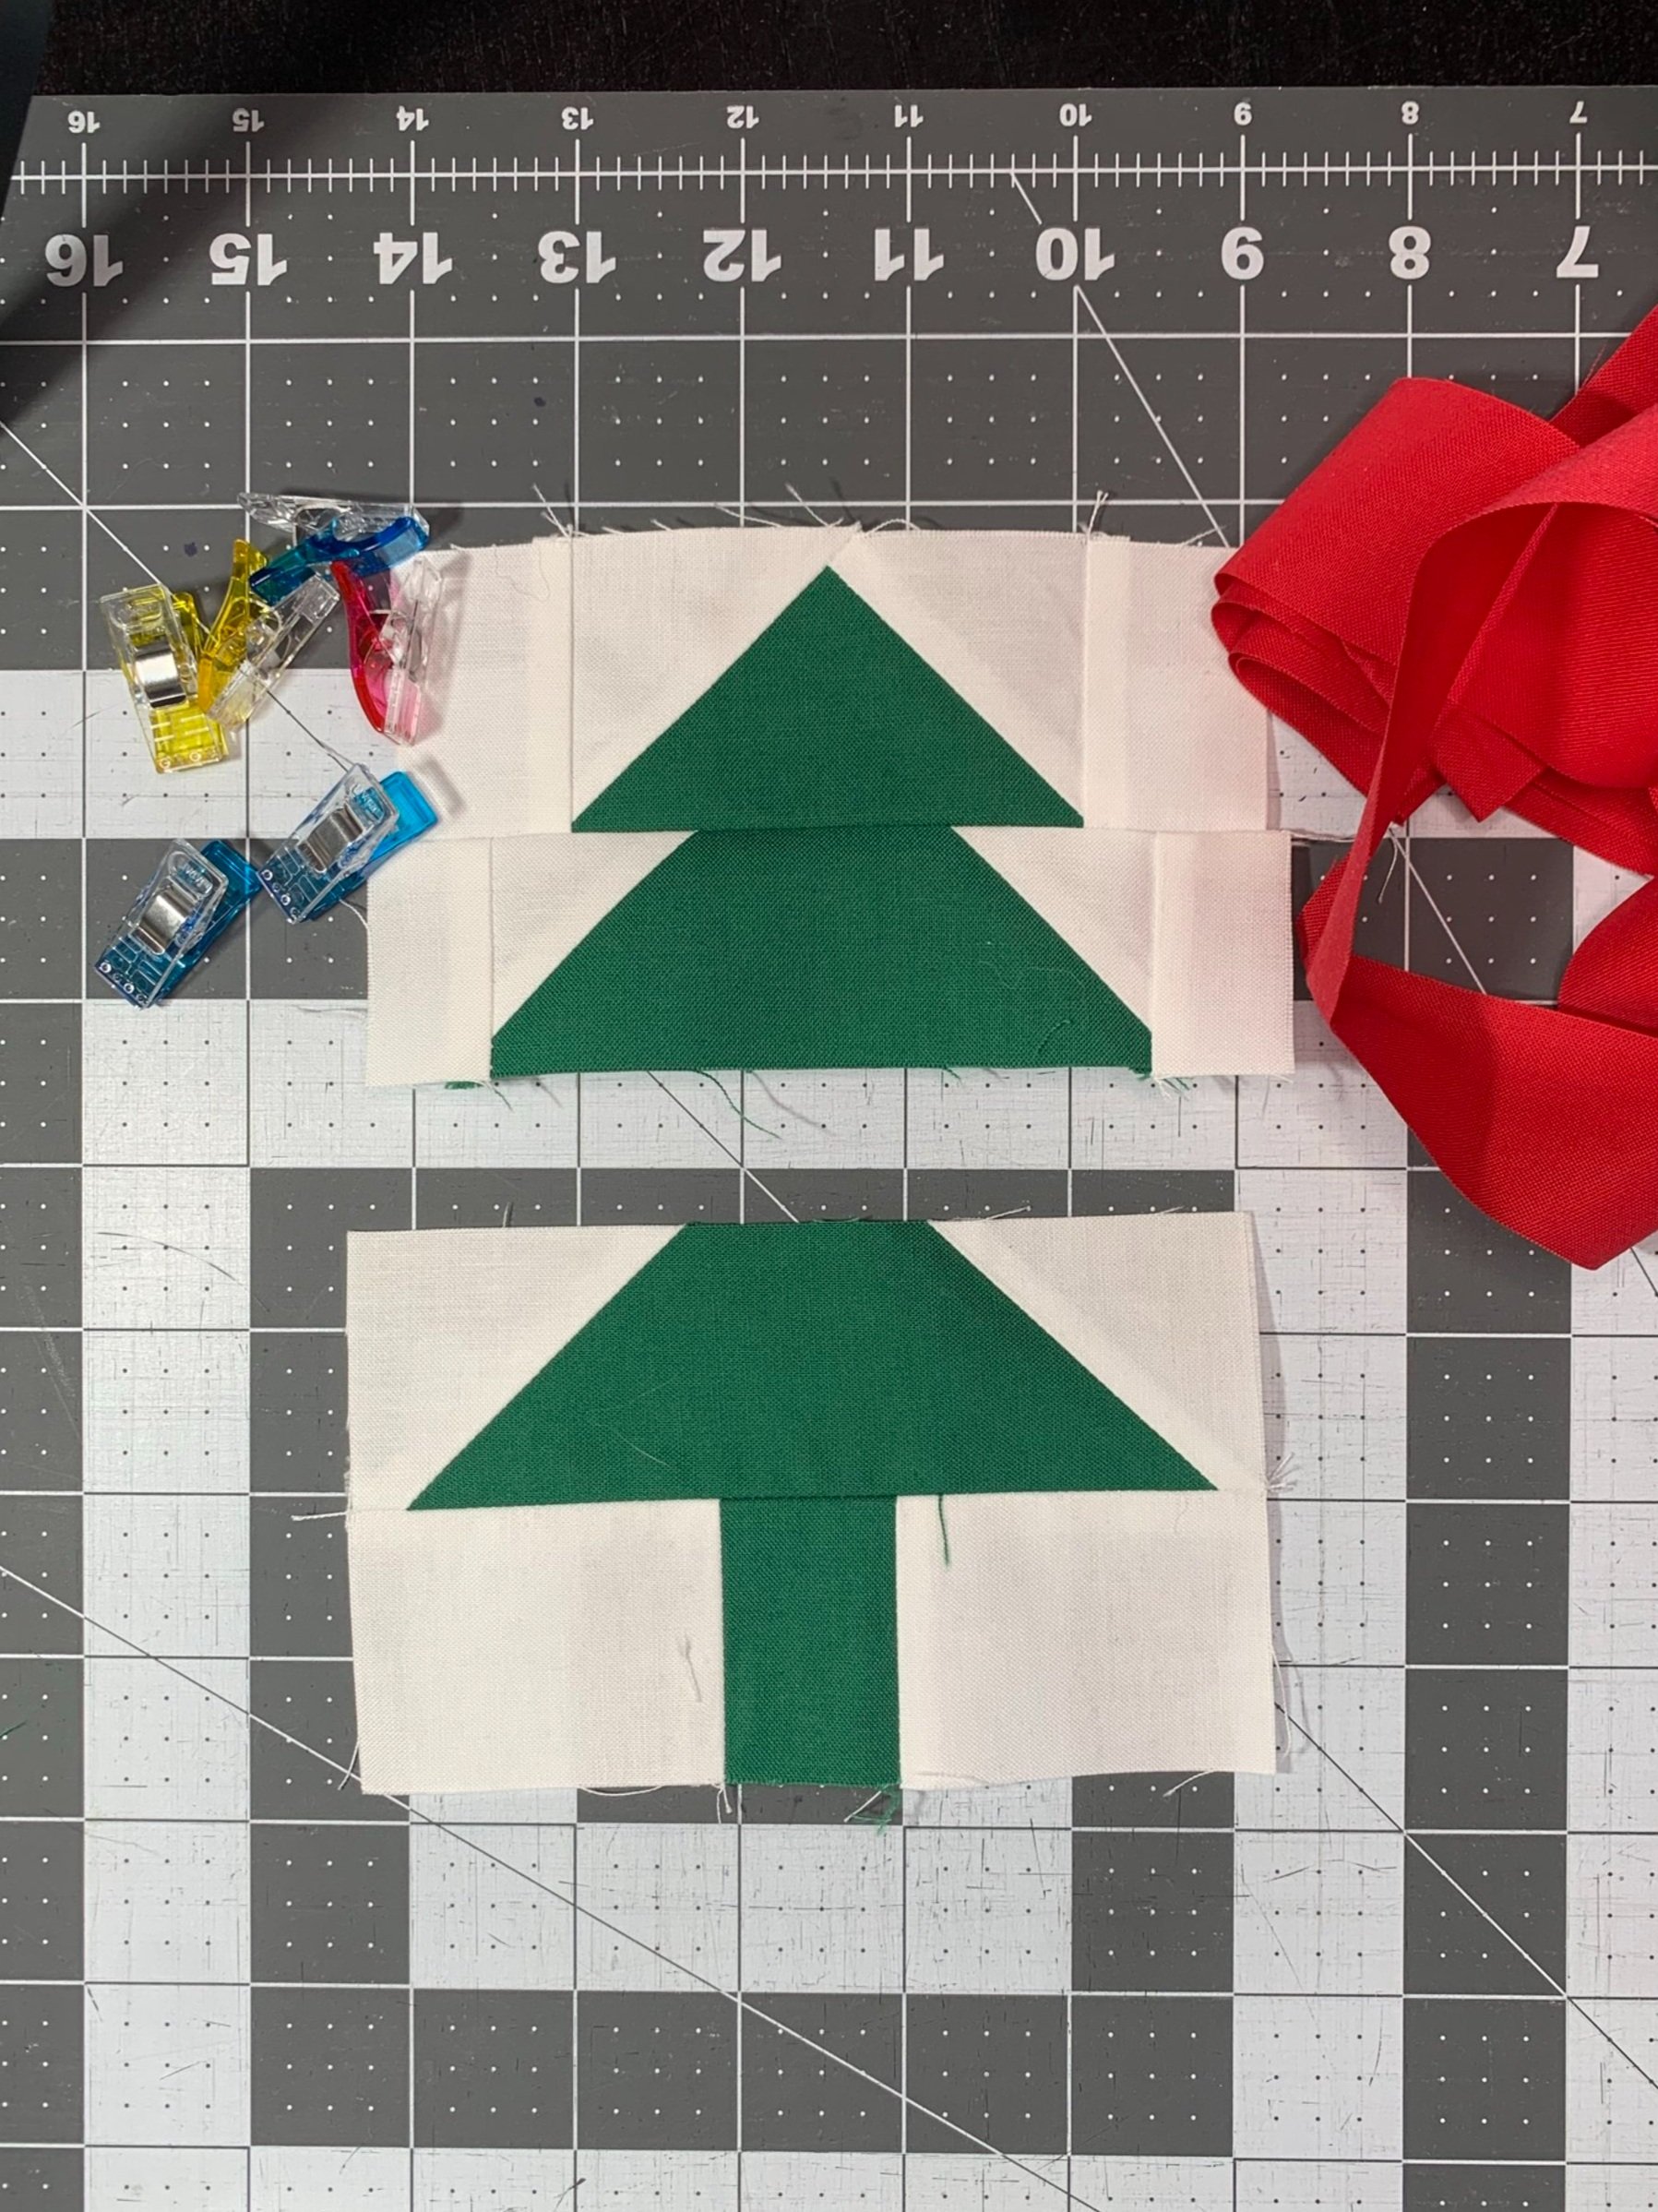
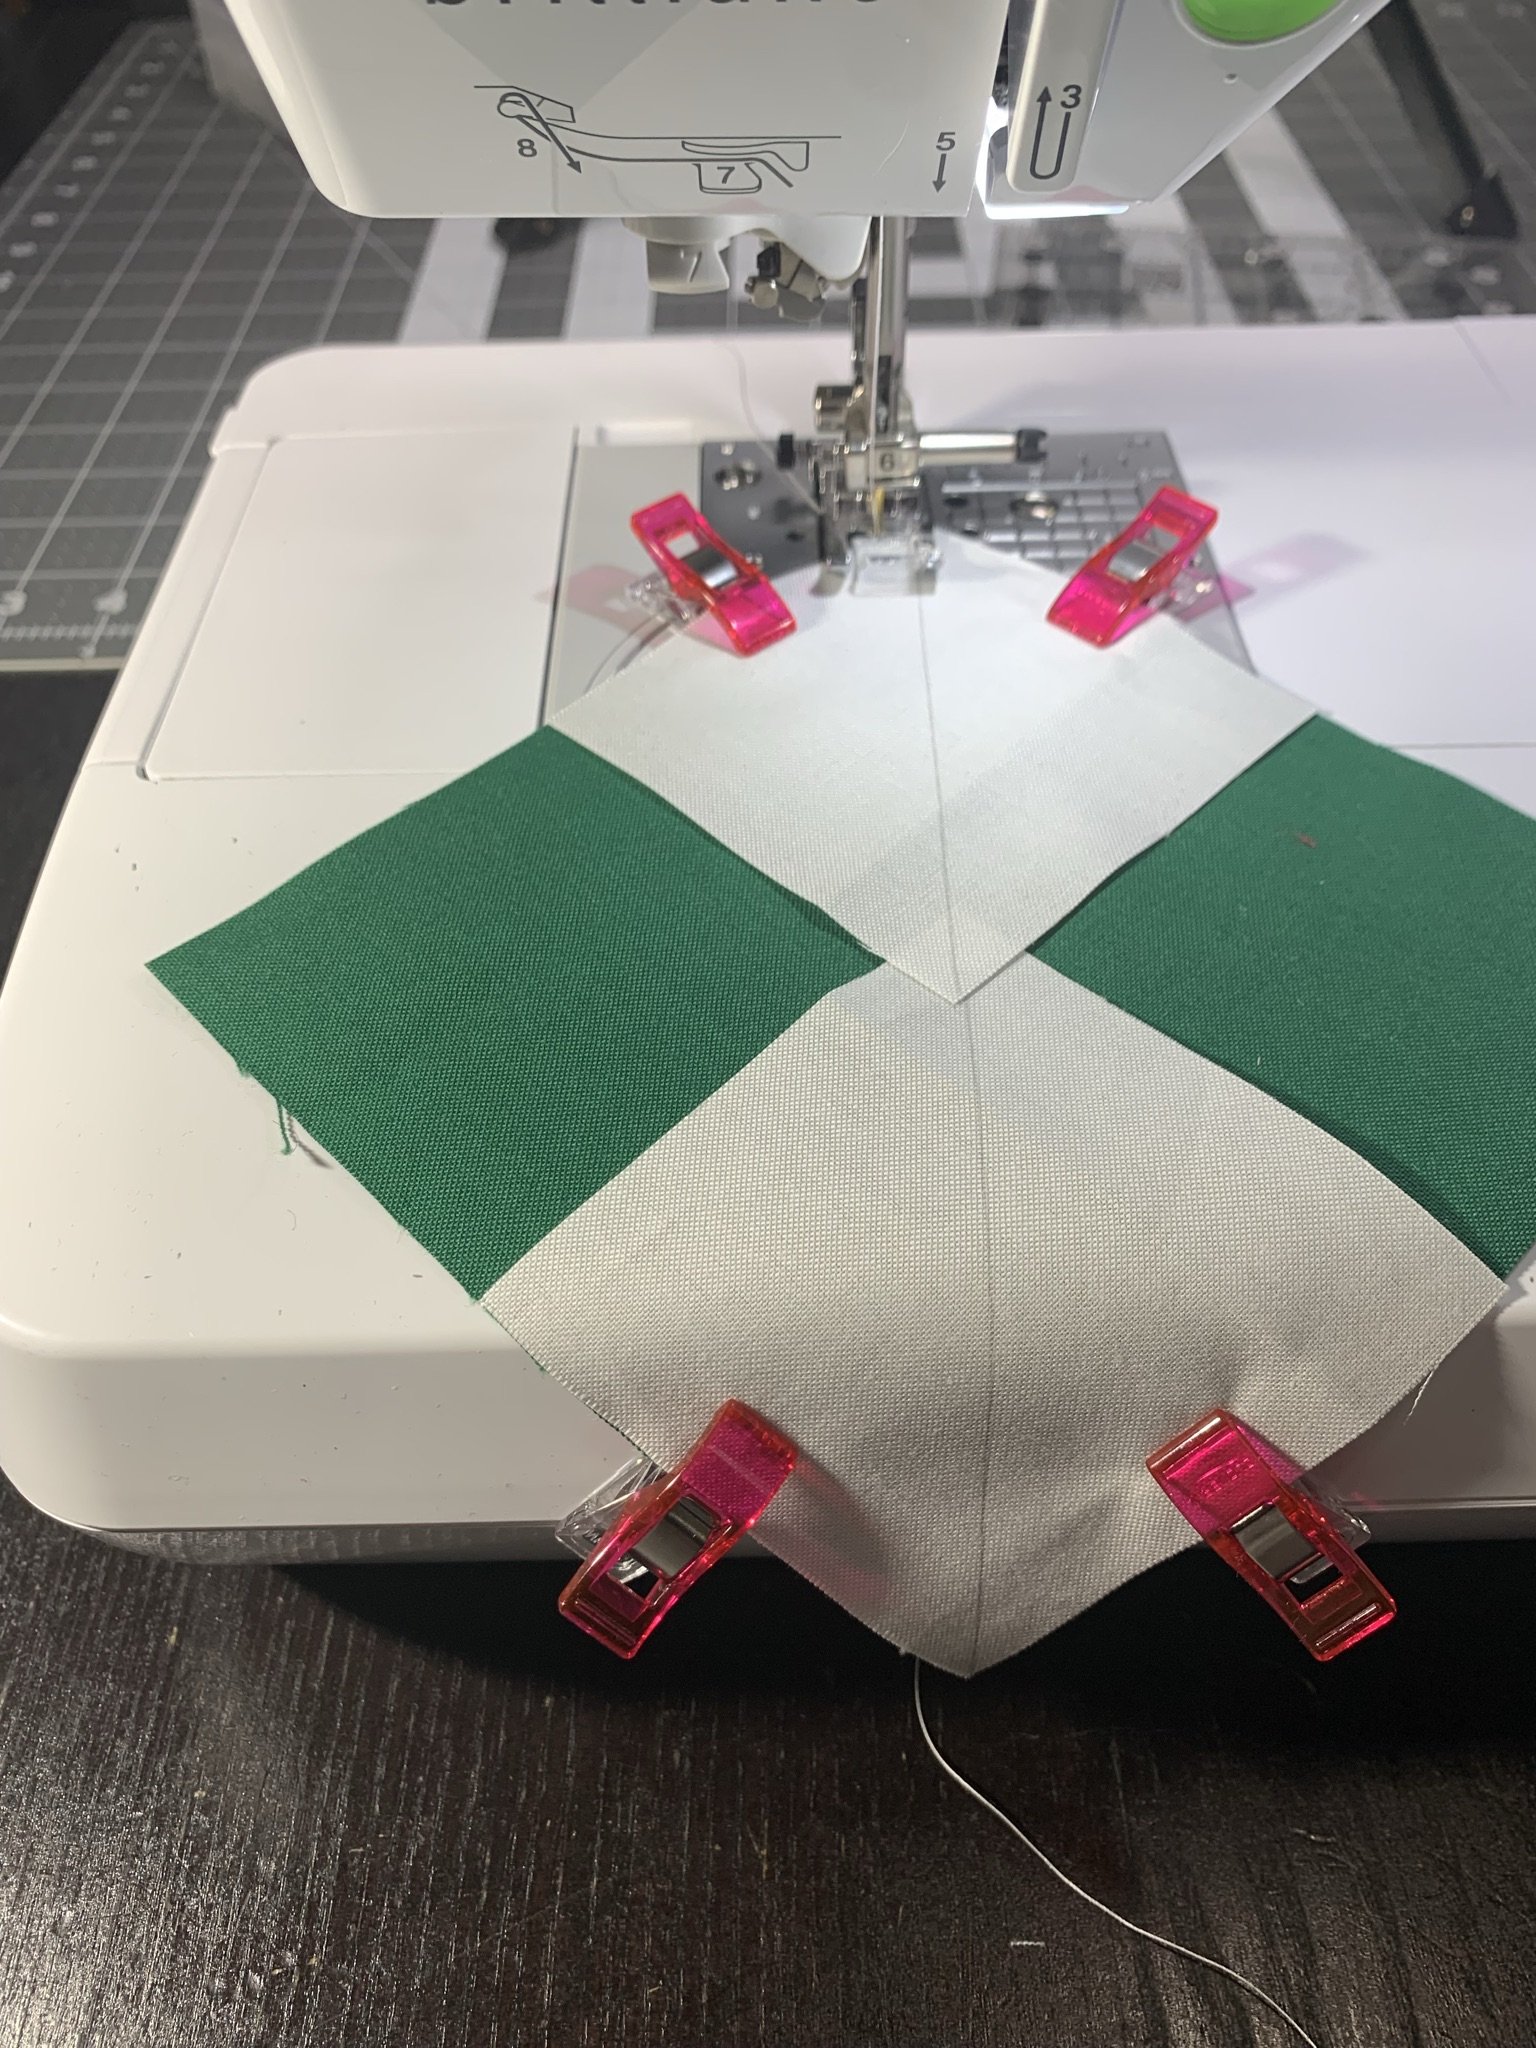
Sew the Small Flying Geese Blocks to the Medium Flying Geese Blocks, and the Large Flying Geese Blocks to the Base Blocks. Press seam open.


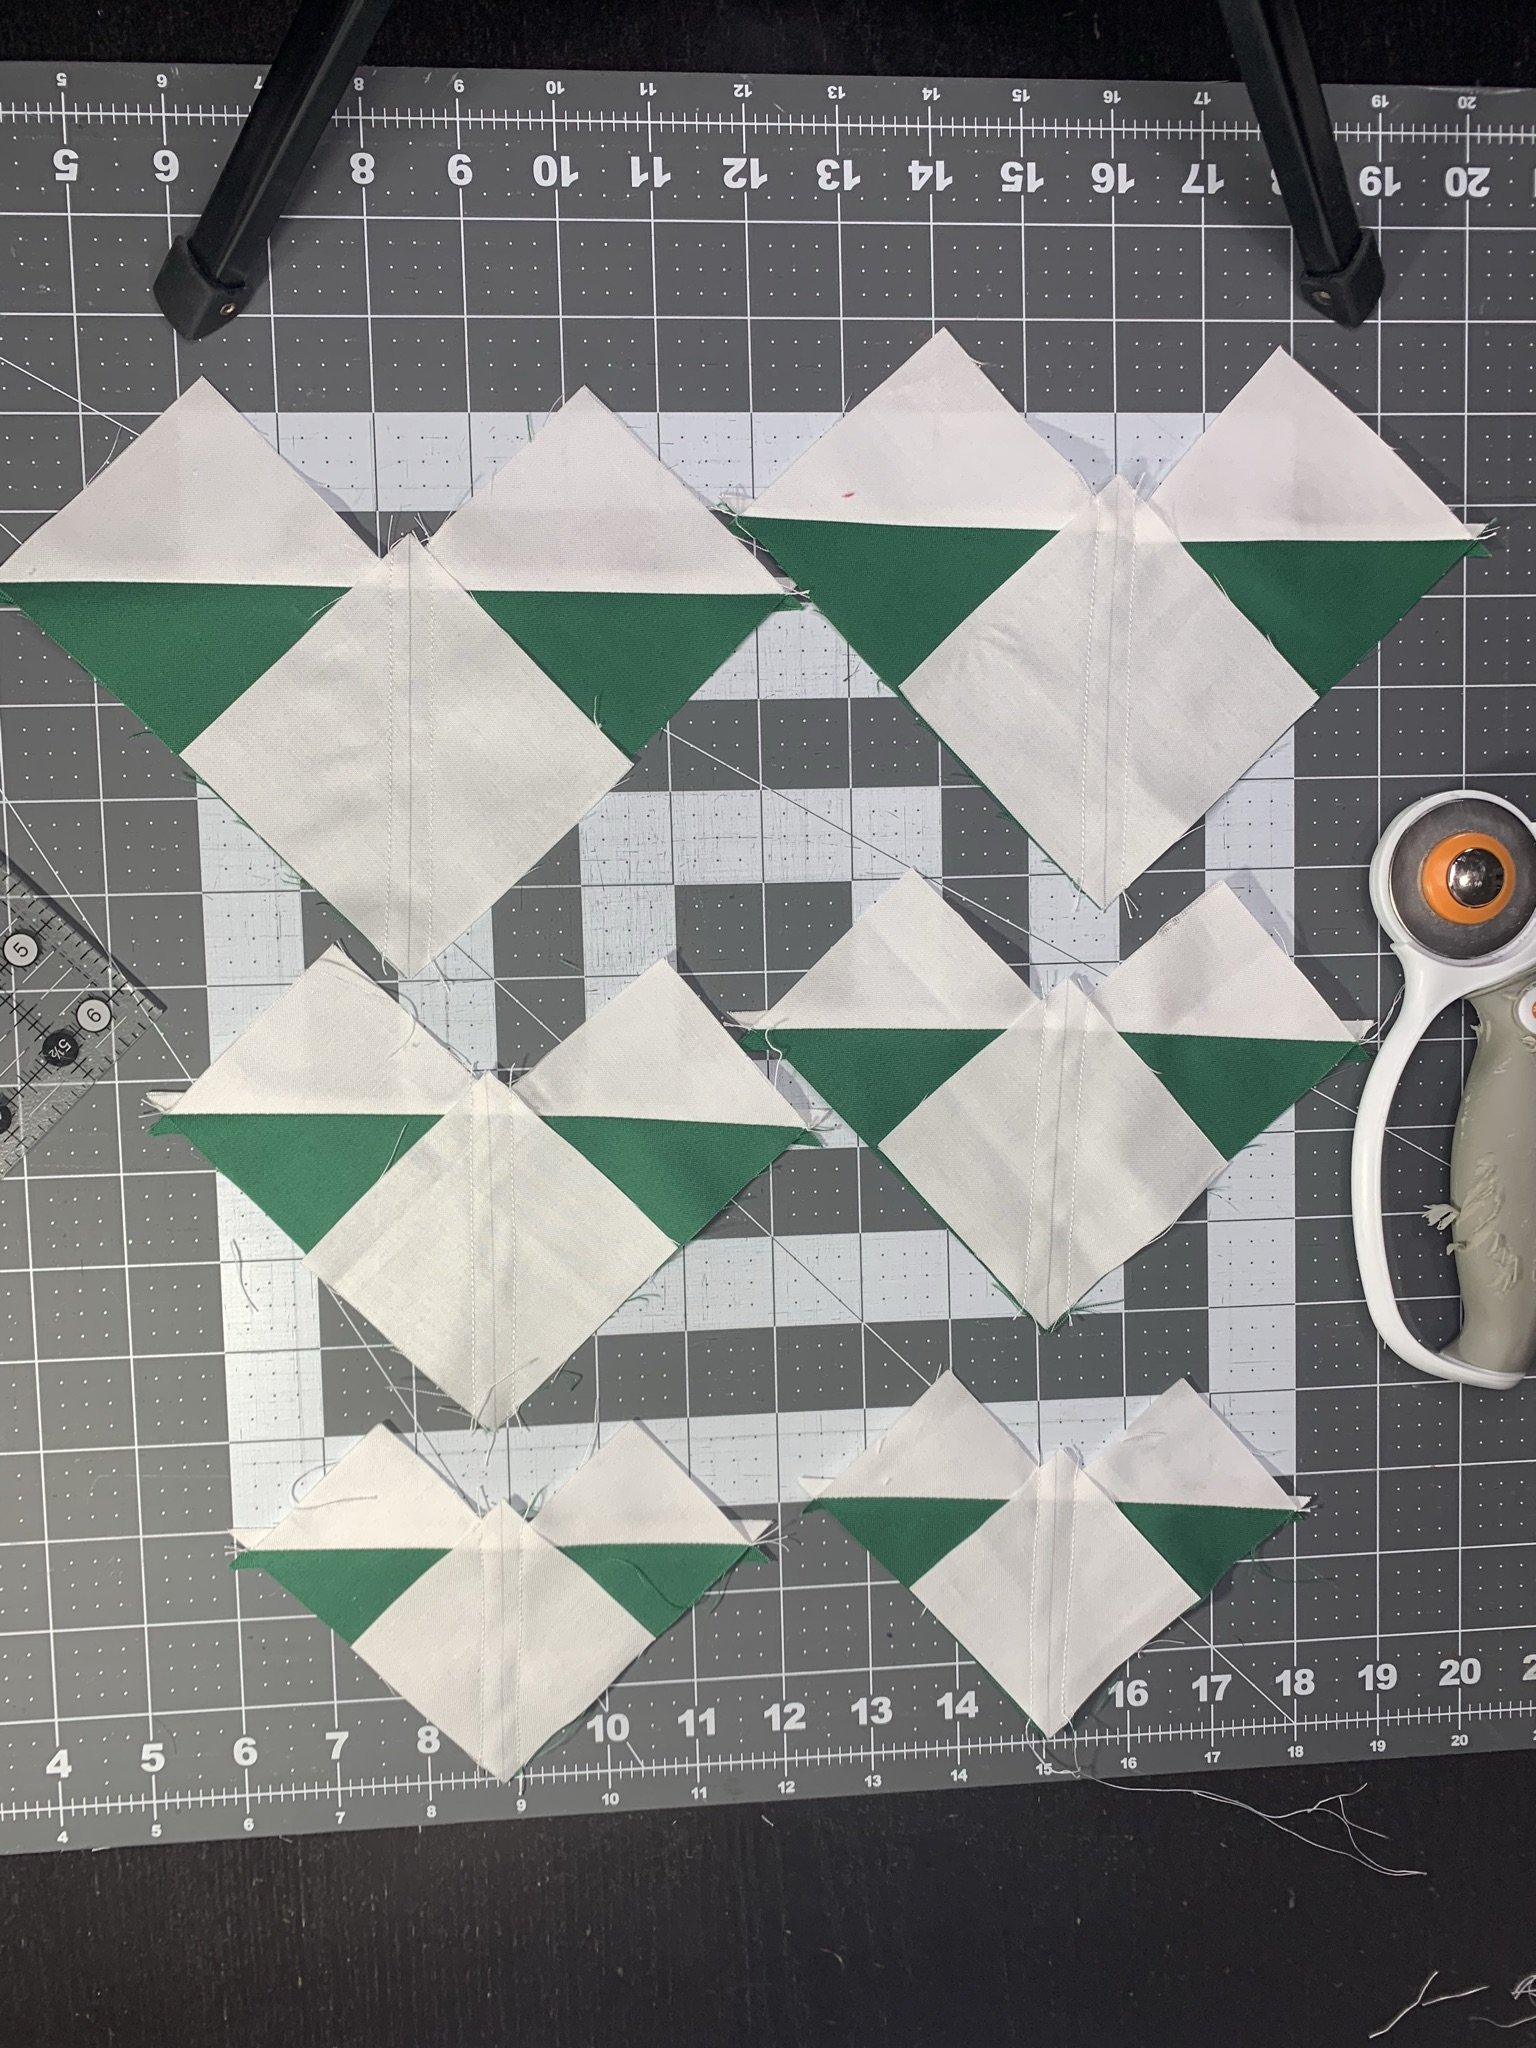
Sew the top block (Small and Medium Flying Geese) to the bottom block (Large Flying Geese and Base). Do this for all pieces.
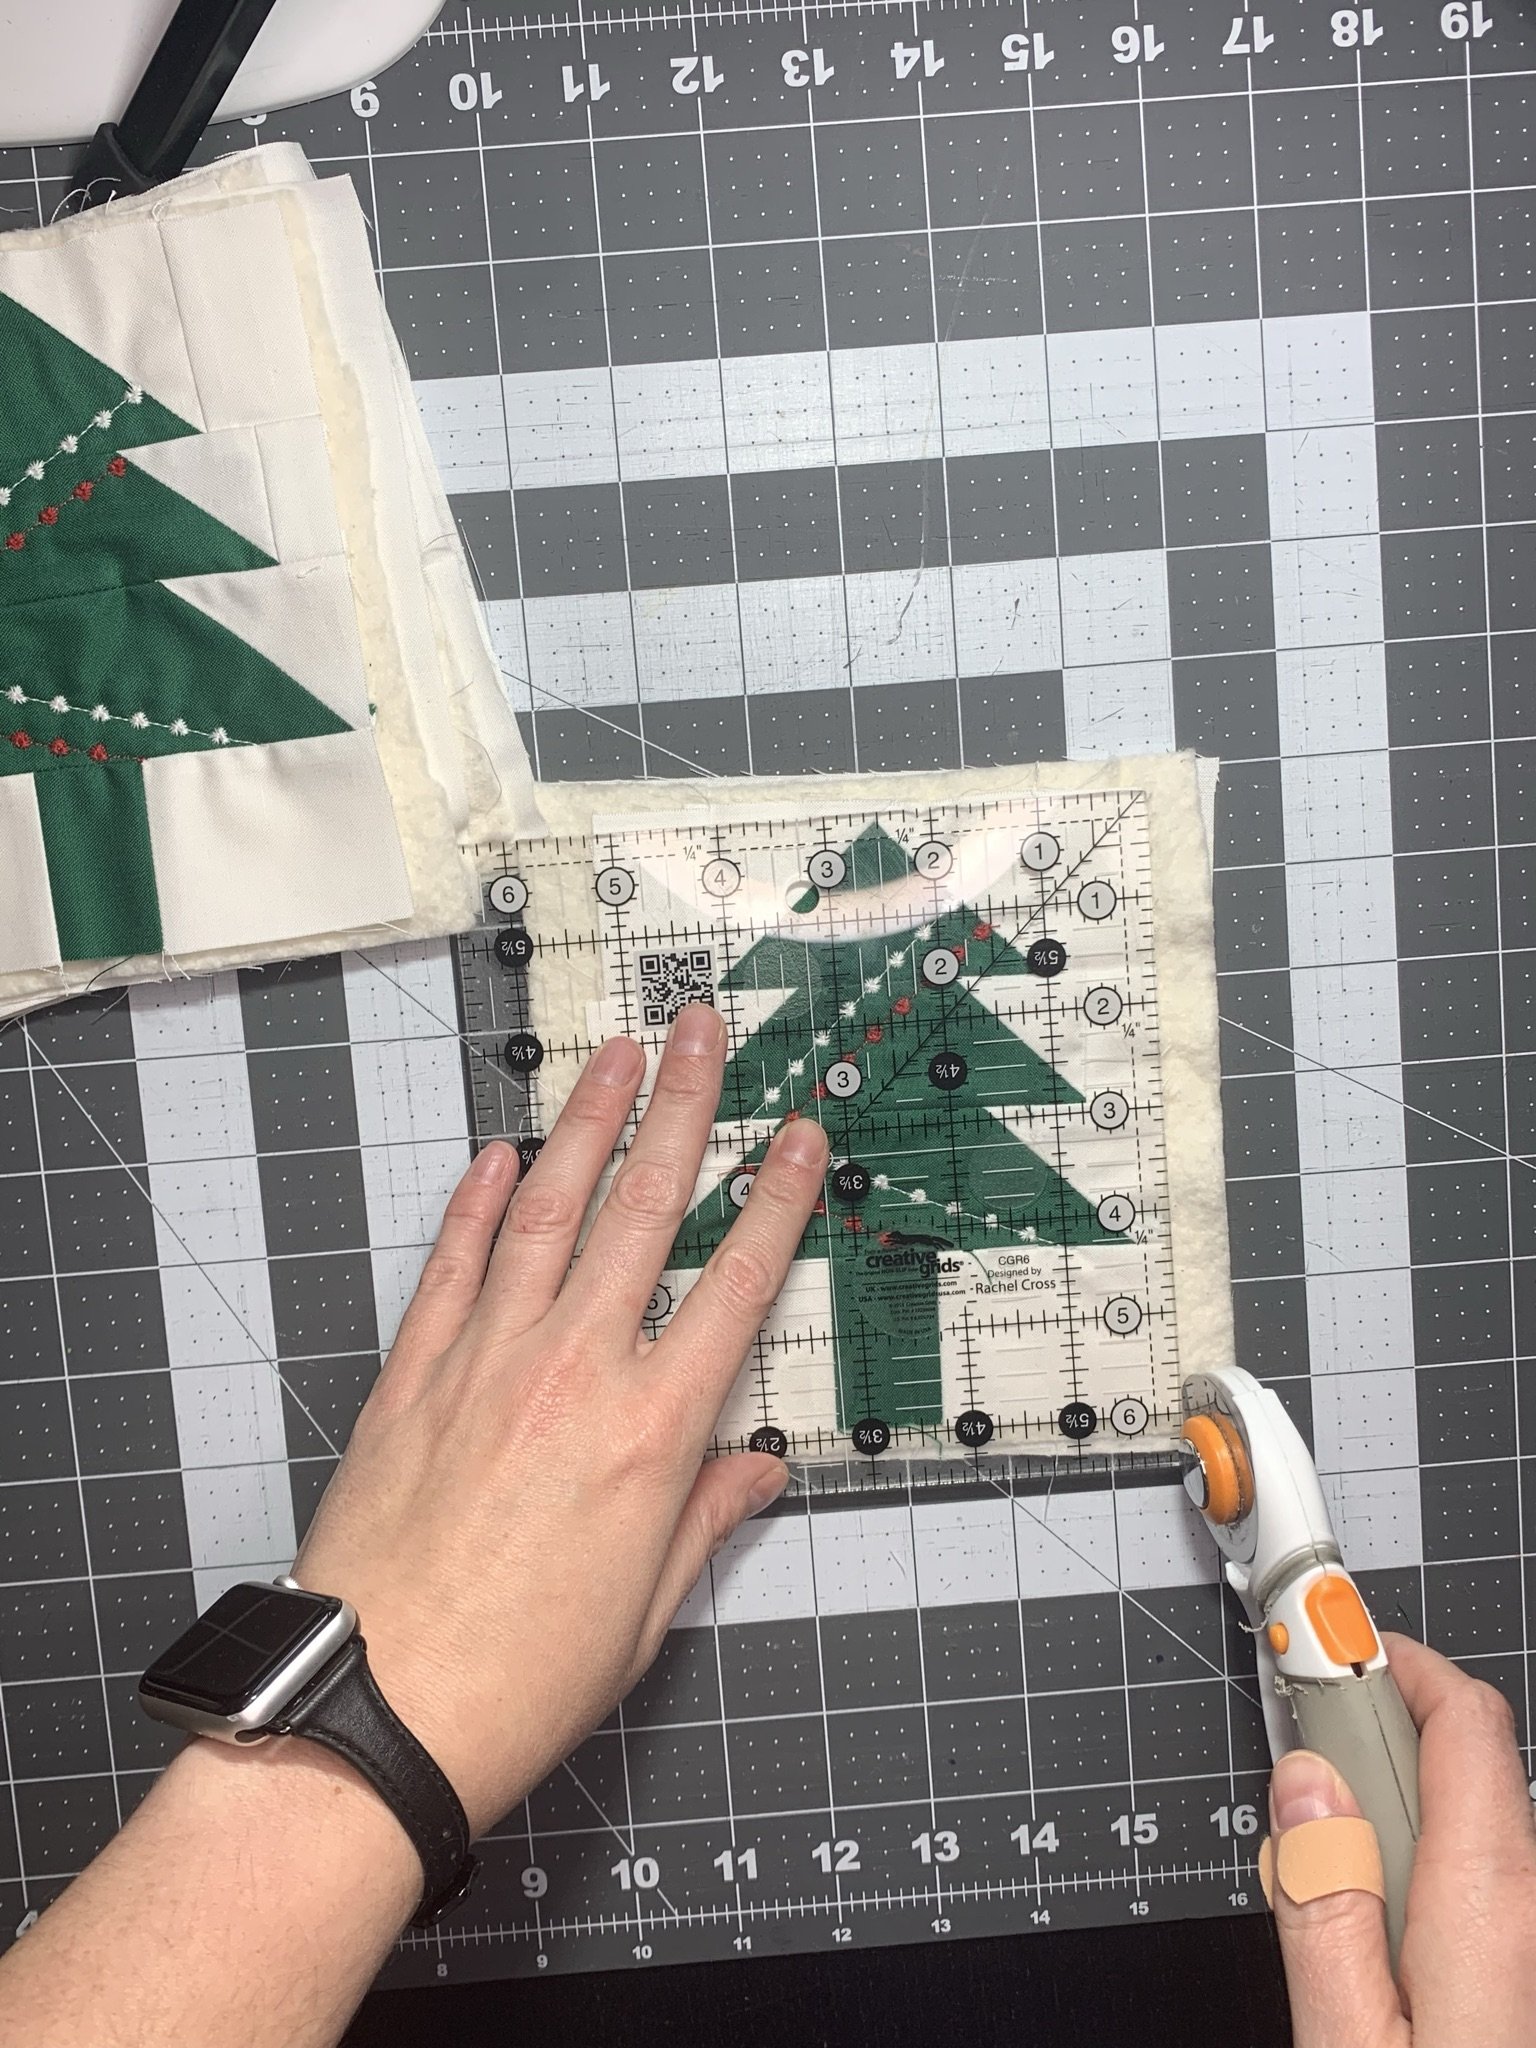
Square up the final block to 6 1/4” x 5 1/2”.
Baste and Quilt
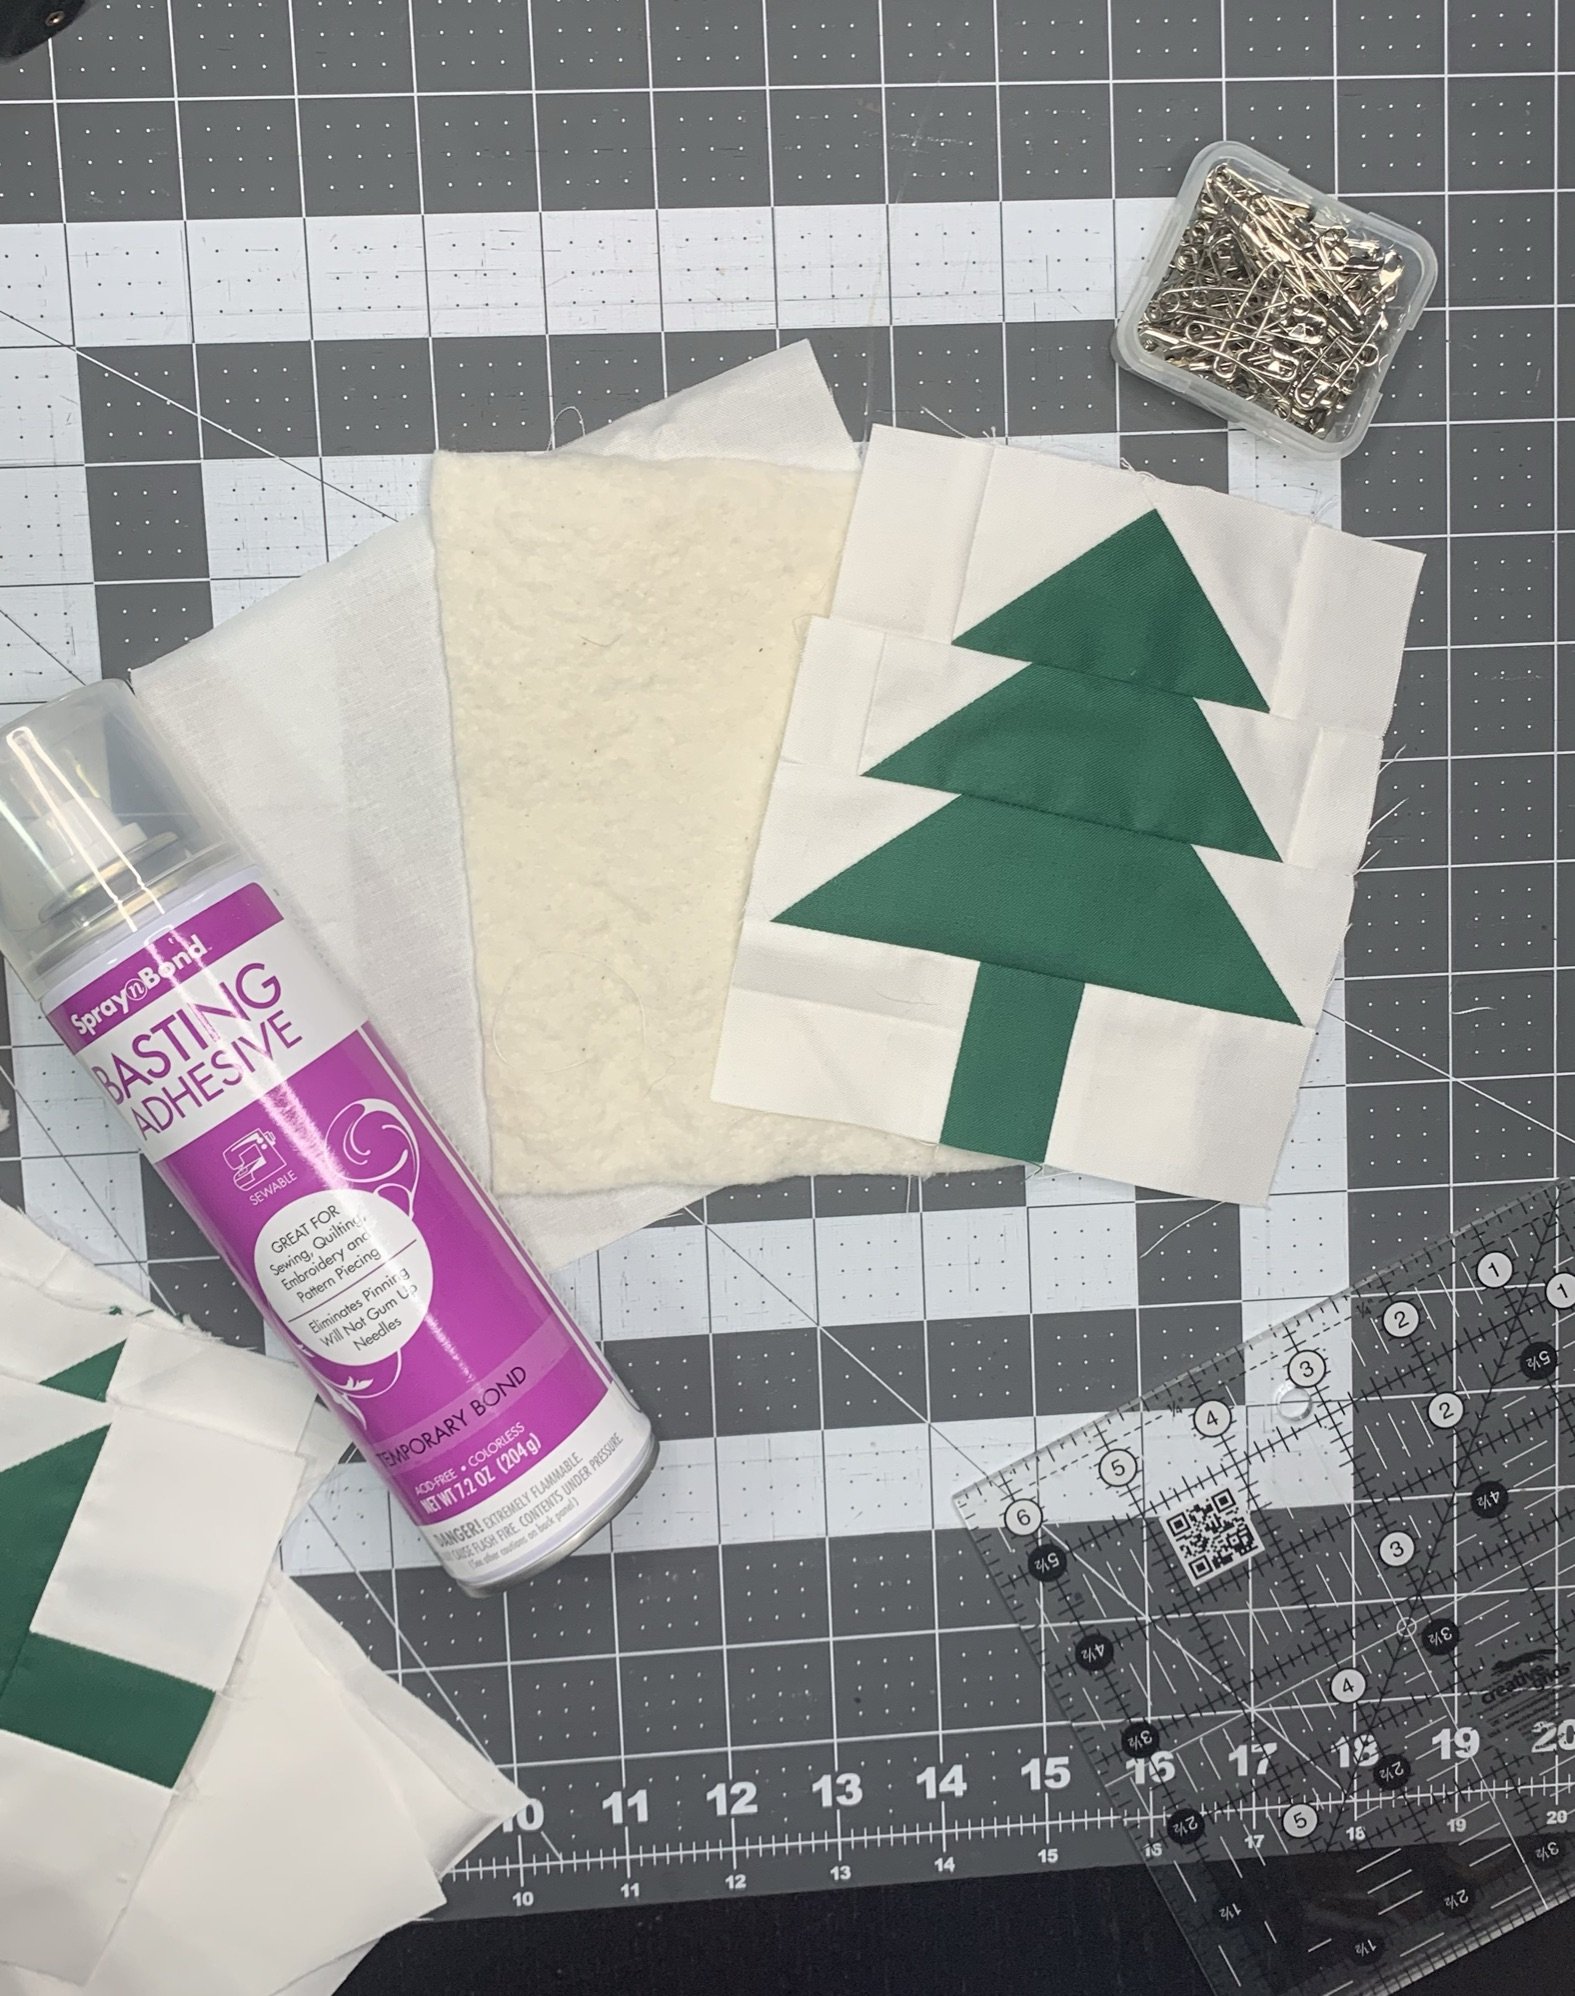
Make the mini-quilt sandwich by layering your backing fabric right-side-down, spraying with basting adhesive, batting next, spraying with basting adhesive, then trees right-side-up. If you prefer to pin paste instead of spray baste, you may do so after layering.
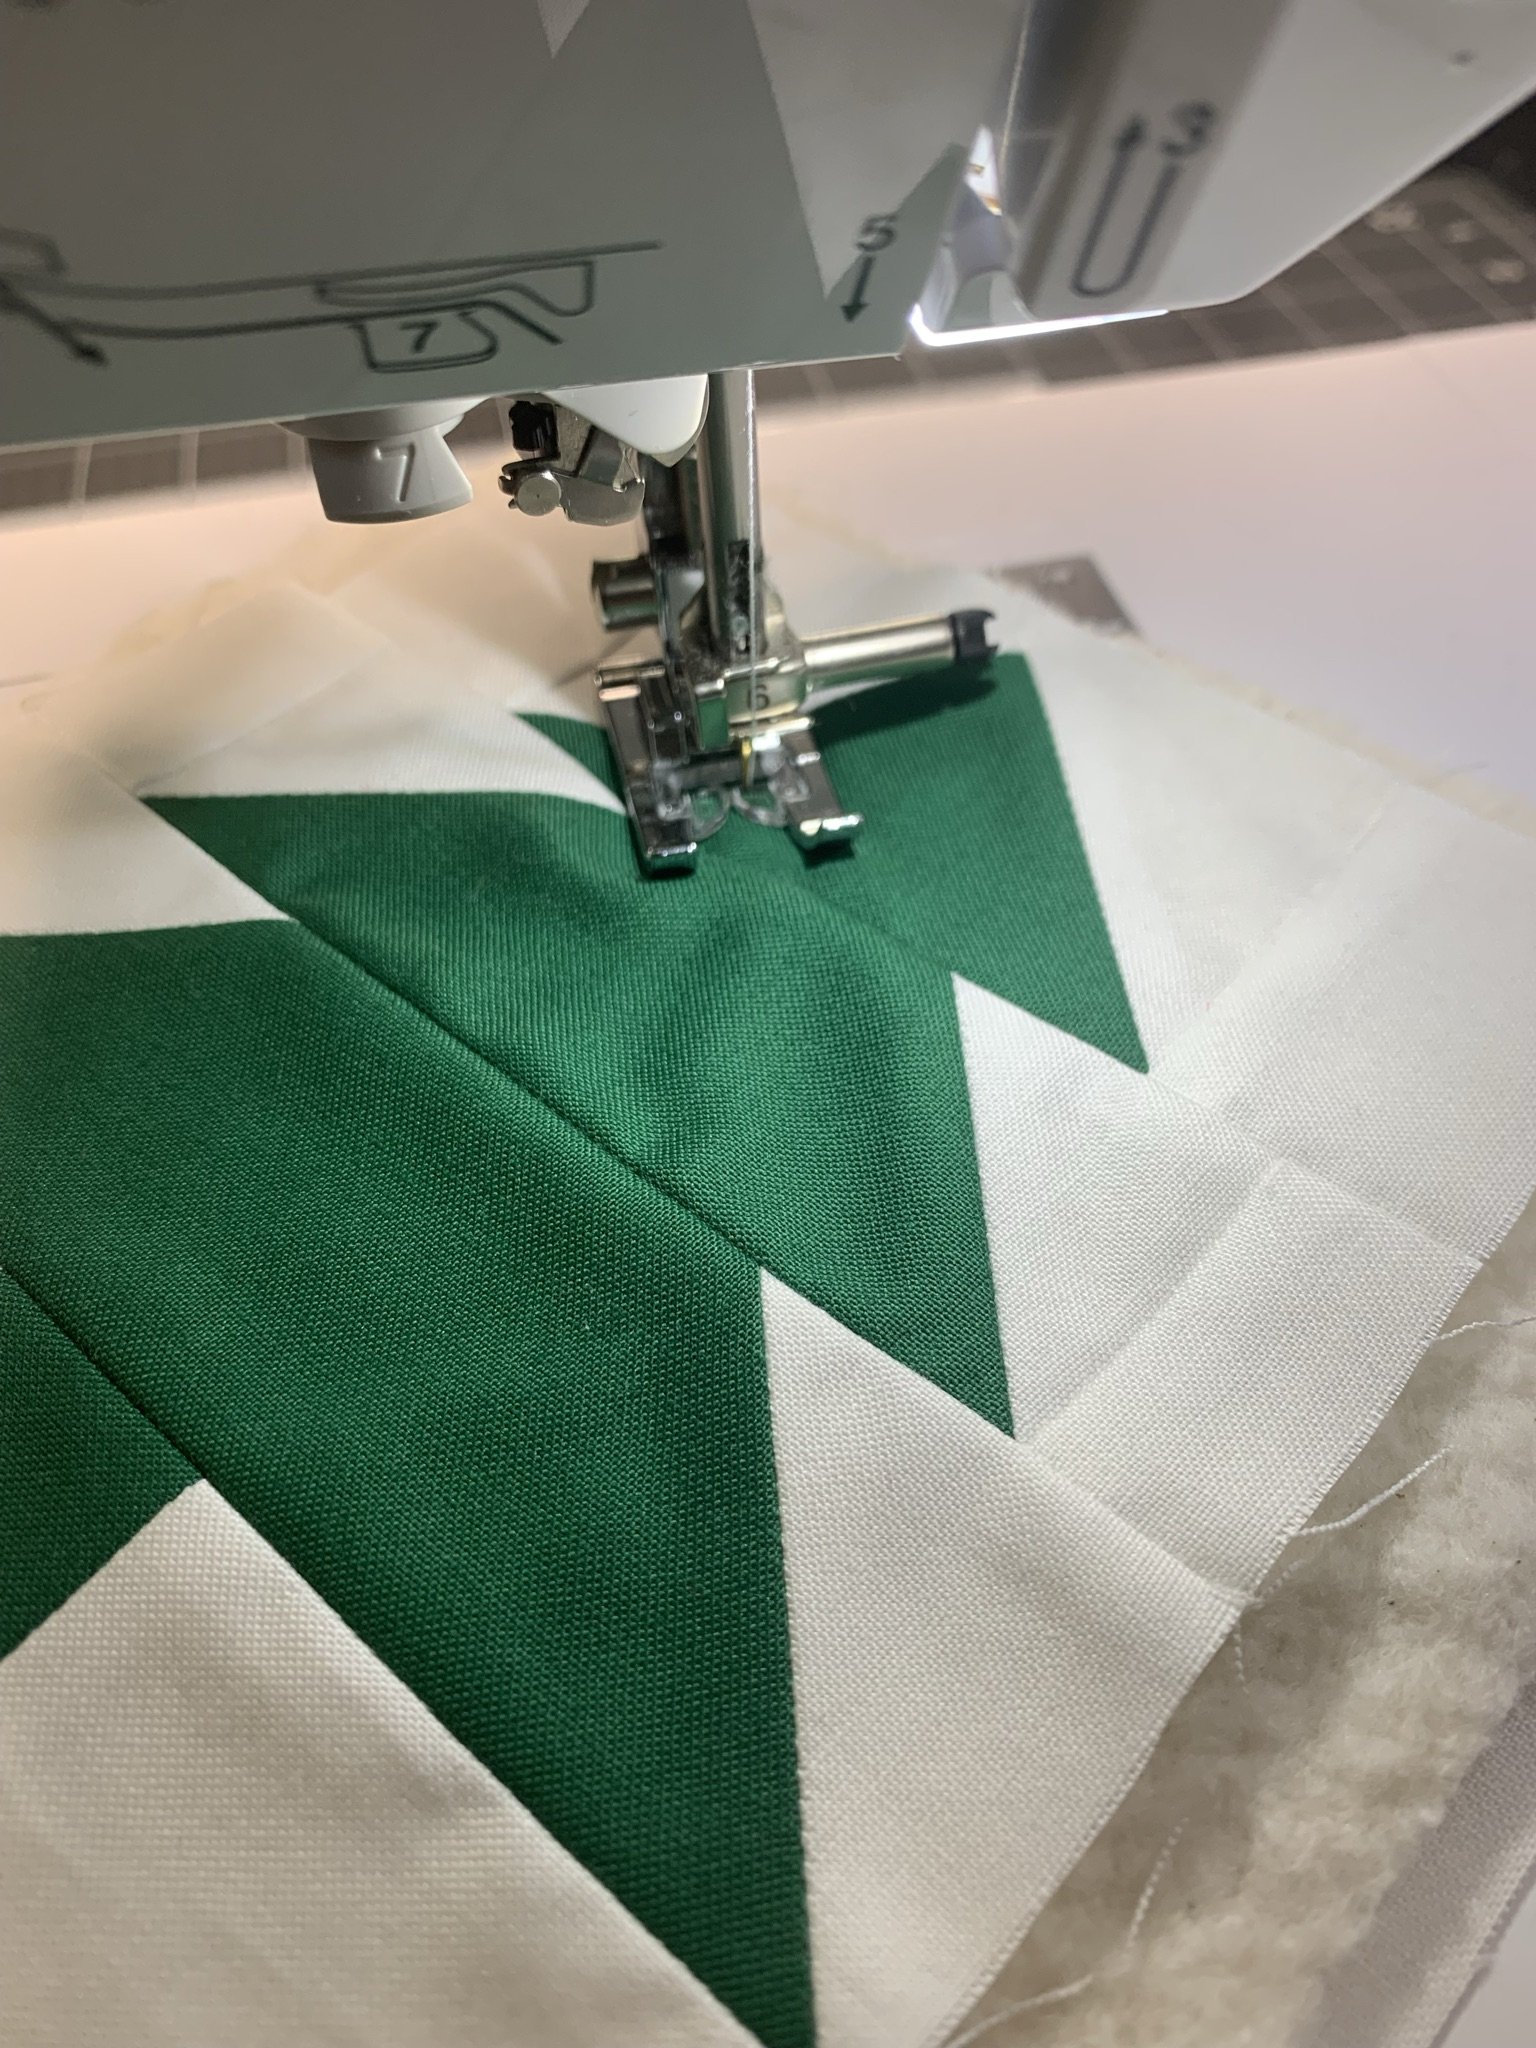
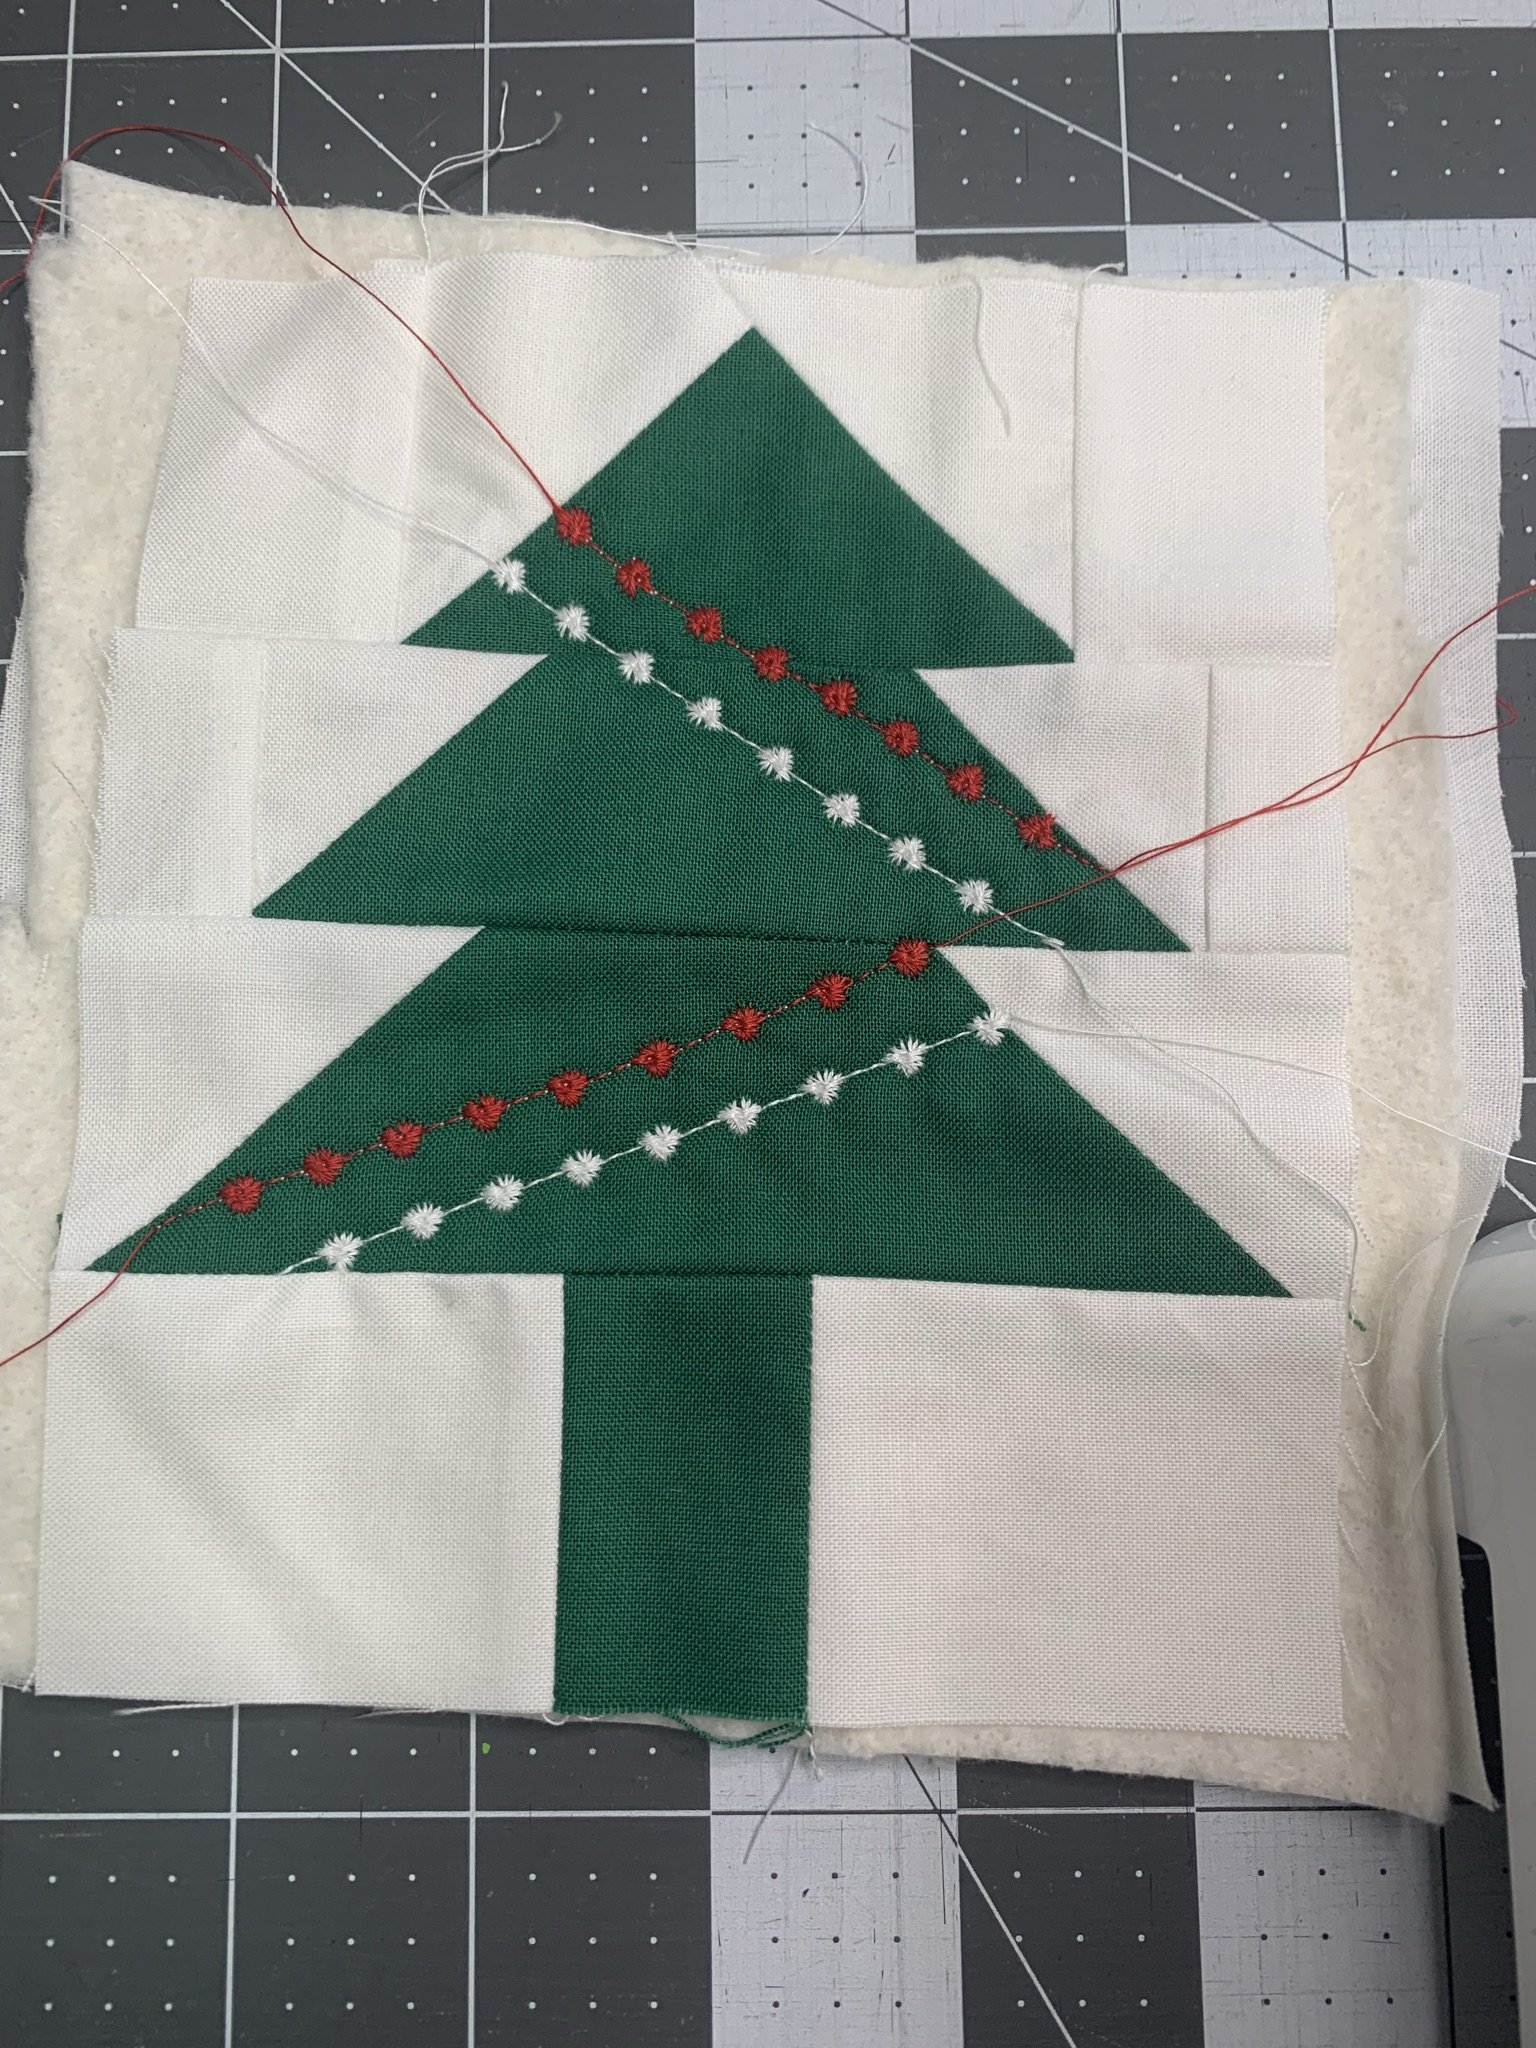
Quilt as desired. For the sample, a decorative stitch was used in contrasting threads (Red and White Essential Quilting Threads by Connecting Threads). Trim the threads if they are secured, or bury the threads if they are not edge to edge.
Make the Binding and Attach to Mini Quilts

Make binding strips by joining the strips on the diagonal (right sides together) until you have one long strip.
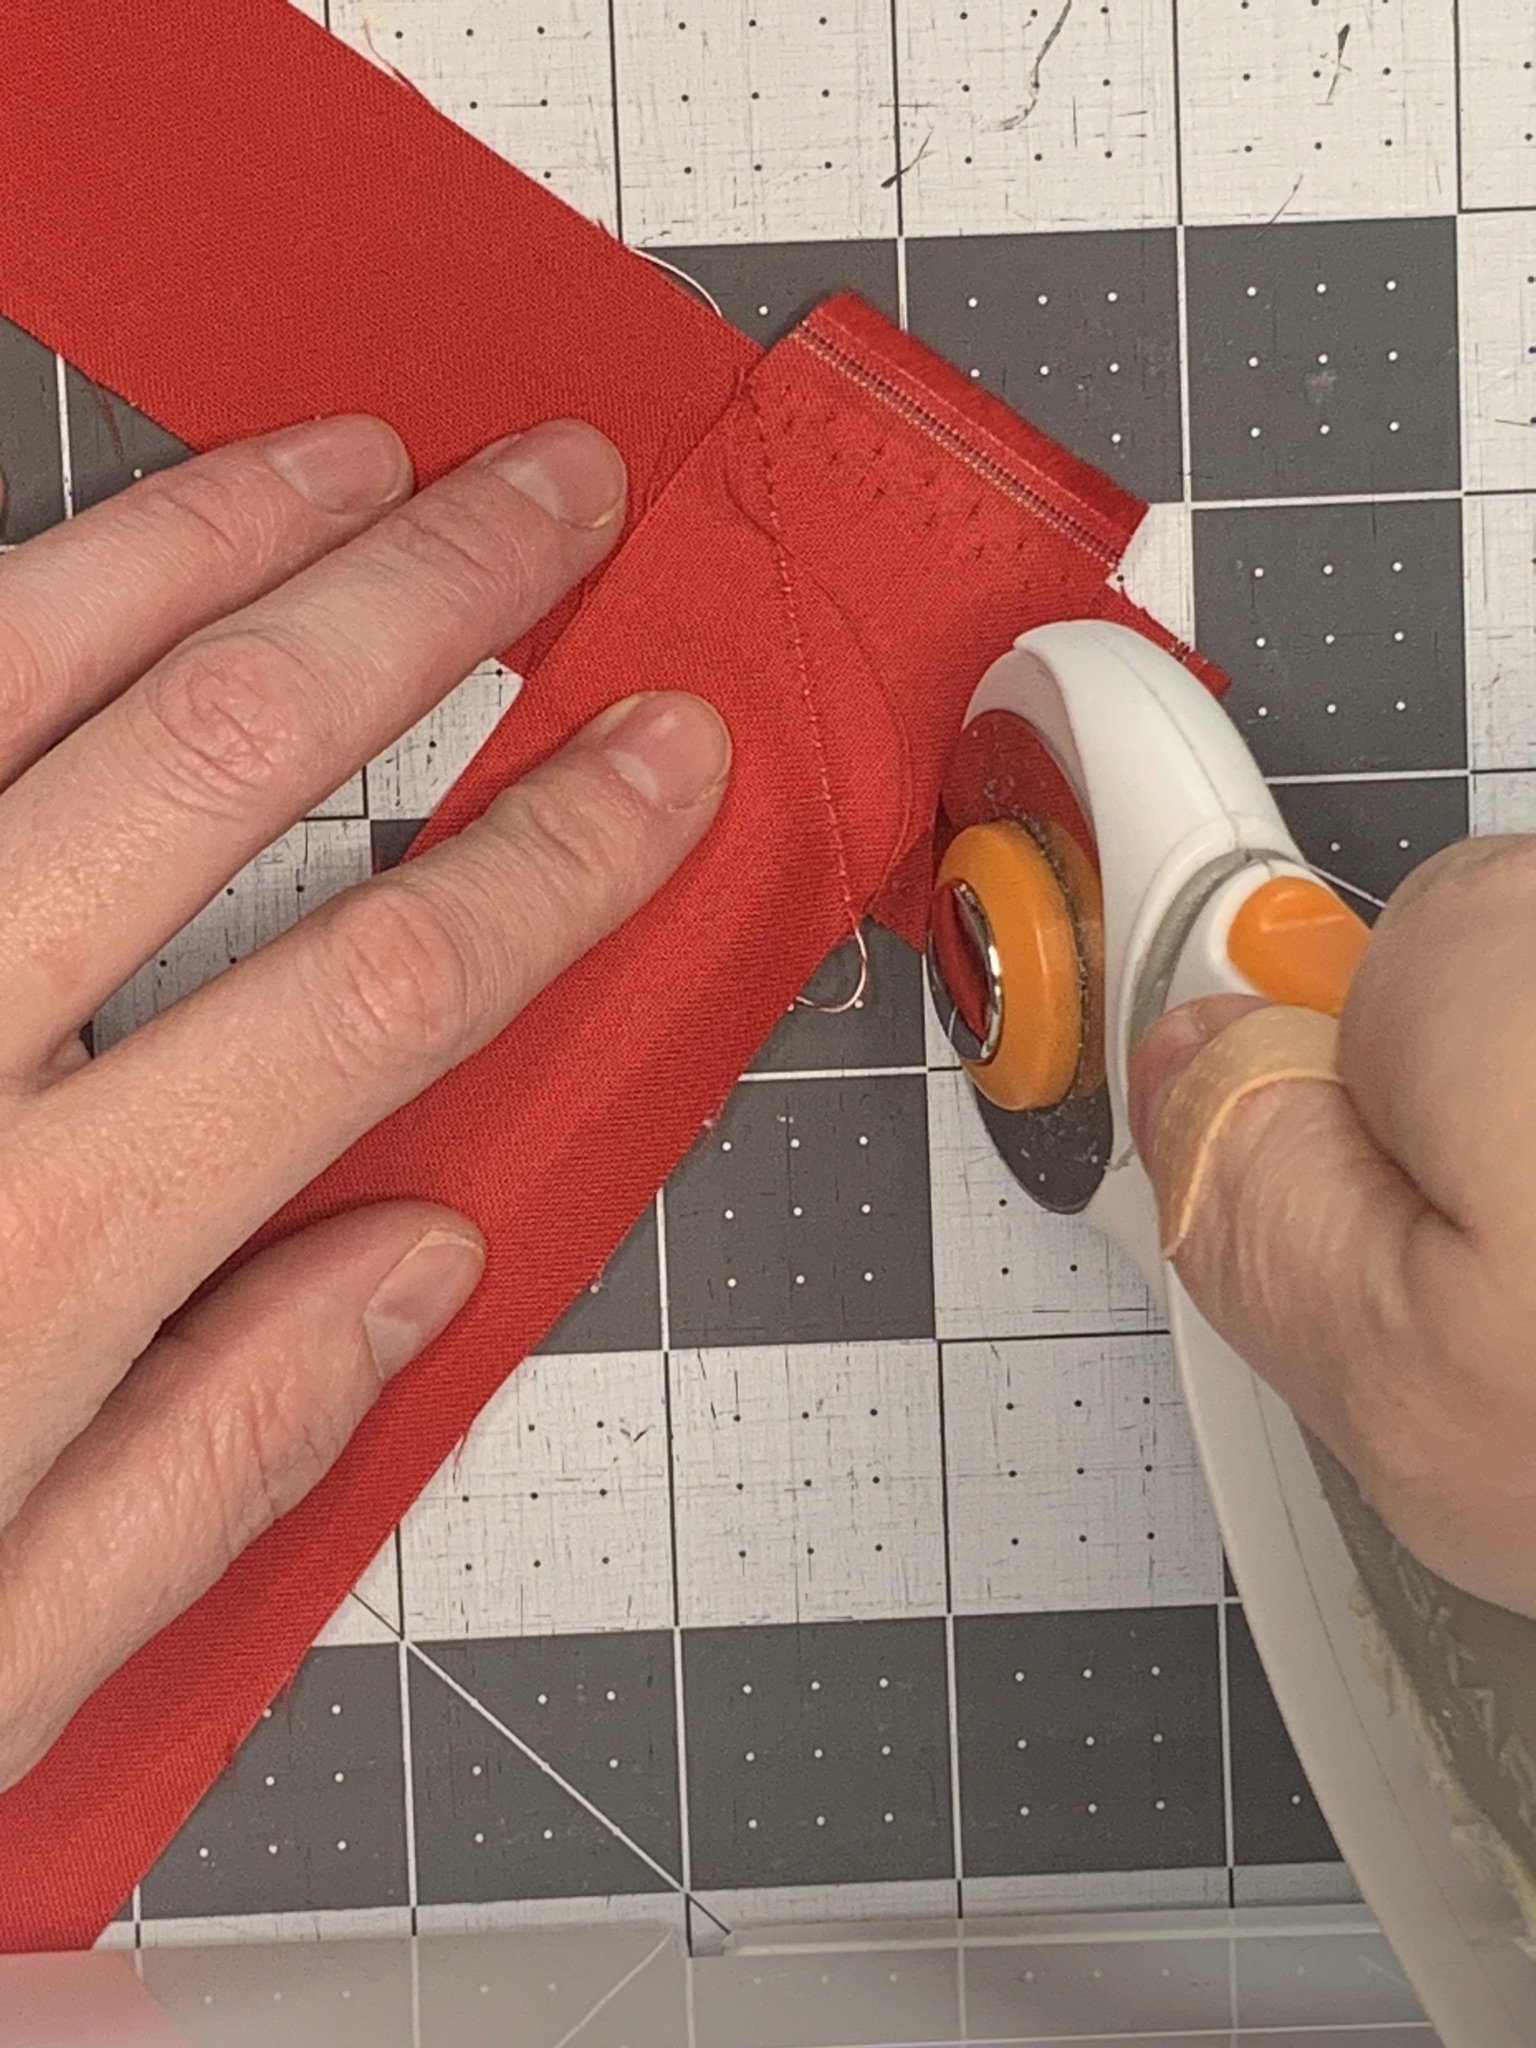
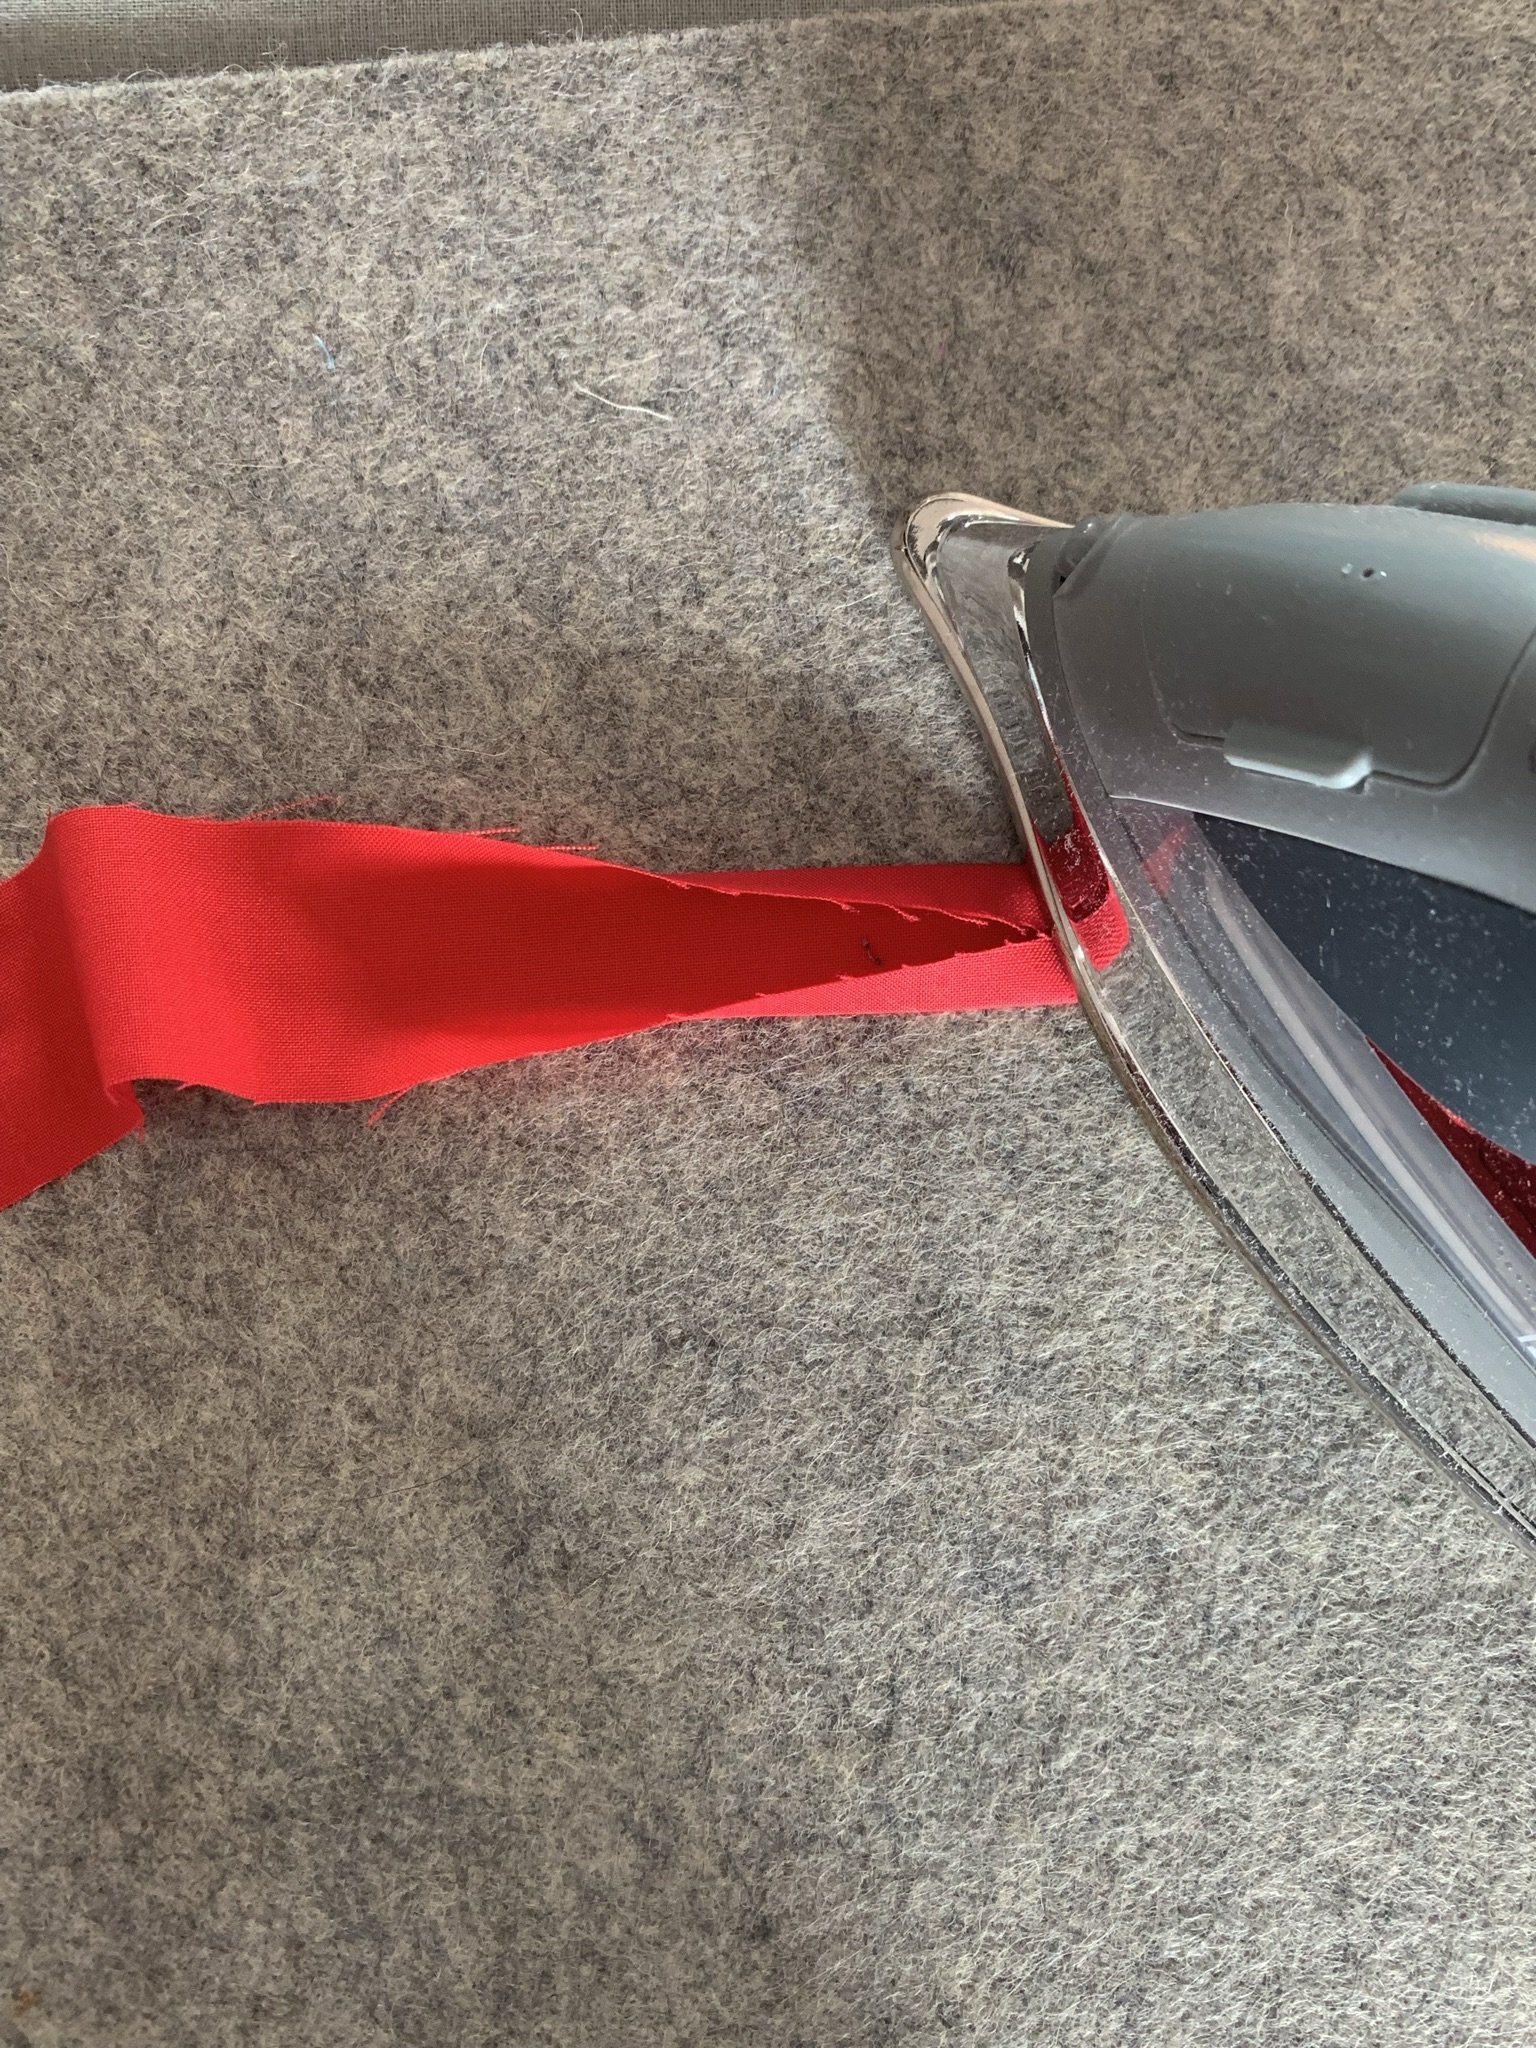
Trim 1/4” away from sew line for seam allowance, press open. Fold the strip edges into the center and press across the entire length of the strip. Next, fold in half an press to crease.

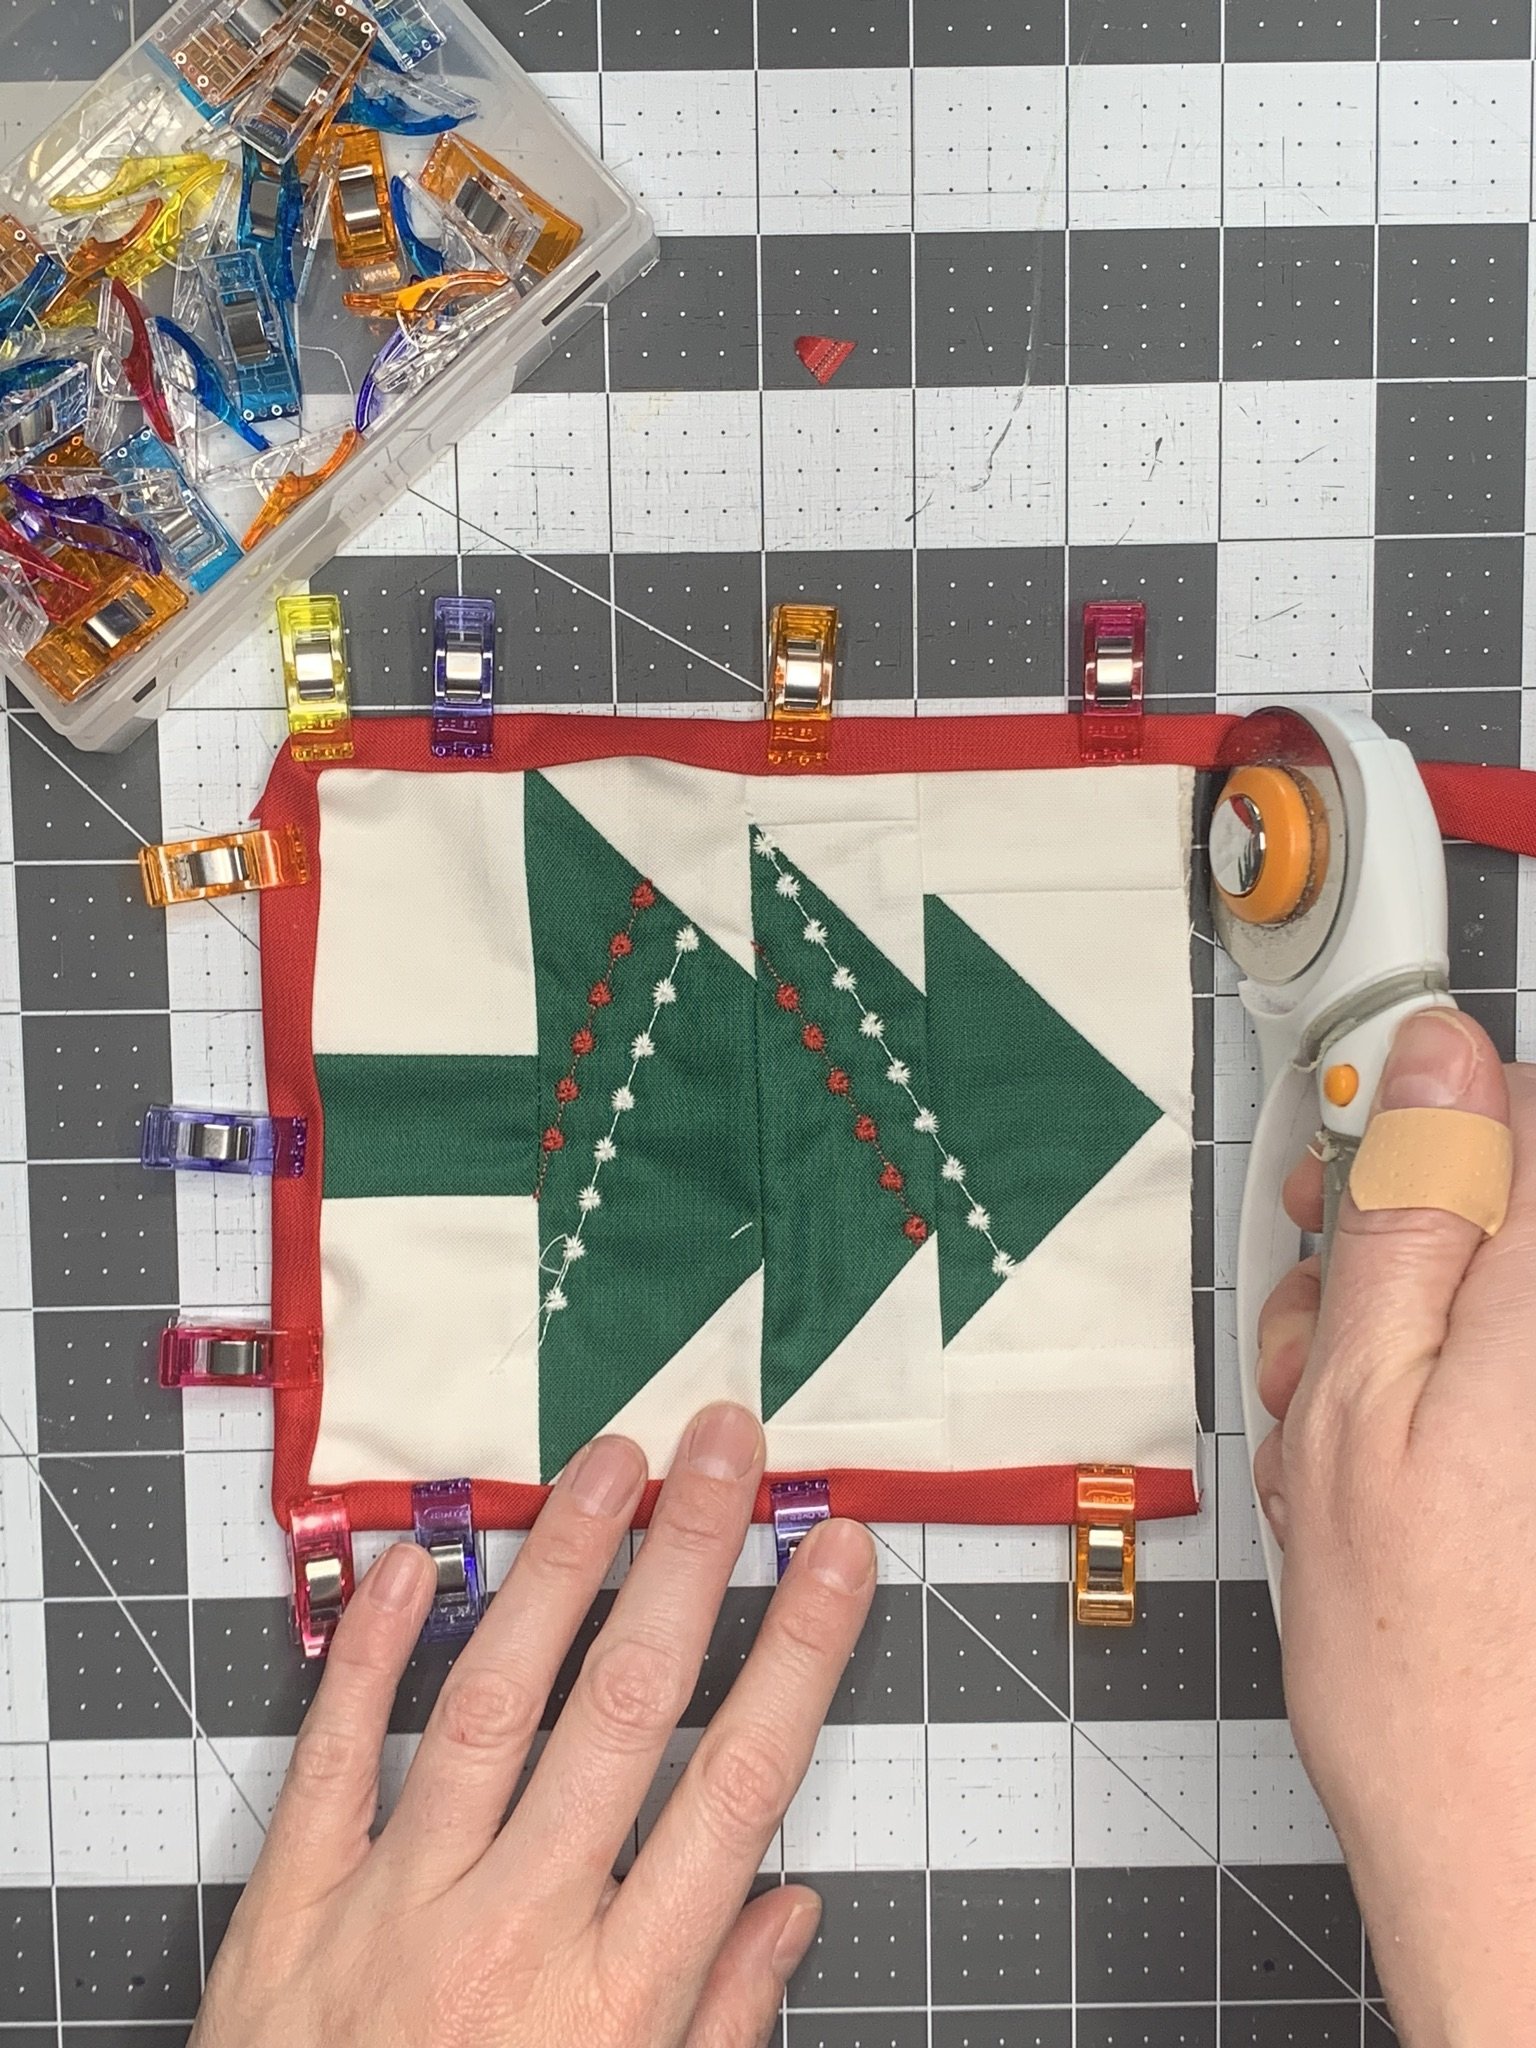
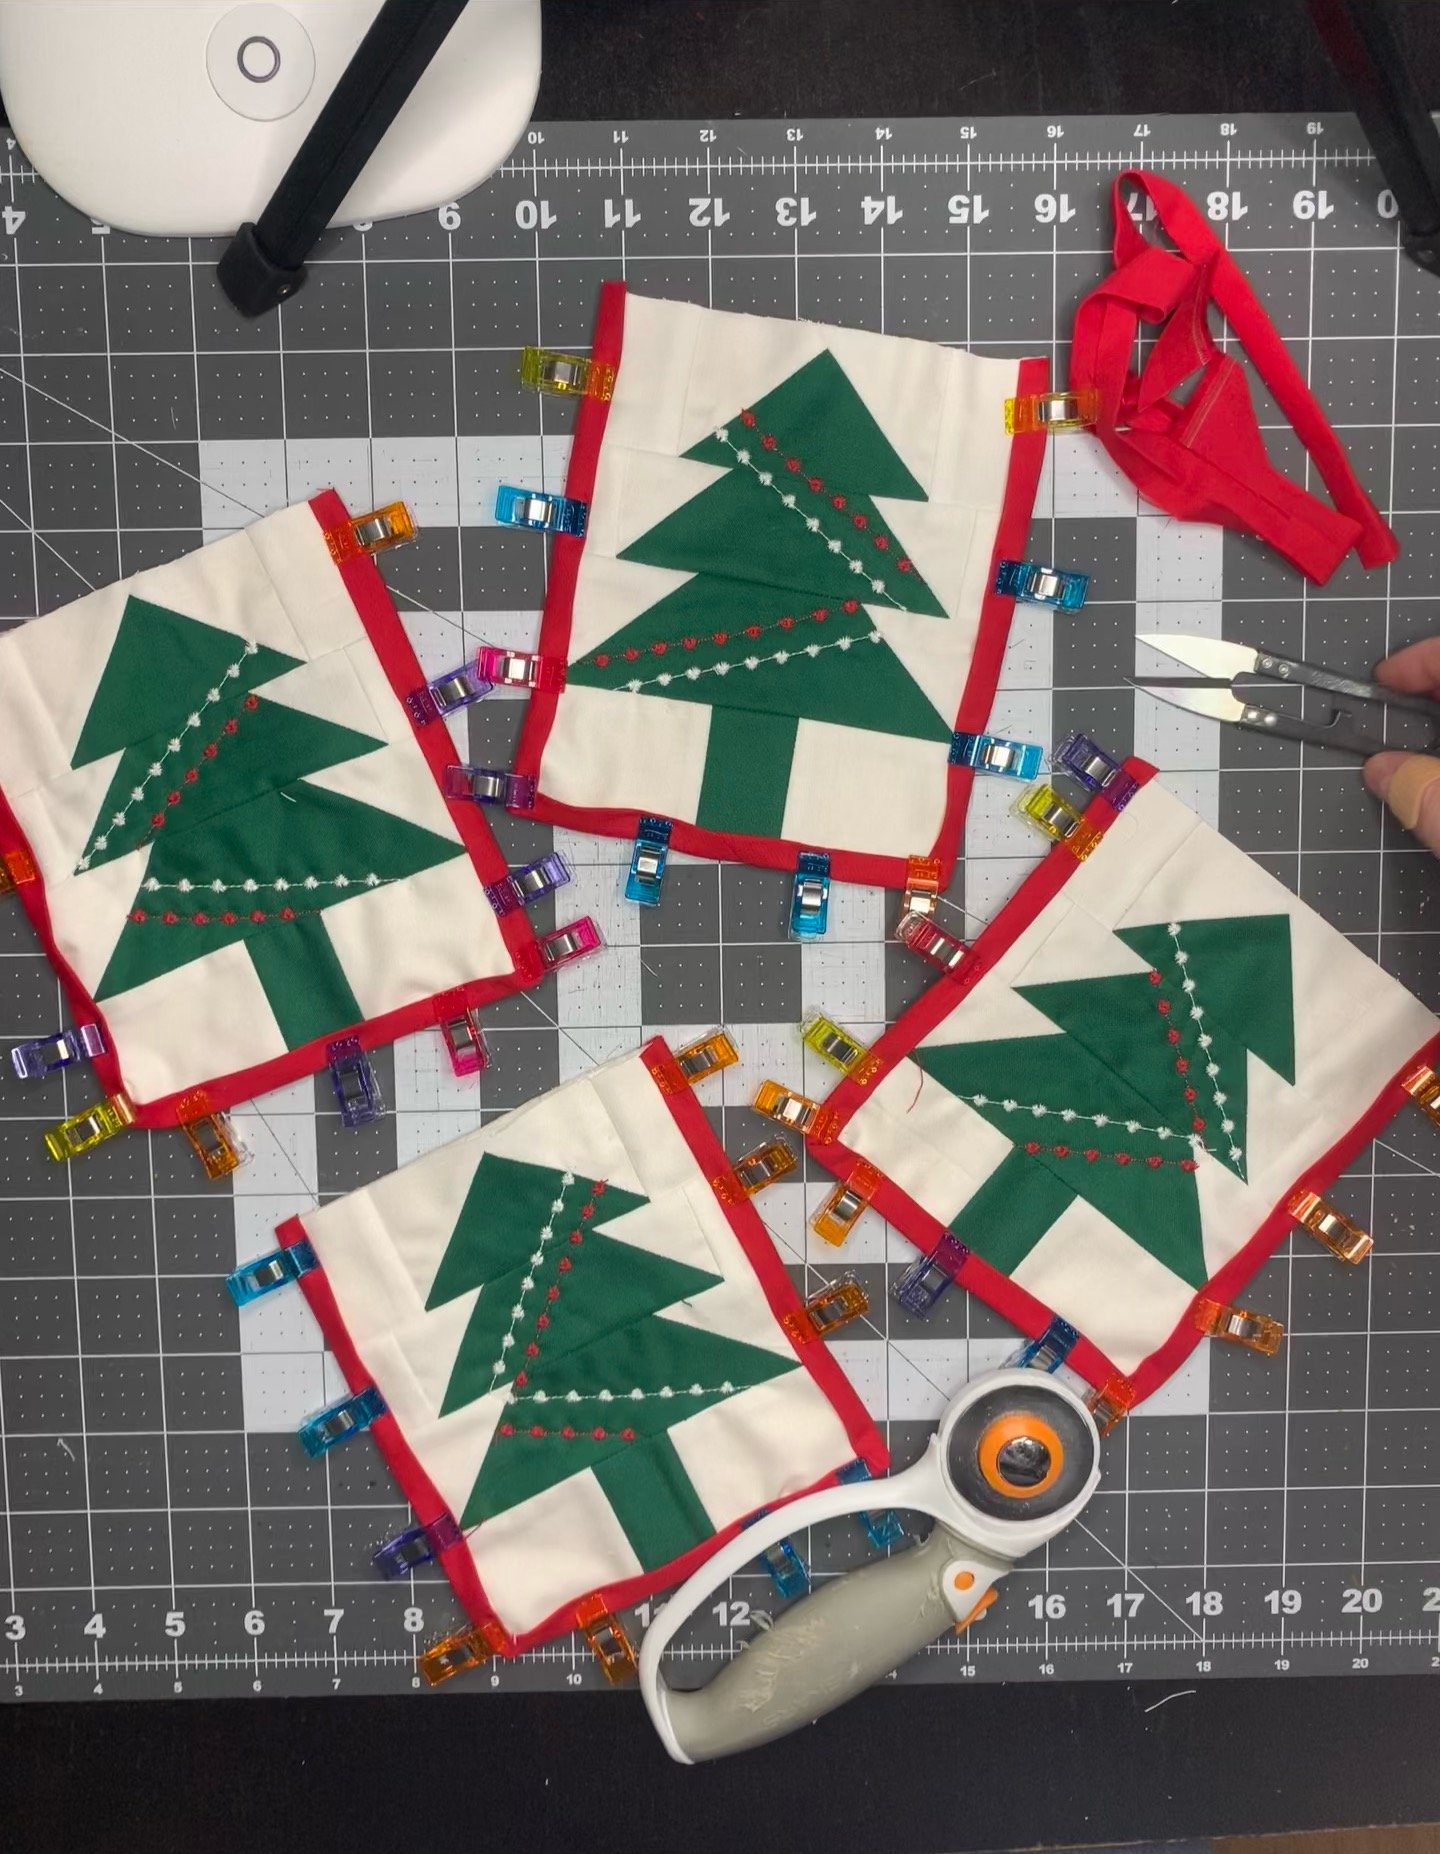
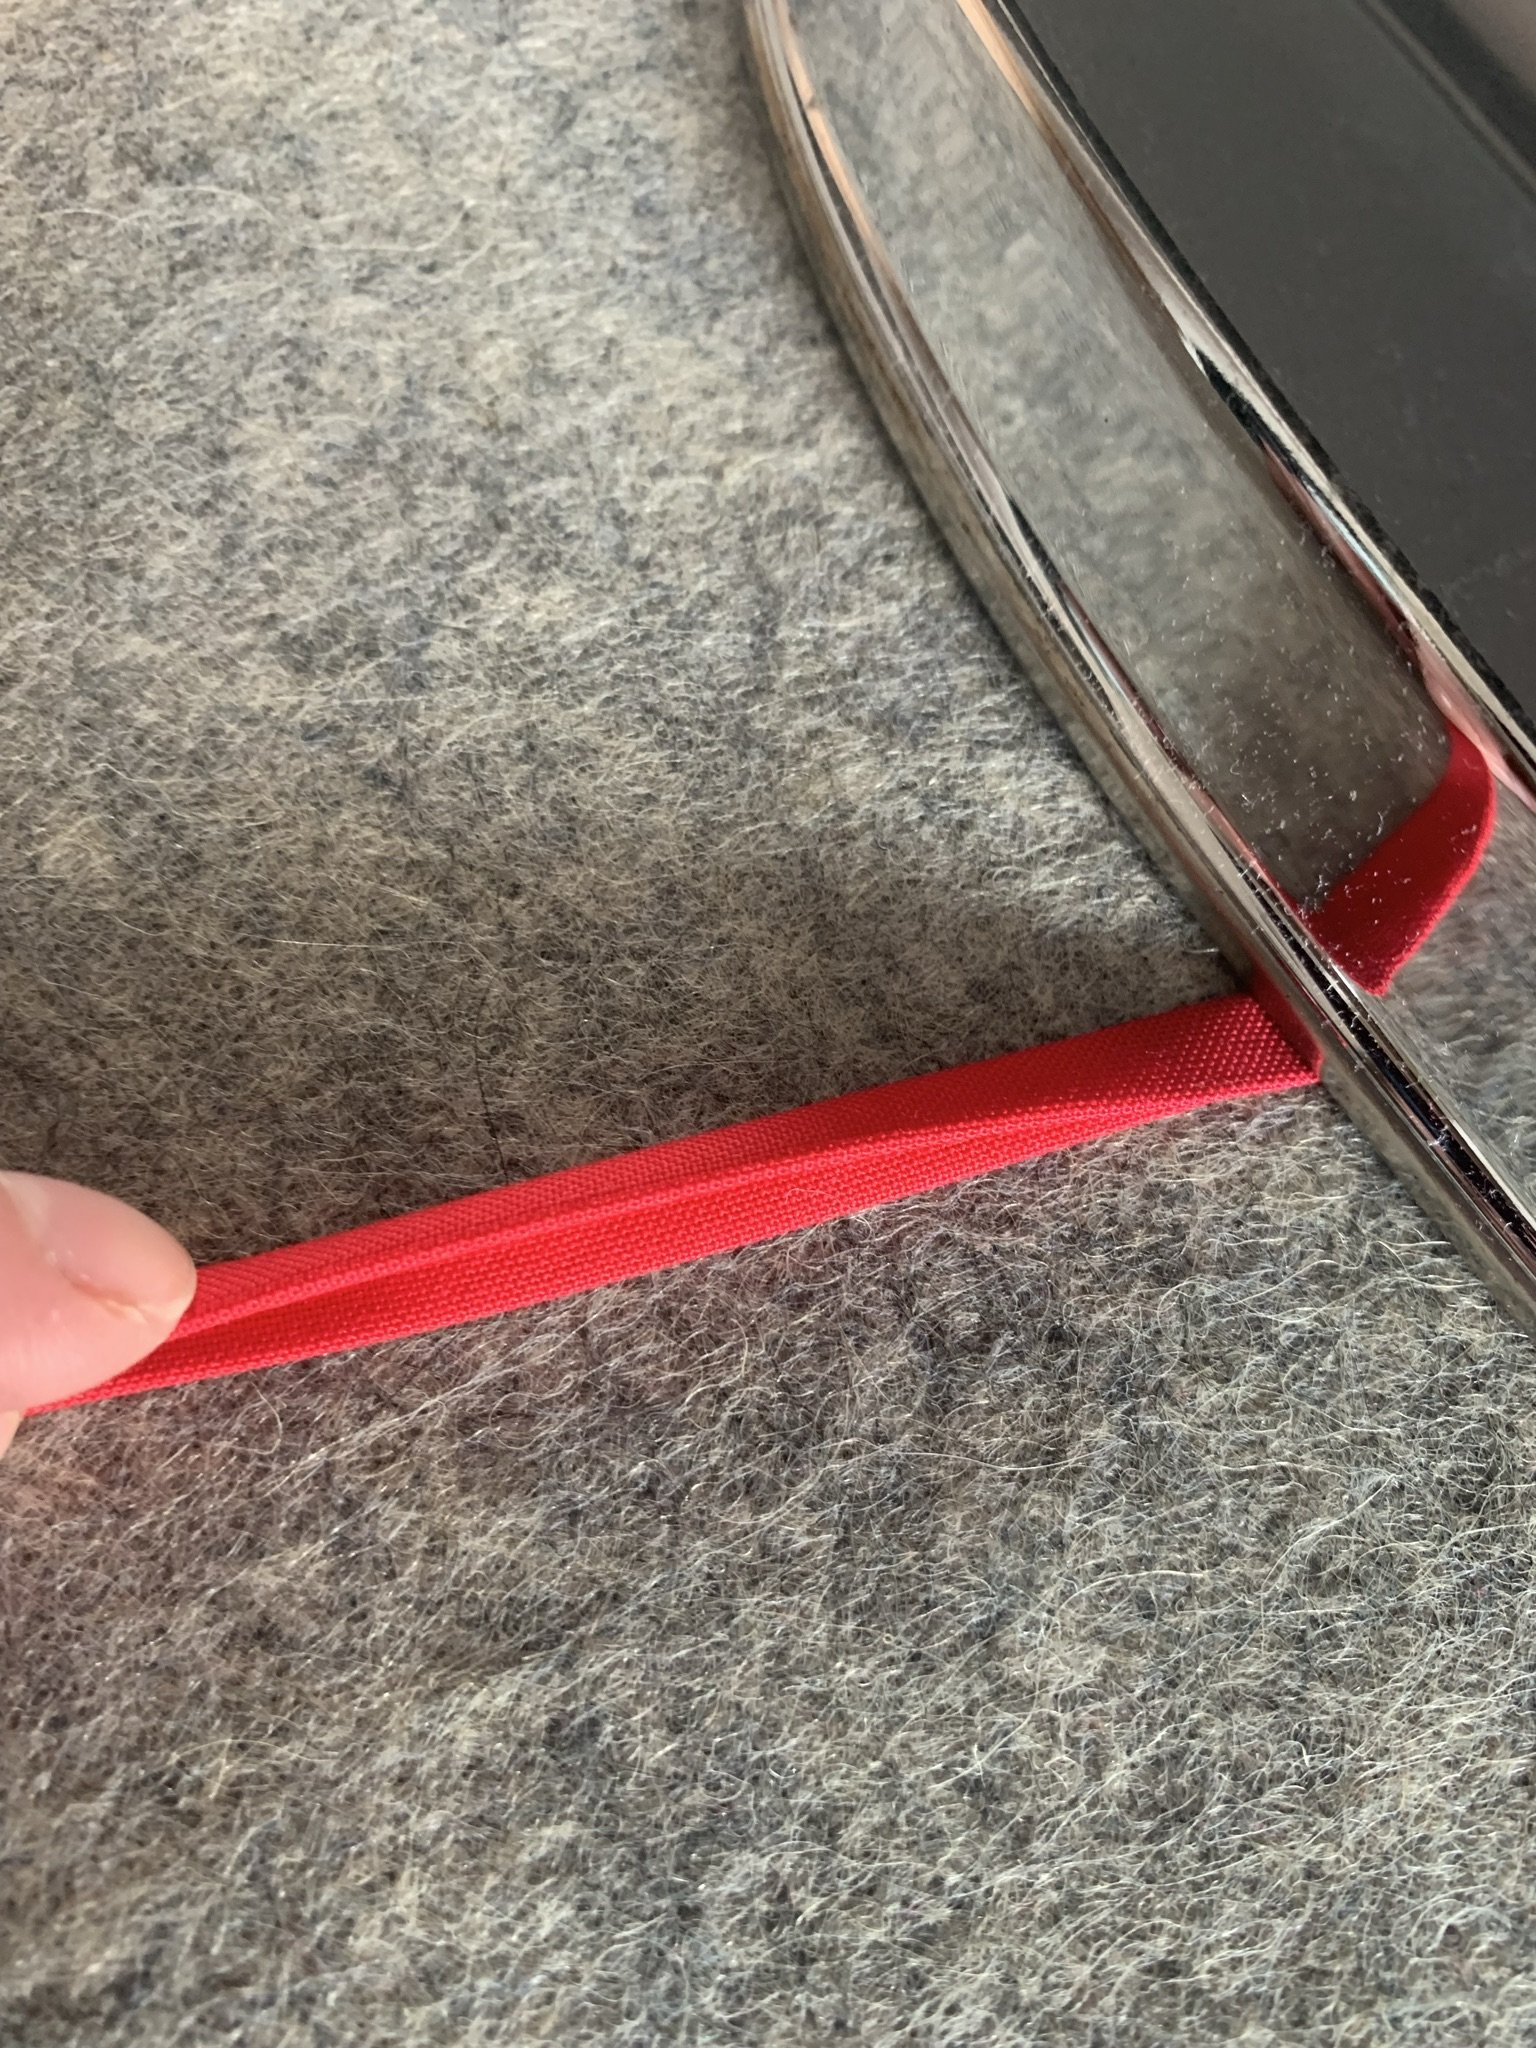
Secure binding around the edges of the tree, inserting the mini quilt inside the folded binding strip so that the binding covers the raw edges. Miter the corners. Trim the binding at the top, as the top binding ribbon will come at a later step. Complete for all pieces.
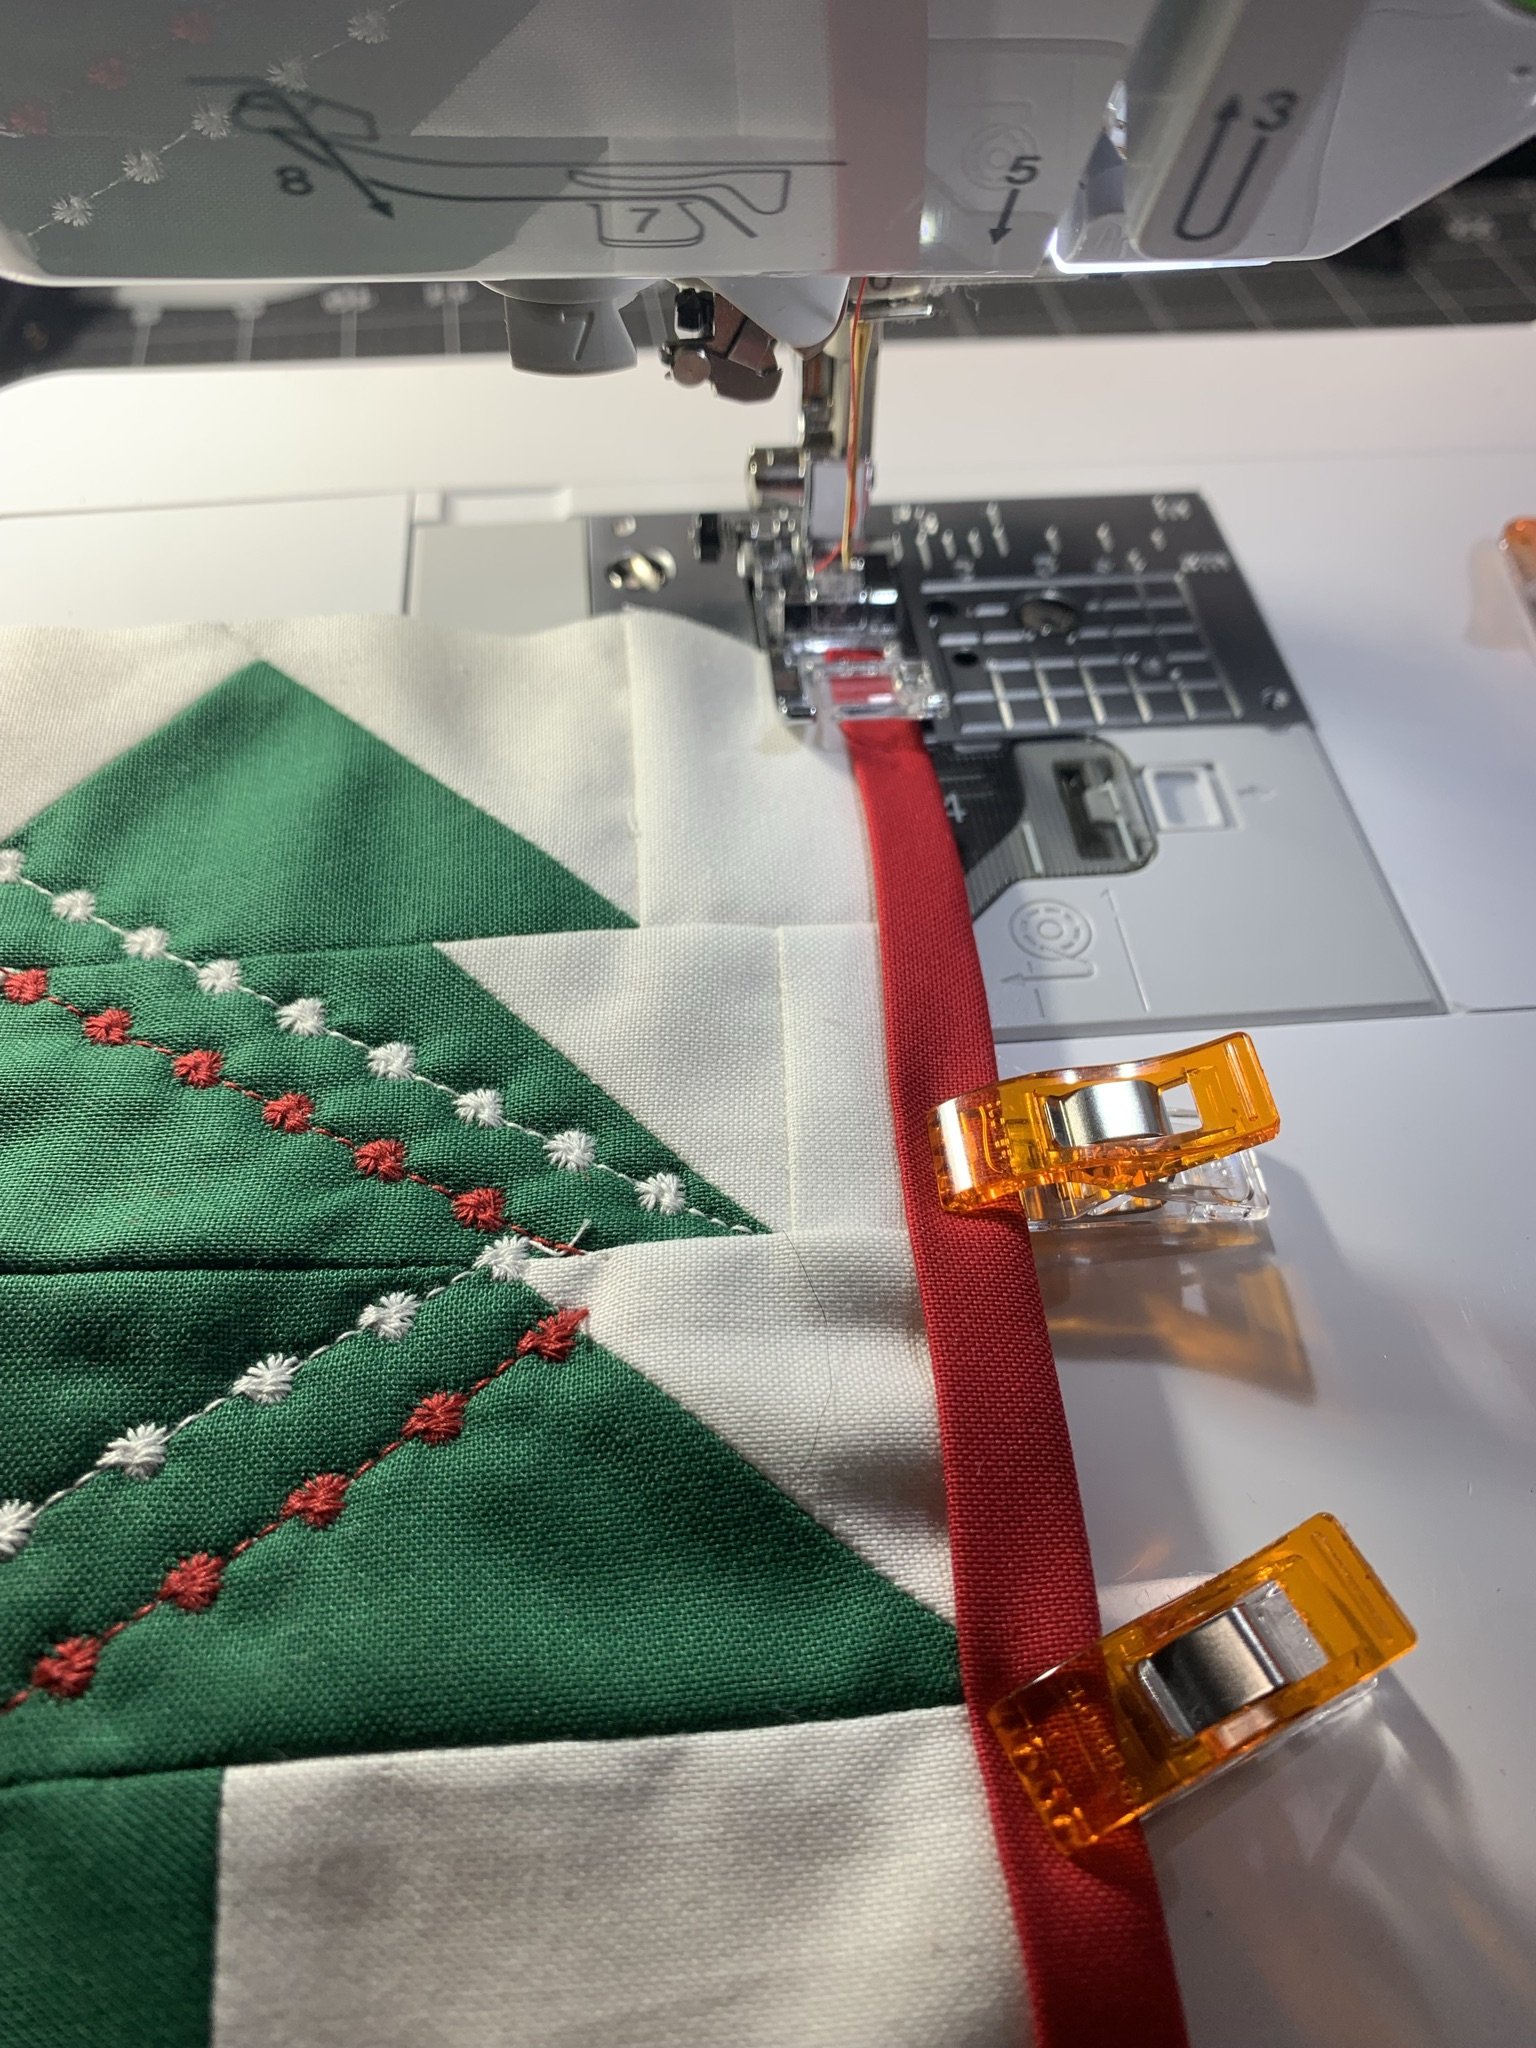
Top stitch the binding down to the mini quilt using a 2.5mm - 3.0mm stitch length, being sure to be even enough to catch the binding on the back side. Do this for all pieces.
Add the Binding Bunting Ribbon
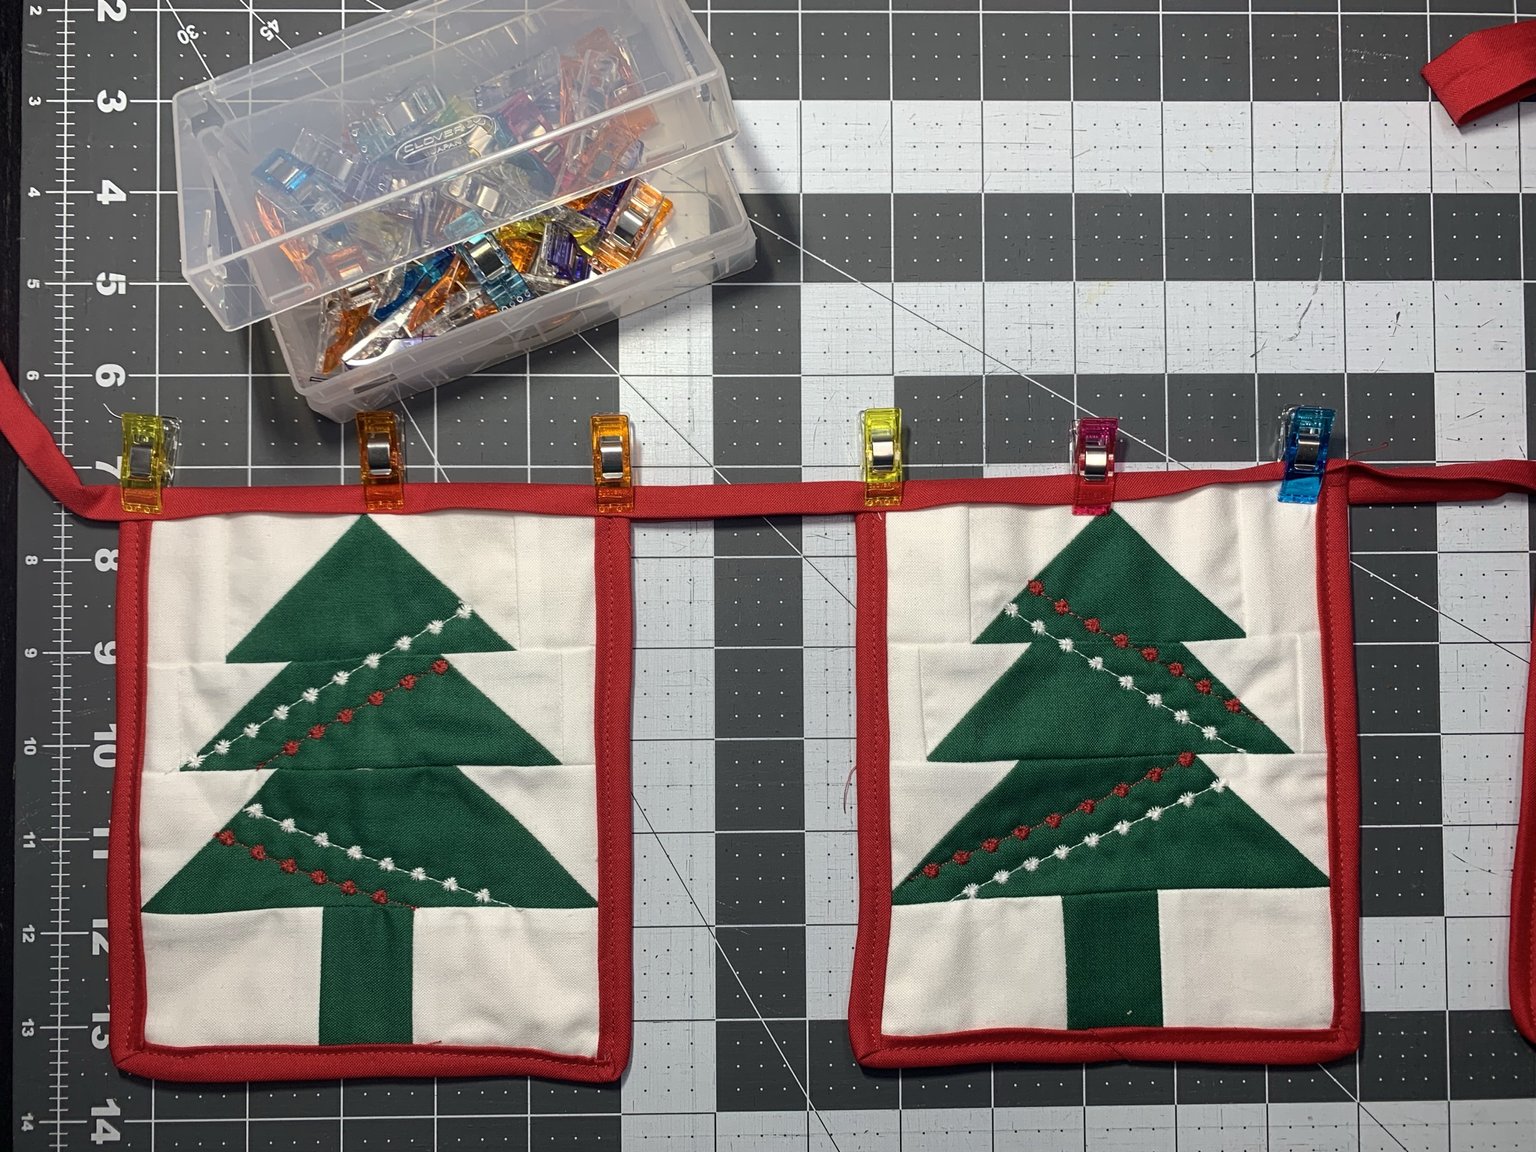
Lay out all of the tree pieces and add the remaining binding strip to the top to create the hanging bunting.
Find the center of the binding strip and arrange the edges of two trees 1 1/4” away from the center. Insert the trees in the same way as the binding, with the folds going around the edge. Clip or pin in place. This will ensure the bunting hangs properly. Spread the other two 2 1/2” away from the trees and clip or pin inside.
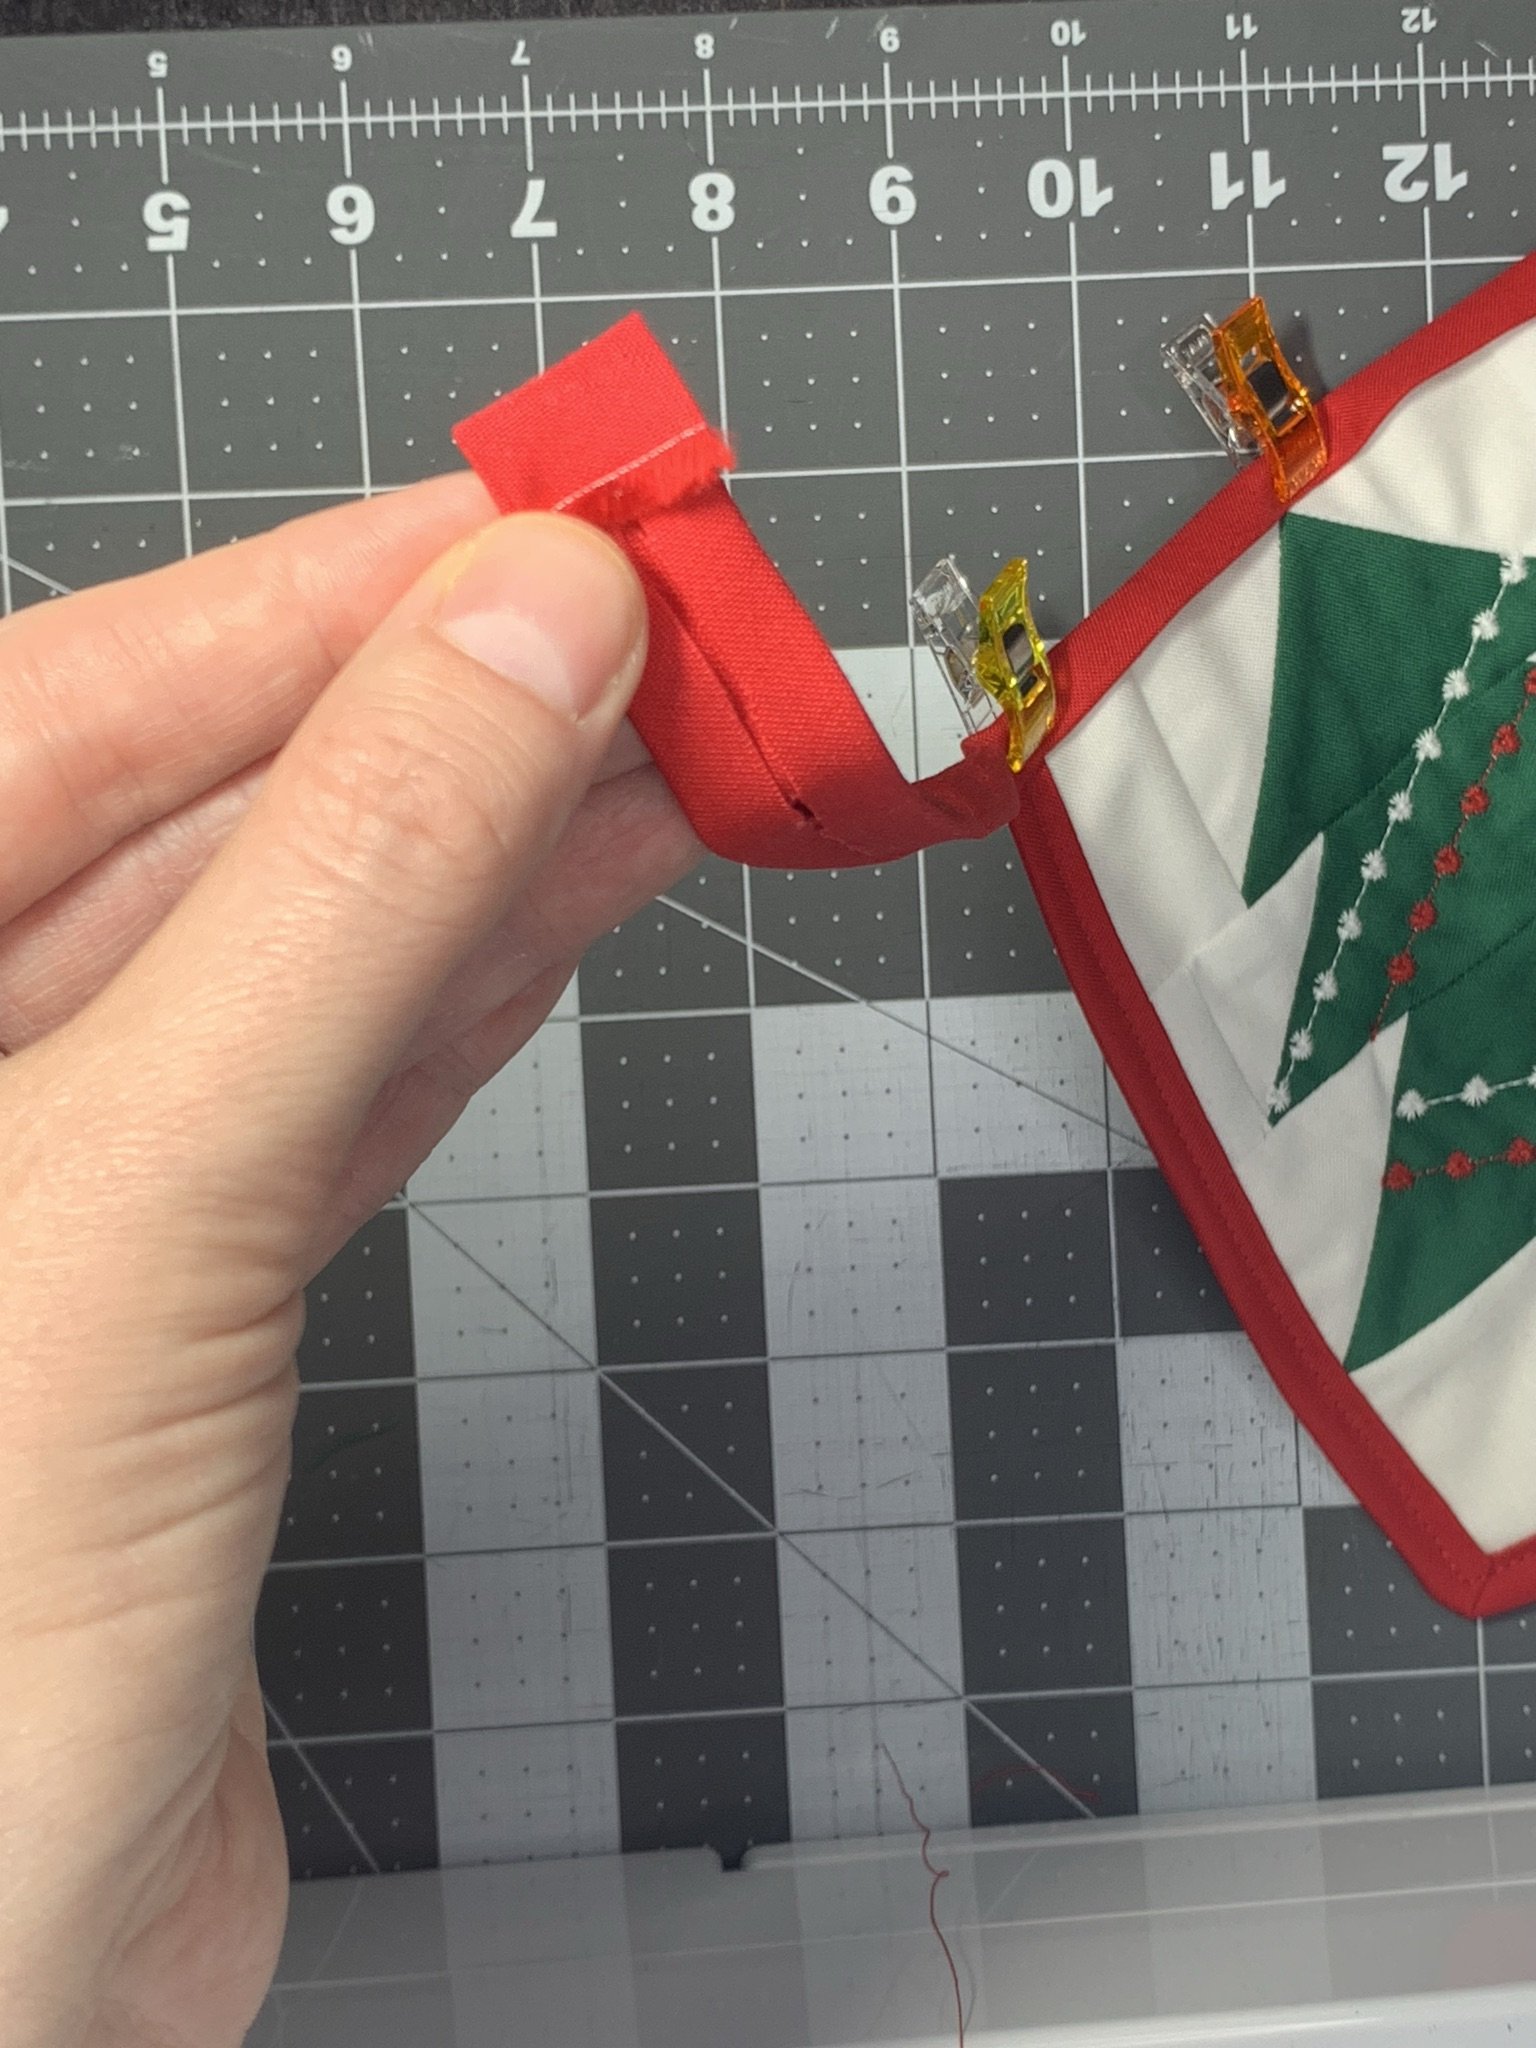
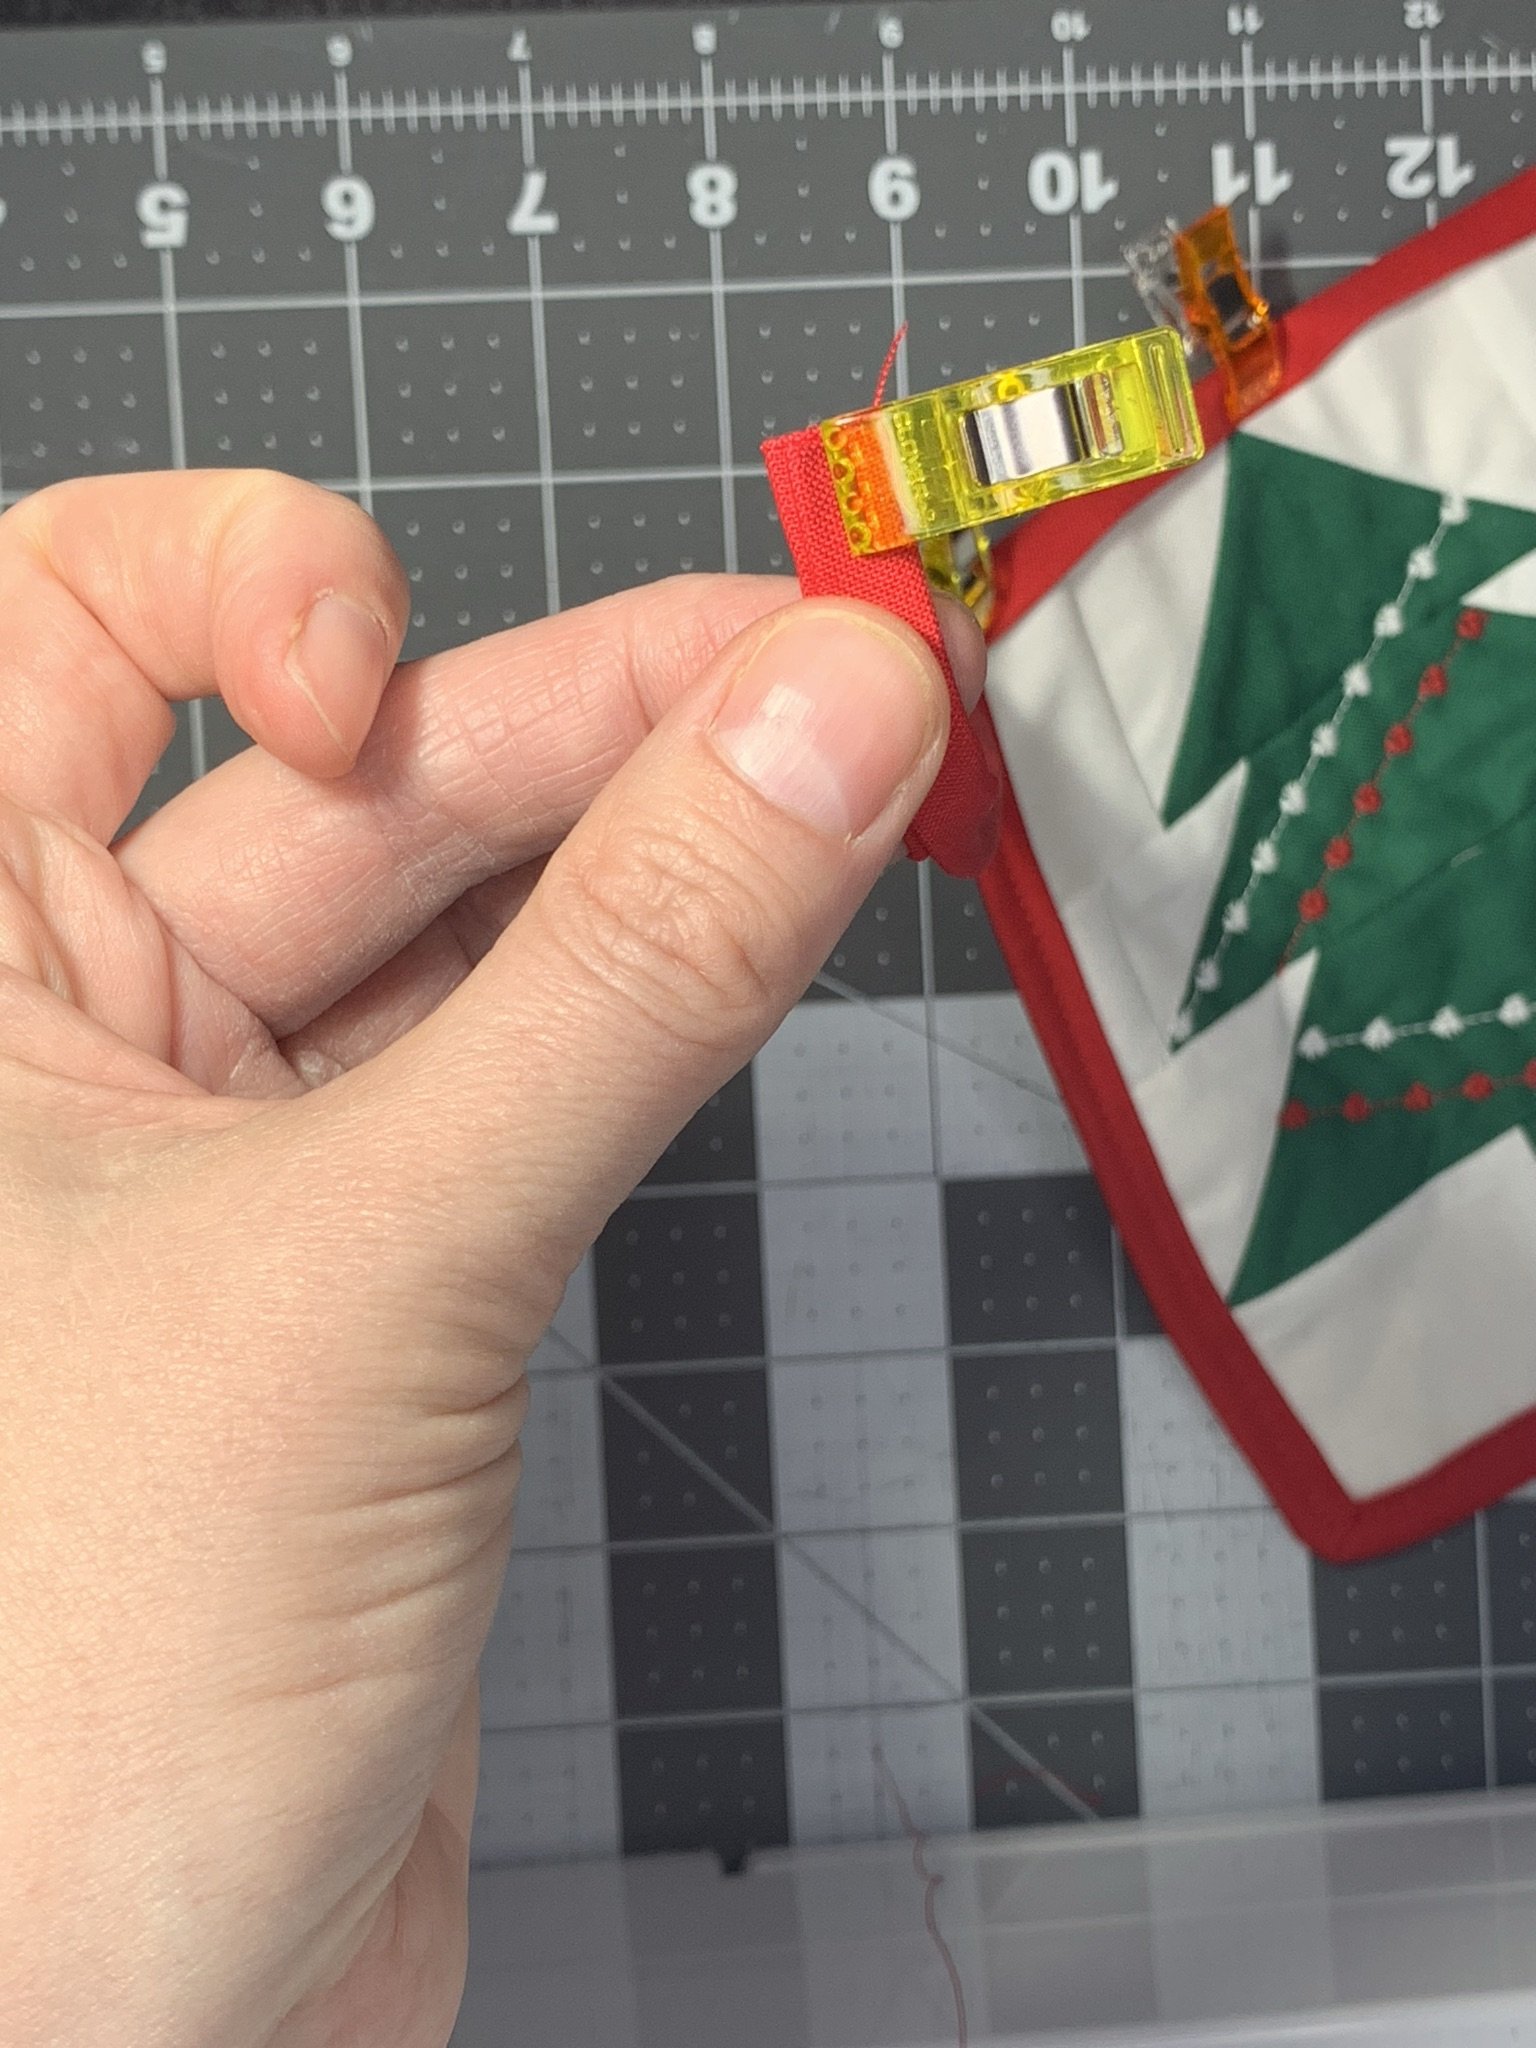
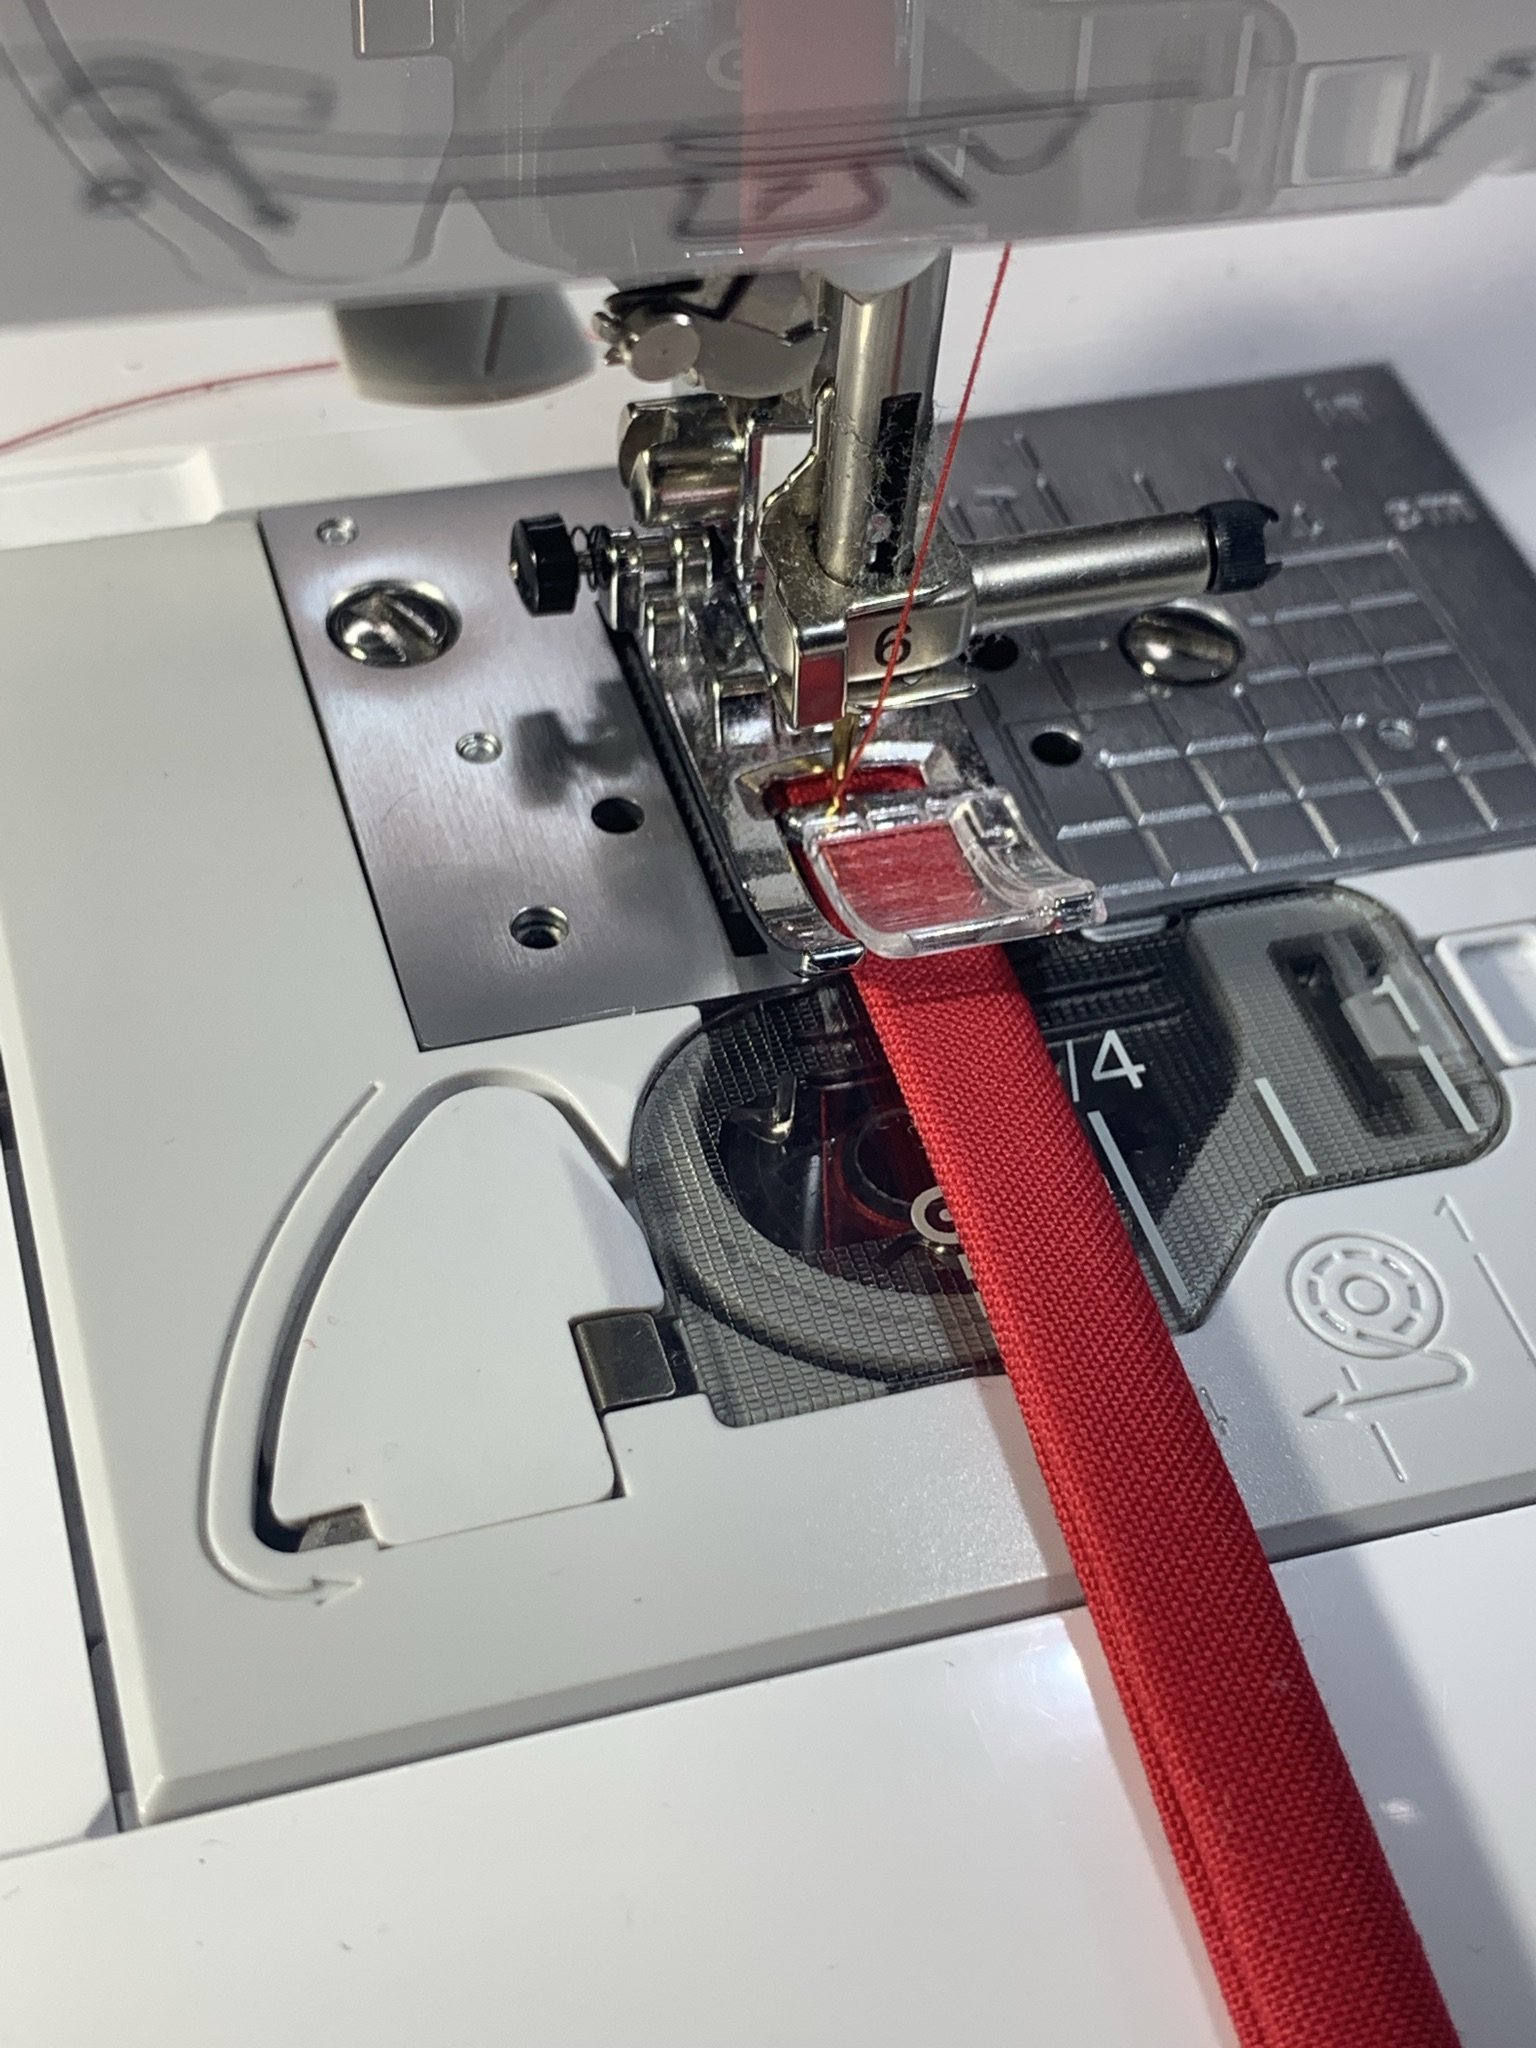
Fold the ends of the binding in and refold. Clip or pin in place. This will finish the ends of the binding ribbon. Begin to sew the strip closed approximately 1/8” from the open edge, with all tree pieces secured in place, being sure to backstitch at the start and stop to secure threads.

Congratulations on completing the City Trees Bunting!
Pin it up on your wall, a decorative cabinet, or pretend it’s a kicky scarf and live your life!
Share your progress and makes on social media using the #CityTreesBunting and #SarahJeanMakes hashtags. Please tag me at @SarahJeanMakes so I can cheer you on!